> ## Documentation Index
> Fetch the complete documentation index at: https://docs.tilebox.com/llms.txt
> Use this file to discover all available pages before exploring further.
# Build a spatio-temporal catalog
> Create a custom spatio-temporal dataset catalog with the Python SDK, document its schema, ingest geospatial metadata, and query it by time and location.
Use a spatio-temporal dataset when each datapoint has both a time and a geometry. This is useful for internal imagery catalogs, derived products, ground truth data, regions of interest, and processing outputs that need geospatial lookup.
This guide creates an imagery catalog from code. You will define the dataset schema with the Python SDK, add field descriptions and examples for generated schema documentation, create a collection, ingest geospatial metadata, and query the catalog by time and location.
## Prerequisites
* You have a [Tilebox API key](/authentication).
* You have installed the [Python SDK](/sdks/python/install).
```bash theme={"system"}
uv add tilebox geopandas shapely
```
## Define the catalog schema
Start by choosing the spatio-temporal dataset kind and the custom fields for your catalog. Tilebox adds the required `time`, `id`, `ingestion_time`, and `geometry` fields automatically.
The example catalog tracks imagery products with a provider product ID, a storage location, cloud cover, and processing level. Field descriptions and example values become part of the generated schema documentation.
```python Python theme={"system"}
from tilebox.datasets import Client
from tilebox.datasets.data.datasets import DatasetKind
client = Client()
fields = [
{
"name": "product_id",
"type": str,
"description": "Stable product or scene identifier from the source catalog.",
"example_value": "LC08_L2SP_033033_20240808_20240814_02_T1",
},
{
"name": "location",
"type": str,
"description": "Storage path, object key, or provider-specific product location.",
"example_value": "s3://example-bucket/landsat/LC08_L2SP_033033_20240808_20240814_02_T1",
},
{
"name": "cloud_cover",
"type": float,
"description": "Cloud cover percentage for the product footprint.",
"example_value": "3.2",
},
{
"name": "processing_level",
"type": str,
"description": "Processing level or product type assigned by the source provider.",
"example_value": "L2_SR",
},
]
```
Use field names that are stable and descriptive. Changing or removing fields after ingesting datapoints requires emptying the affected collections first, because existing datapoints must continue to match the dataset schema.
## Create the dataset
Call `create_or_update_dataset` with the dataset kind, code name, field list, and display name. The code name becomes the stable identifier used in SDK calls.
```python Python theme={"system"}
dataset = client.create_or_update_dataset(
kind=DatasetKind.SPATIOTEMPORAL,
code_name="internal_imagery_catalog",
fields=fields,
name="Internal imagery catalog",
)
print(dataset)
```
If a dataset with the same code name already exists, `create_or_update_dataset` updates it instead of creating a duplicate. This makes the snippet safe to keep in a setup script.
The Python SDK currently sets the dataset display name and schema. Field-level `description` and `example_value` entries populate the generated schema documentation. Use the Tilebox Console when you want to add rich Markdown documentation to the dataset page.
## Inspect the generated schema documentation
Tilebox uses the dataset kind and field annotations to document the schema. Required fields are added by the dataset kind, and your custom fields appear with their descriptions and examples.
For this catalog, the complete schema includes:
| Field | Type | Purpose |
| ------------------ | -------- | ------------------------------------------ |
| `time` | Required | Timestamp associated with the datapoint. |
| `id` | Required | Tilebox-generated UUID for the datapoint. |
| `ingestion_time` | Required | Time when Tilebox ingested the datapoint. |
| `geometry` | Required | Geometry used for spatial queries. |
| `product_id` | Custom | Stable product or scene identifier. |
| `location` | Custom | Storage path or provider product location. |
| `cloud_cover` | Custom | Cloud cover percentage for filtering. |
| `processing_level` | Custom | Provider processing level or product type. |
The descriptions and example values you provided in the SDK call appear in the dataset schema documentation.
## Add richer dataset documentation
Use field descriptions for schema-level documentation. Use the Console documentation editor when you want longer Markdown documentation for the dataset, such as provenance notes, quality caveats, ingestion rules, or examples for downstream users.
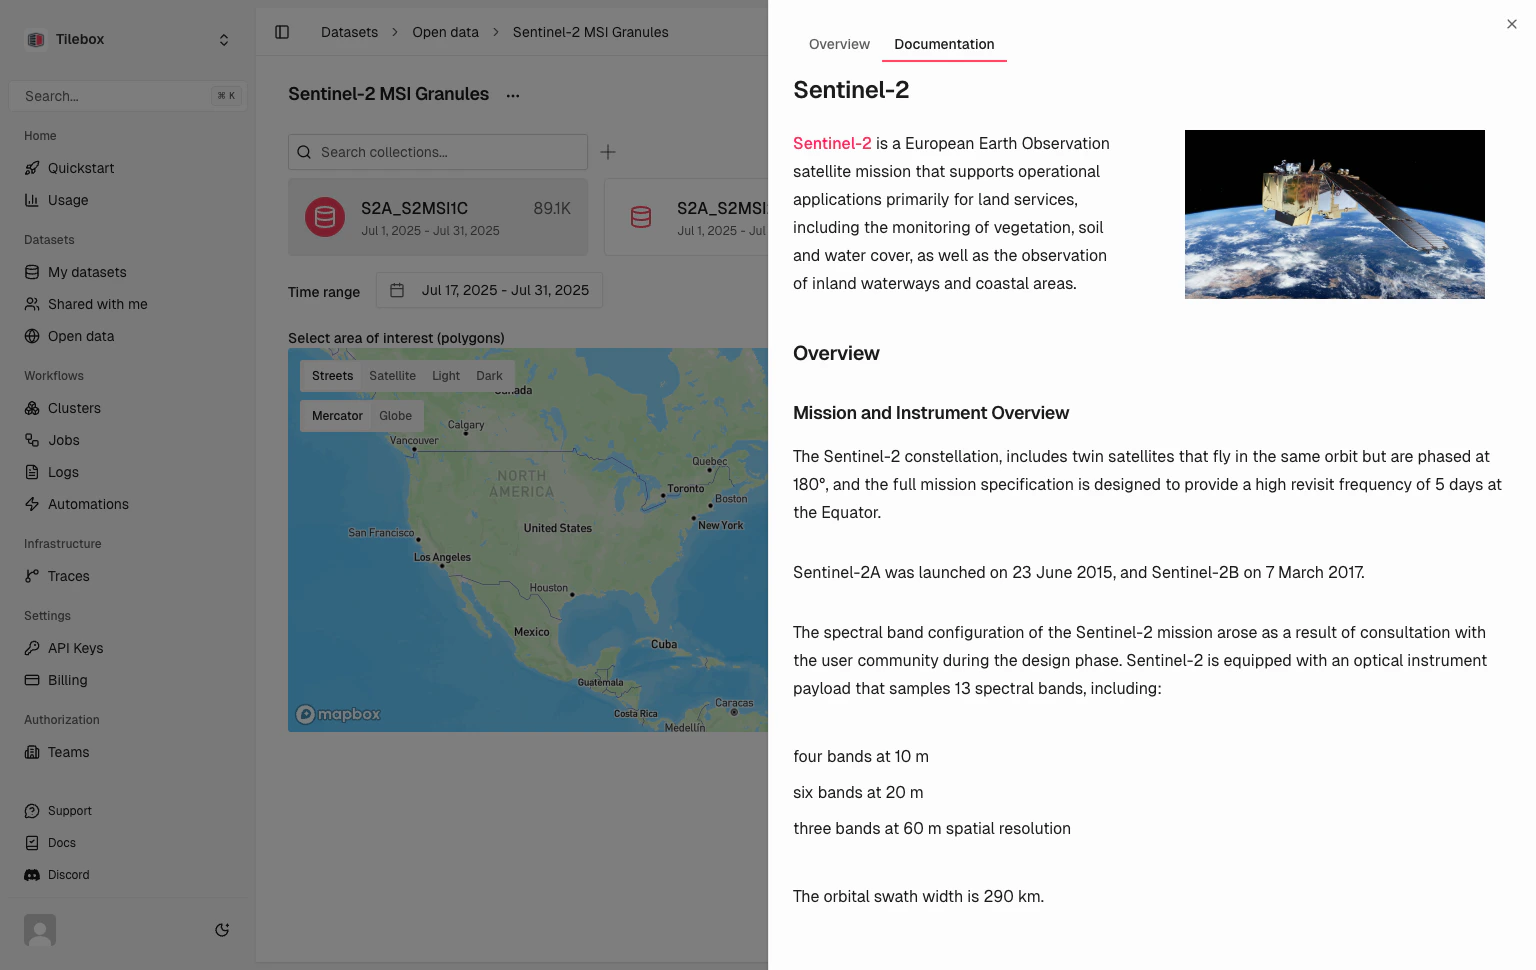
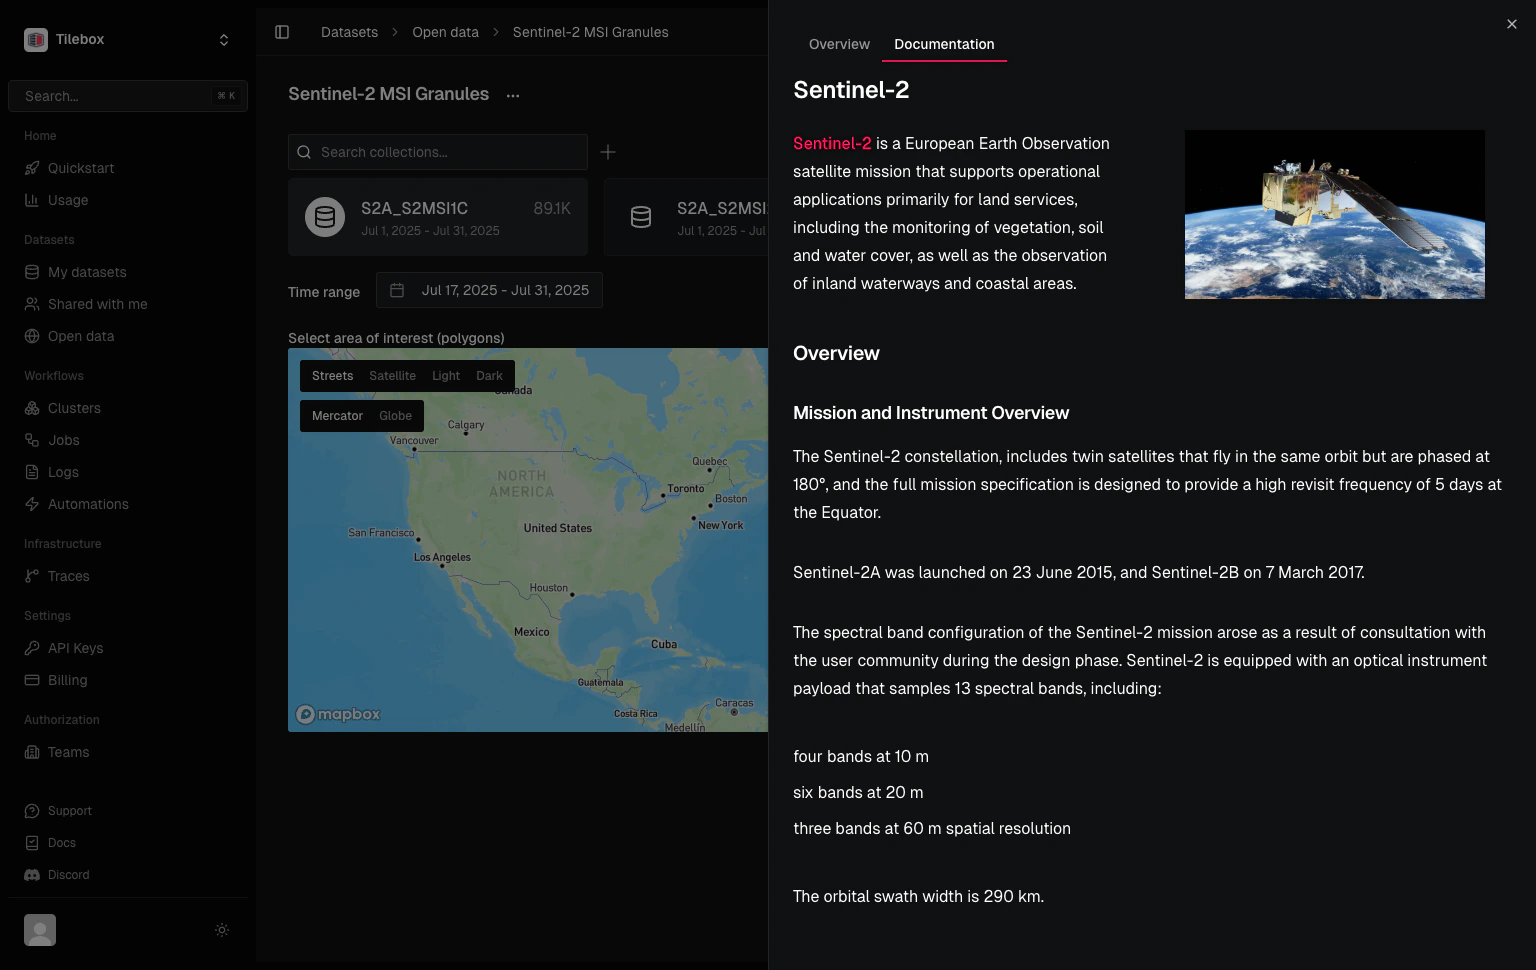 Open the dataset in the Console, click the edit pencil on the documentation section, and add Markdown content. A short documentation block often includes:
```md Markdown theme={"system"}
# Internal imagery catalog
This dataset indexes analysis-ready imagery products used by the operations team.
## Source
Products are copied from the provider archive after validation.
## Usage notes
Use `cloud_cover < 10` for workflows that require mostly cloud-free scenes.
```
## Create a collection
After creating the dataset, create a collection to hold datapoints. Collections let you organize datapoints within the same schema, for example by provider, product family, or processing pipeline.
```python Python theme={"system"}
collection = dataset.get_or_create_collection("landsat_level_2")
print(collection)
```
## Prepare datapoints
Load your source metadata into a GeoDataFrame. The geometry column should contain the footprint for each datapoint.
```python Python theme={"system"}
import geopandas as gpd
products = gpd.read_parquet("products.geoparquet")
products = products.rename(
columns={
"timestamp": "time",
"scene": "product_id",
"path": "location",
}
)
products = products[
["time", "geometry", "product_id", "location", "cloud_cover", "processing_level"]
]
```
## Ingest the catalog
Ingest the prepared records into a collection.
```python Python theme={"system"}
collection.ingest(products)
```
## Query by time and location
After ingestion, use the same query model as Tilebox open data catalogs.
```python Python theme={"system"}
from shapely import box
area = box(11.0, 46.0, 12.0, 47.0)
matches = collection.query(
temporal_extent=("2026-01-01", "2026-02-01"),
spatial_extent=area,
)
```
## Next steps
Learn the required fields and query behavior.
Load CSV, Parquet, GeoParquet, and NetCDF data before ingestion.
Prepare GeoParquet metadata and ingest it into this catalog.
Open the dataset in the Console, click the edit pencil on the documentation section, and add Markdown content. A short documentation block often includes:
```md Markdown theme={"system"}
# Internal imagery catalog
This dataset indexes analysis-ready imagery products used by the operations team.
## Source
Products are copied from the provider archive after validation.
## Usage notes
Use `cloud_cover < 10` for workflows that require mostly cloud-free scenes.
```
## Create a collection
After creating the dataset, create a collection to hold datapoints. Collections let you organize datapoints within the same schema, for example by provider, product family, or processing pipeline.
```python Python theme={"system"}
collection = dataset.get_or_create_collection("landsat_level_2")
print(collection)
```
## Prepare datapoints
Load your source metadata into a GeoDataFrame. The geometry column should contain the footprint for each datapoint.
```python Python theme={"system"}
import geopandas as gpd
products = gpd.read_parquet("products.geoparquet")
products = products.rename(
columns={
"timestamp": "time",
"scene": "product_id",
"path": "location",
}
)
products = products[
["time", "geometry", "product_id", "location", "cloud_cover", "processing_level"]
]
```
## Ingest the catalog
Ingest the prepared records into a collection.
```python Python theme={"system"}
collection.ingest(products)
```
## Query by time and location
After ingestion, use the same query model as Tilebox open data catalogs.
```python Python theme={"system"}
from shapely import box
area = box(11.0, 46.0, 12.0, 47.0)
matches = collection.query(
temporal_extent=("2026-01-01", "2026-02-01"),
spatial_extent=area,
)
```
## Next steps
Learn the required fields and query behavior.
Load CSV, Parquet, GeoParquet, and NetCDF data before ingestion.
Prepare GeoParquet metadata and ingest it into this catalog.