>> raises KeyError: "2022-05-01T11:28:28.000000"
```
To return the closest value instead of raising an error, specify a `method`.
```python Finding the closest data point theme={"system"}
nearest_datapoint = satellite_data.sel(time="2022-05-01T11:28:28.000000", method="nearest")
assert nearest_datapoint.equals(specific_datapoint) # passes
```
## Dropping duplicates
Xarray allows you to drop duplicate values from a dataset. For example, to drop duplicate timestamps:
```python Dropping duplicates theme={"system"}
deduped = satellite_data.drop_duplicates("time")
```
De-duped datasets are required for certain operations, like [selecting data by value](#selecting-data-by-value).
## Statistics
Xarray and NumPy include a wide range of statistical functions that you can apply to a dataset or DataArray. Here are some examples:
```python Computing dataset statistics theme={"system"}
cloud_cover = satellite_data.cloud_cover
min_meas = cloud_cover.min().item()
max_meas = cloud_cover.max().item()
mean_meas = cloud_cover.mean().item()
std_meas = cloud_cover.std().item()
print(f"Cloud cover ranges from {min_meas:.2f} to {max_meas:.2f} with a mean of {mean_meas:.2f} and a standard deviation of {std_meas:.2f}")
```
```plaintext Output theme={"system"}
Cloud cover ranges from 0.00 to 100.00 with a mean of 76.48 and a standard deviation of 34.17
```
You can also directly apply many NumPy functions to datasets or DataArrays. For example, to find out how many unique bands the data contains, use [np.unique](https://numpy.org/doc/stable/reference/generated/numpy.unique.html):
```python Finding unique values theme={"system"}
import numpy as np
print("Sensors:", np.unique(satellite_data.bands))
```
```plaintext Output theme={"system"}
Sensors: [12]
```
## Reading and writing files
Xarray provides a simple method for saving and loading datasets from files. This is useful for sharing your data or storing it for future use. Xarray supports many different file formats, including NetCDF, Zarr, GRIB, and more. For a complete list of supported formats, refer to the [official documentation page](https://docs.xarray.dev/en/stable/user-guide/io.html).
To save the example dataset as a NetCDF file:
You may need to install the `netcdf4` package first.
```python Saving a dataset to a file theme={"system"}
satellite_data.to_netcdf("example_satellite_data.nc")
```
This creates a file named `example_satellite_data.nc` in your current directory. You can then load this file back into memory with:
```python Loading a dataset from a file theme={"system"}
import xarray as xr
satellite_data = xr.open_dataset("example_satellite_data.nc")
```
If you would like to follow along with the examples in this section, you can download the example dataset as a NetCDF file [here][example_satellite_data.nc].
## Further reading
This section covers only a few common use cases for Xarray. The library offers many more functions and features. For more information, please see the [Xarray documentation](https://xarray.pydata.org/en/stable/) or explore the [Xarray Tutorials](https://tutorial.xarray.dev/intro.html).
Some useful capabilities not covered in this section include:
# Storage Clients
Source: https://docs.tilebox.com/storage/clients
Learn about the different storage clients available in Tilebox to access open data.
Tilebox does not host the actual open data satellite products but instead relies on publicly accessible storage providers for data access.
Tilebox ingests available metadata as [datasets](/datasets/concepts/datasets) to enable high performance querying and structured access of the data as [xarray.Dataset](/sdks/python/xarray).
Below is a list of the storage providers currently supported by Tilebox.
This feature is only available in the Python SDK.
## Copernicus Data Space
The [Copernicus Data Space](https://dataspace.copernicus.eu/) is an open ecosystem that provides free instant access to data and services from the Copernicus Sentinel missions. Check out the [ASF Open Data datasets](/datasets/open-data#copernicus-data-space) that are available in Tilebox.
### Access Copernicus data
To download data products from the Copernicus Data Space after querying them via the Tilebox API, you need to [create an account](https://identity.dataspace.copernicus.eu/auth/realms/CDSE/protocol/openid-connect/auth?client_id=cdse-public\&response_type=code\&scope=openid\&redirect_uri=https%3A//dataspace.copernicus.eu/account/confirmed/1) and then generate [S3 credentials here](https://eodata-s3keysmanager.dataspace.copernicus.eu/panel/s3-credentials).
The following code snippet demonstrates how to query and download Copernicus data using the Tilebox Python SDK.
```python Python highlight={4,8-12,25} theme={"system"}
from pathlib import Path
from tilebox.datasets import Client
from tilebox.storage import CopernicusStorageClient
# Creating clients
client = Client()
storage_client = CopernicusStorageClient(
access_key="YOUR_ACCESS_KEY",
secret_access_key="YOUR_SECRET_ACCESS_KEY",
cache_directory=Path("./data")
)
# Choosing the dataset and collection
s2_dataset = client.dataset("open_data.copernicus.sentinel2_msi")
collection = s2_dataset.collection("S2A_S2MSI2A")
# Loading metadata
s2_data = collection.query(temporal_extent=("2024-08-01", "2024-08-02"), show_progress=True)
# Selecting a data point to download
selected = s2_data.isel(time=0) # index 0 selected
# Downloading the data
downloaded_data = storage_client.download(selected)
print(f"Downloaded granule: {downloaded_data.name} to {downloaded_data}")
print("Contents: ")
for content in downloaded_data.iterdir():
print(f" - {content.relative_to(downloaded_data)}")
```
```plaintext Output theme={"system"}
Downloaded granule: S2A_MSIL2A_20240801T002611_N0511_R102_T58WET_20240819T170544.SAFE to data/Sentinel-2/MSI/L2A/2024/08/01/S2A_MSIL2A_20240801T002611_N0511_R102_T58WET_20240819T170544.SAFE
Contents:
- manifest.safe
- GRANULE
- INSPIRE.xml
- MTD_MSIL2A.xml
- DATASTRIP
- HTML
- rep_info
- S2A_MSIL2A_20240801T002611_N0511_R102_T58WET_20240819T170544-ql.jpg
```
### Partial product downloads
For cases where only a subset of the available file objects for a product is needed, you may restrict your download to just that subset. First, list available objects using `list_objects`, filter them, and then download using `download_objects`.
For example, a Sentinel-2 L2A product includes many files such as metadata, different bands in multiple resolutions, masks, and quicklook images. The following example shows how to download only specific files from a Sentinel-2 L2A product.
```python Python highlight={6, 17} theme={"system"}
s2_dataset = client.dataset("open_data.copernicus.sentinel2_msi")
collection = s2_dataset.collection("S2A_S2MSI2A")
s2_data = collection.query(temporal_extent=("2024-08-01", "2024-08-02"), show_progress=True)
selected = s2_data.isel(time=0) # download the first granule in the given time range
objects = storage_client.list_objects(selected)
print(f"Granule {selected.granule_name.item()} consists of {len(objects)} individual objects.")
# only select specific objects to download
want_products = ["B02_10m", "B03_10m", "B08_10m"]
objects = [obj for obj in objects if any(prod in obj for prod in want_products)] # remove all other objects
print(f"Downloading {len(objects)} objects.")
for obj in objects:
print(f" - {obj}")
# Finally, download the selected data
downloaded_data = storage_client.download_objects(selected, objects)
```
```plaintext Output theme={"system"}
Granule S2A_MSIL2A_20240801T002611_N0511_R102_T58WET_20240819T170544.SAFE consists of 95 individual objects.
Downloading 3 objects.
- GRANULE/L2A_T58WET_A047575_20240801T002608/IMG_DATA/R10m/T58WET_20240801T002611_B02_10m.jp2
- GRANULE/L2A_T58WET_A047575_20240801T002608/IMG_DATA/R10m/T58WET_20240801T002611_B03_10m.jp2
- GRANULE/L2A_T58WET_A047575_20240801T002608/IMG_DATA/R10m/T58WET_20240801T002611_B08_10m.jp2
```
### Quicklook images
Many Copernicus products include a quicklook image. The Tilebox storage client includes support for displaying these quicklook images directly when running in an interactive environment such as a Jupyter notebook.
```python Python highlight={6} theme={"system"}
s2_dataset = client.dataset("open_data.copernicus.sentinel2_msi")
collection = s2_dataset.collection("S2A_S2MSI2A")
s2_data = collection.query(temporal_extent=("2024-08-01", "2024-08-02"), show_progress=True)
selected = s2_data.isel(time=0) # download the first granule in the given time range
storage_client.quicklook(selected)
```
 ## USGS Landsat
The [United States Geological Survey (USGS)](https://www.usgs.gov/) provides a wide range of Earth observation data, including Landsat data, which are also available as open data through Tilebox.
### Accessing Landsat data
Landsat data is available in a S3 bucket. The following code snippet demonstrates how to query and download Landsat data using the Tilebox Python SDK.
The USGS Landsat S3 bucket is a [requester-pays](https://docs.aws.amazon.com/AmazonS3/latest/userguide/RequesterPaysBuckets.html) bucket.
This means that you will need to have an AWS account to access the data, and then have your AWS credentials configured in your environment.
Check out the [boto3 documentation](https://boto3.amazonaws.com/v1/documentation/api/latest/guide/credentials.html) for more information on how to configure your credentials.
```python Python theme={"system"}
from pathlib import Path
from tilebox.datasets import Client
from tilebox.storage import USGSLandsatStorageClient
# Creating clients
client = Client()
storage_client = USGSLandsatStorageClient()
# Choosing the dataset and collection
l9_dataset = client.dataset("open_data.usgs.landsat9_oli_tirs")
collection = l9_dataset.collection("L2_SR")
# Loading metadata
l9_data = collection.query(temporal_extent=("2024-08-01", "2024-08-02"), show_progress=True)
# Selecting a data point to download
selected = l9_data.isel(time=0) # index 0 selected
# Downloading the data
downloaded_data = storage_client.download(selected)
print(f"Downloaded granule: {downloaded_data.name} to {downloaded_data}")
print("Contents: ")
for content in downloaded_data.iterdir():
print(f" - {content.relative_to(downloaded_data)}")
```
```plaintext Output theme={"system"}
Downloaded granule: LC09_L2SP_088241_20240801_20240802_02_T1 to /Users/lukasbindreiter/.cache/tilebox/collection02/level-2/standard/oli-tirs/2024/088/241/LC09_L2SP_088241_20240801_20240802_02_T1
Contents:
- LC09_L2SP_088241_20240801_20240802_02_T1_ST_EMSD.TIF
- LC09_L2SP_088241_20240801_20240802_02_T1_SR_QA_AEROSOL.TIF
- LC09_L2SP_088241_20240801_20240802_02_T1_SR_B7.TIF
- LC09_L2SP_088241_20240801_20240802_02_T1_ST_QA.TIF
- LC09_L2SP_088241_20240801_20240802_02_T1_SR_B6.TIF
- LC09_L2SP_088241_20240801_20240802_02_T1_SR_B4.TIF
- LC09_L2SP_088241_20240801_20240802_02_T1_SR_B5.TIF
- LC09_L2SP_088241_20240801_20240802_02_T1_SR_B1.TIF
- LC09_L2SP_088241_20240801_20240802_02_T1_SR_B2.TIF
- LC09_L2SP_088241_20240801_20240802_02_T1_SR_B3.TIF
- LC09_L2SP_088241_20240801_20240802_02_T1_ST_URAD.TIF
- LC09_L2SP_088241_20240801_20240802_02_T1_ANG.txt
- LC09_L2SP_088241_20240801_20240802_02_T1_ST_CDIST.TIF
- LC09_L2SP_088241_20240801_20240802_02_T1_thumb_large.jpeg
- LC09_L2SP_088241_20240801_20240802_02_T1_thumb_small.jpeg
- LC09_L2SP_088241_20240801_20240802_02_T1_ST_B10.TIF
- LC09_L2SP_088241_20240801_20240802_02_T1_MTL.txt
- LC09_L2SP_088241_20240801_20240802_02_T1_ST_TRAD.TIF
- LC09_L2SP_088241_20240801_20240802_02_T1_MTL.json
- LC09_L2SP_088241_20240801_20240802_02_T1_ST_DRAD.TIF
- LC09_L2SP_088241_20240801_20240802_02_T1_ST_ATRAN.TIF
- LC09_L2SP_088241_20240801_20240802_02_T1_QA_RADSAT.TIF
- LC09_L2SP_088241_20240801_20240802_02_T1_SR_stac.json
- LC09_L2SP_088241_20240801_20240802_02_T1_MTL.xml
- LC09_L2SP_088241_20240801_20240802_02_T1_QA_PIXEL.TIF
- LC09_L2SP_088241_20240801_20240802_02_T1_ST_EMIS.TIF
- LC09_L2SP_088241_20240801_20240802_02_T1_ST_stac.json
```
### Partial product downloads
For cases where only a subset of the available file objects for a product is needed, you may restrict your download to just that subset. First, list available objects using `list_objects`, filter them, and then download using `download_objects`.
For example, a Landsat 9 L2 SR product includes many files such as metadata, different bands in multiple resolutions, masks, and quicklook images. The following example shows how to download only specific files from a Landsat 9 L2 SR product.
```python highlight={17} theme={"system"}
l9_dataset = client.dataset("open_data.usgs.landsat9_oli_tirs")
collection = l9_dataset.collection("L2_SR")
l9_data = collection.query(temporal_extent=("2024-08-01", "2024-08-02"), show_progress=True)
selected = l9_data.isel(time=0)
objects = storage_client.list_objects(selected)
print(f"Granule {selected.granule_name.item()} consists of {len(objects)} individual objects.")
rgb_bands = ["B4", "B3", "B2"]
objects = [obj for obj in objects if any(obj.endswith(band + ".TIF") for band in rgb_bands)]
print(f"Downloading {len(objects)} objects.")
for obj in objects:
print(f" - {obj}")
# Finally, download the selected data
downloaded_data = storage_client.download_objects(selected, objects)
```
```plaintext Output theme={"system"}
Granule LC09_L2SP_088241_20240801_20240802_02_T1_SR consists of 27 individual objects.
Downloading 3 objects.
- LC09_L2SP_088241_20240801_20240802_02_T1_SR_B2.TIF
- LC09_L2SP_088241_20240801_20240802_02_T1_SR_B3.TIF
- LC09_L2SP_088241_20240801_20240802_02_T1_SR_B4.TIF
```
### Quicklook images
Many USGS products include a quicklook image. The Tilebox storage client includes support for displaying these quicklook images directly when running in an interactive environment such as a Jupyter notebook.
```python Python highlight={10} theme={"system"}
# Loading metadata
l9_dataset = client.dataset("open_data.usgs.landsat9_oli_tirs")
collection = l9_dataset.collection("L2_SR")
l9_data = collection.query(temporal_extent=("2024-08-01", "2024-08-02"), show_progress=True)
# Selecting a data point to download
selected = l9_data.isel(time=0) # index 0 selected
# Displaying a quicklook image
storage_client.quicklook(selected)
```
 ## Alaska Satellite Facility (ASF)
The [Alaska Satellite Facility (ASF)](https://asf.alaska.edu/) is a NASA-funded research center at the University of Alaska Fairbanks. Check out the [ASF Open Data datasets](/datasets/open-data#alaska-satellite-facility-asf) that are available in Tilebox.
### Accessing ASF Data
You can query ASF metadata without needing an account, as Tilebox has indexed and ingested the relevant metadata. To access and download the actual satellite products, you will need an ASF account.
You can create an ASF account in the [ASF Vertex Search Tool](https://search.asf.alaska.edu/).
The following code snippet demonstrates how to query and download ASF data using the Tilebox Python SDK.
```python Python highlight={4,9-13,27} theme={"system"}
from pathlib import Path
from tilebox.datasets import Client
from tilebox.storage import ASFStorageClient
# Creating clients
client = Client()
storage_client = ASFStorageClient(
user="YOUR_ASF_USER",
password="YOUR_ASF_PASSWORD",
cache_directory=Path("./data")
)
# Choosing the dataset and collection
ers_dataset = client.dataset("open_data.asf.ers_sar")
collection = ers_dataset.collection("ERS-2")
# Loading metadata
ers_data = collection.query(temporal_extent=("2009-01-01", "2009-01-02"), show_progress=True)
# Selecting a data point to download
selected = ers_data.isel(time=0) # index 0 selected
# Downloading the data
downloaded_data = storage_client.download(selected, extract=True)
print(f"Downloaded granule: {downloaded_data.name} to {downloaded_data}")
print("Contents: ")
for content in downloaded_data.iterdir():
print(f" - {content.relative_to(downloaded_data)}")
```
```plaintext Output theme={"system"}
Downloaded granule: E2_71629_STD_L0_F183 to data/ASF/E2_71629_STD_F183/E2_71629_STD_L0_F183
Contents:
- E2_71629_STD_L0_F183.000.vol
- E2_71629_STD_L0_F183.000.meta
- E2_71629_STD_L0_F183.000.raw
- E2_71629_STD_L0_F183.000.pi
- E2_71629_STD_L0_F183.000.nul
- E2_71629_STD_L0_F183.000.ldr
```
### Quicklook images
Many ASF products include a quicklook image. The Tilebox storage client includes support for displaying these quicklook images directly when running in an interactive environment such as a Jupyter notebook.
```python Python highlight={10} theme={"system"}
# Loading metadata
ers_dataset = client.dataset("open_data.asf.ers_sar")
collection = ers_dataset.collection("ERS-2")
ers_data = collection.query(temporal_extent=("2009-01-01", "2009-01-02"), show_progress=True)
# Selecting a data point to download
selected = ers_data.isel(time=0) # index 0 selected
# Displaying a quicklook image
storage_client.quicklook(selected)
```
 ### Further Reading
## Umbra Space
[Umbra](https://umbra.space/) satellites provide high resolution Synthetic Aperture Radar (SAR) imagery from space. Check out the [Umbra datasets](/datasets/open-data#umbra-space) that are available in Tilebox.
### Accessing Umbra data
No account is needed to access Umbra data. All data is under a Creative Commons License (CC BY 4.0), allowing you to use it freely.
The following code snippet demonstrates how to query and download Umbra data using the Tilebox Python SDK.
```python Python highlight={4,9,23} theme={"system"}
from pathlib import Path
from tilebox.datasets import Client
from tilebox.storage import UmbraStorageClient
# Creating clients
client = Client()
datasets = client.datasets()
storage_client = UmbraStorageClient(cache_directory=Path("./data"))
# Choosing the dataset and collection
umbra_dataset = datasets.open_data.umbra.sar
collections = umbra_dataset.collections()
collection = collections["SAR"]
# Loading metadata
umbra_data = collection.query(temporal_extent=("2024-01-05", "2024-01-06"), show_progress=True)
# Selecting a data point to download
selected = umbra_data.isel(time=0) # index 0 selected
# Downloading the data
downloaded_data = storage_client.download(selected)
print(f"Downloaded granule: {downloaded_data.name} to {downloaded_data}")
print("Contents: ")
for content in downloaded_data.iterdir():
print(f" - {content.relative_to(downloaded_data)}")
```
```plaintext Output theme={"system"}
Downloaded granule: 2024-01-05-01-53-37_UMBRA-07 to data/Umbra/ad hoc/Yi_Sun_sin_Bridge_SK/6cf02931-ca2e-4744-b389-4844ddc701cd/2024-01-05-01-53-37_UMBRA-07
Contents:
- 2024-01-05-01-53-37_UMBRA-07_SIDD.nitf
- 2024-01-05-01-53-37_UMBRA-07_SICD.nitf
- 2024-01-05-01-53-37_UMBRA-07_CSI-SIDD.nitf
- 2024-01-05-01-53-37_UMBRA-07_METADATA.json
- 2024-01-05-01-53-37_UMBRA-07_GEC.tif
- 2024-01-05-01-53-37_UMBRA-07_CSI.tif
```
### Partial product downloads
For cases where only a subset of the available file objects for a given Umbra data point is necessary, you can limit your download to just that subset. First, list available objects using `list_objects`, filter the list, and then use `download_objects`.
The below example shows how to download only the metadata file for a given data point.
```python Python highlight={4, 15} theme={"system"}
collection = datasets.open_data.umbra.sar.collections()["SAR"]
umbra_data = collection.query(temporal_extent=("2024-01-05", "2024-01-06"), show_progress=True)
# Selecting a data point to download
selected = umbra_data.isel(time=0) # index 0 selected
objects = storage_client.list_objects(selected)
print(f"Data point {selected.granule_name.item()} consists of {len(objects)} individual objects.")
# only select specific objects to download
objects = [obj for obj in objects if "METADATA" in obj] # remove all other objects
print(f"Downloading {len(objects)} object.")
print(objects)
# Finally, download the selected data
downloaded_data = storage_client.download_objects(selected, objects)
```
```plaintext Output theme={"system"}
Data point 2024-01-05-01-53-37_UMBRA-07 consists of 6 individual objects.
Downloading 1 object.
['2024-01-05-01-53-37_UMBRA-07_METADATA.json']
```
# Caches
Source: https://docs.tilebox.com/workflows/caches
Sharing data between tasks is crucial for workflows, especially in satellite imagery processing, where large datasets are the norm. Tilebox Workflows offers a straightforward API for storing and retrieving data from a shared cache.
The cache API is currently experimental and may undergo changes in the future. Many more features and new [backends](#cache-backends) are on the roadmap. There might be breaking changes to the Cache API in the future.
Caches are configured at the [task runner](/workflows/concepts/task-runners) level. Because task runners can be deployed across multiple locations, caches must be accessible from all task runners contributing to a workflow.
Currently, the default cache implementation uses a Google Cloud Storage bucket, providing a scalable method to share data between tasks. For quick prototyping and local development, you can also use a local file system cache, which is included by default.
If needed, you can create your own cache backend by implementing the `Cache` interface.
## Configuring a Cache
You can configure a cache while creating a task runner by passing a cache instance to the `cache` parameter. To use an in-memory cache, use `tilebox.workflows.cache.InMemoryCache`. This implementation is helpful for local development and quick testing. For alternatives, see the supported [cache backends](#cache-backends).
```python Python theme={"system"}
from tilebox.workflows import Client
from tilebox.workflows.cache import InMemoryCache
client = Client()
runner = client.runner(
tasks=[...],
cache=InMemoryCache(),
)
```
By configuring such a cache, the `context` object that is passed to the execution of each task gains access to a `job_cache`
attribute that can be used to [store and retrieve data](#storing-and-retrieving-data) from the cache.
## Cache Backends
Tilebox Workflows comes with four cache implementations out of the box, each backed by a different storage system.
### Google Storage Cache
A cache implementation backed by a Google cloud Storage bucket to store and retrieve data. It's a reliable method for sharing data across tasks, suitable for production environments. You will need access to a GCP project and a bucket.
The Tilebox Workflow orchestrator uses the official Python Client for Google Cloud Storage. To set up authentication, refer to the official documentation.
```python Python theme={"system"}
from tilebox.workflows import Client
from tilebox.workflows.cache import GoogleStorageCache
from google.cloud.storage import Client as StorageClient
storage_client = StorageClient(project="gcp-project")
bucket = storage_client.bucket("cache-bucket")
client = Client()
runner = client.runner(
tasks=[...],
cache=GoogleStorageCache(bucket, prefix="jobs"),
)
```
The `prefix` parameter is optional and can be used to set a common prefix for all cache keys, which helps organize objects within a bucket when re-using the same bucket for other purposes.
### Amazon S3 Cache
A cache implementation backed by an Amazon S3 bucket to store and retrieve data. Like the Google Cloud Storage option, it's reliable and scalable for production use.
Tilebox utilizes the `boto3` library to communicate with Amazon S3. For the necessary authentication setup, refer to [its documentation](https://boto3.amazonaws.com/v1/documentation/api/latest/guide/quickstart.html#configuration).
```python Python theme={"system"}
from tilebox.workflows import Client
from tilebox.workflows.cache import AmazonS3Cache
client = Client()
runner = client.runner(
tasks=[...],
cache=AmazonS3Cache("my-bucket-name", prefix="jobs")
)
```
The `prefix` parameter is optional and can be used to set a common prefix for all cache keys, which helps organize objects within a bucket when re-using the same bucket for other purposes.
### Local File System Cache
A cache implementation backed by a local file system. It's suitable for quick prototyping and local development, assuming all task runners share the same machine or access the same file system.
```python Python theme={"system"}
from tilebox.workflows import Client
from tilebox.workflows.cache import LocalFileSystemCache
client = Client()
runner = client.runner(
tasks=[...],
cache=LocalFileSystemCache("/path/to/cache/directory"),
)
```
Local file system caches can also be used in conjunction with network attached storage or similar tools, making it a viable option also for distributed setups.
### In-Memory Cache
A simple in-memory cache useful for quick prototyping and development. The data is not shared between task runners and is lost upon task runner restarts. Use this cache only for workflows executed on a single task runner.
```python Python theme={"system"}
from tilebox.workflows import Client
from tilebox.workflows.cache import InMemoryCache
client = Client()
runner = client.runner(
tasks=[...],
cache=InMemoryCache(),
)
```
## Data Isolation
Caches are isolated per job, meaning that each job's cache data is only accessible to tasks within that job. This setup prevents key conflicts between different job executions. Currently, accessing cache data of other jobs is not supported.
The capability to share data across jobs is planned for future updates. This feature will be beneficial for real-time processing workflows or workflows requiring auxiliary data from external sources.
## Storing and Retrieving Data
The job cache can be accessed via the `ExecutionContext` passed to a tasks `execute` function. This [`job_cache`](/api-reference/python/tilebox.workflows/ExecutionContext.job_cache) object provides methods to handle data storage and retrieval from the cache. The specifics of data storage depend on the chosen cache backend.
The cache API is designed to be simple and can handle all types of data, supporting binary data in the form of `bytes`, identified by `str` cache keys. This allows for storing many different data types, such as pickled Python objects, serialized JSON, UTF-8, or binary data.
The following snippet illustrates storing and retrieving data from the cache.
```python Python theme={"system"}
from tilebox.workflows import Task, ExecutionContext
class ProducerTask(Task):
def execute(self, context: ExecutionContext) -> None:
# store data in the cache
context.job_cache["data"] = b"my_binary_data_to_store"
context.submit_subtask(ConsumerTask())
class ConsumerTask(Task):
def execute(self, context: ExecutionContext) -> None:
data = context.job_cache["data"]
print(f"Read {data} from cache")
```
In this example, data stored under the key `"data"` can be any size that fits the cache backend constraints. Ensure the key remains unique within the job's scope to avoid conflicts.
To test the workflow, you can start a local task runner using the `InMemoryCache` backend. Then, submit a job to execute the `ProducerTask` and observe the output of the `ConsumerTask`.
```python Python theme={"system"}
# submit a job to test our workflow
job_client = client.jobs()
job_client.submit("testing-cache-access", ProducerTask())
# start a runner to execute it
runner = client.runner(
tasks=[ProducerTask, ConsumerTask],
cache=LocalFileSystemCache("/path/to/cache/directory"),
)
runner.run_forever()
```
```plaintext Output theme={"system"}
Read b'my_binary_data_to_store' from cache
```
## Groups and Hierarchical Keys
The cache API supports groups and hierarchical keys, analogous to directories and files in a file system. Groups help organize cache keys hierarchically, preventing key conflicts and allowing data to be structured better. Additionally, groups are iterable, enabling retrieval of all keys within the group. This feature is useful when multiple tasks create cache data, and a later task needs to list all produced data by earlier tasks.
The following code shows an example of how cache groups can be used.
```python Python {39,44-45} theme={"system"}
from tilebox.workflows import Task, ExecutionContext
import random
class CacheGroupDemo(Task):
n: int
def execute(self, context: ExecutionContext):
# define a cache group key for subtasks
group_key = "random_numbers"
produce_numbers = context.submit_subtask(
ProduceRandomNumbers(self.n, group_key)
)
sum_task = context.submit_subtask(
PrintSum(group_key),
depends_on=[produce_numbers],
)
class ProduceRandomNumbers(Task):
n: int
group_key: str
def execute(self, context: ExecutionContext):
for i in range(self.n):
context.submit_subtask(ProduceRandomNumber(i, self.group_key))
class ProduceRandomNumber(Task):
index: int
group_key: str
def execute(self, context: ExecutionContext) -> None:
number = random.randint(0, 100)
group = context.job_cache.group(self.group_key)
group[f"key_{self.index}"] = str(number).encode()
class PrintSum(Task):
group_key: str
def execute(self, context: ExecutionContext) -> None:
group = context.job_cache.group(self.group_key)
# PrintSum doesn't know how many numbers were produced,
# instead it iterates over all keys in the cache group
numbers = []
for key in group: # iterate over all stored numbers
number = group[key] # read data from cache
numbers.append(int(number.decode())) # convert bytes back to int
print(f"Sum of all numbers: {sum(numbers)}")
```
Submitting a job of the `CacheGroupDemo` and running it with a task runner can be done as follows:
```python Python theme={"system"}
# submit a job to test our workflow
job_client = client.jobs()
job_client.submit("cache-groups", CacheGroupDemo(5))
# start a runner to execute it
runner = client.runner(
tasks=[CacheGroupDemo, ProduceRandomNumbers, ProduceRandomNumber, PrintSum],
cache=LocalFileSystemCache("/path/to/cache/directory"),
)
runner.run_forever()
```
```plaintext Output theme={"system"}
Sum of all numbers: 284
```
# Clusters
Source: https://docs.tilebox.com/workflows/concepts/clusters
Clusters are a logical grouping for [task runners](/workflows/concepts/task-runners).
Using clusters, you can scope certain tasks to a specific group of task runners.
Tasks, which are always submitted to a specific cluster, are only executed on task runners assigned to the same cluster.
## Use Cases
Use clusters to organize [task runners](/workflows/concepts/clusters) into logical groups, which can help with:
* Targeting specific task runners for a particular job
* Reserving a group of task runners for specific purposes, such as running certain types of batch jobs
* Setting up different clusters for different environments (like development and production)
Even when using different clusters, task runners within the same cluster may still have different capabilities, such as different registered tasks.
If multiple task runners have the same set of registered tasks, you can assign them to different clusters to target specific task runners for a particular job.
### Adding Task Runners to a Cluster
You can add task runners to a cluster by specifying the [cluster's slug](#cluster-slug) when [registering a task runner](/workflows/concepts/task-runners).
Each task runner must always be assigned to a cluster.
## Default Cluster
Each team has a default cluster that is automatically created for them.
This cluster is used when no cluster is specified when [registering a task runner](/workflows/concepts/task-runners) or [submitting a job](/workflows/concepts/jobs).
This is useful when you are just getting started and don't need to create any custom clusters yet.
## Managing Clusters
Before registering a task runner or submitting a job, you must create a cluster. You can also list, fetch, and delete clusters as needed. The following sections explain how to do this.
To manage clusters, first instantiate a cluster client using the `clusters` method in the workflows client.
```python Python theme={"system"}
from tilebox.workflows import Client
client = Client()
clusters = client.clusters()
```
```go Go theme={"system"}
import "github.com/tilebox/tilebox-go/workflows/v1"
client := workflows.NewClient()
clusterClient := client.Clusters
```
### Creating a Cluster
To create a cluster, use the `create` method on the cluster client and provide a name for the cluster.
```python Python theme={"system"}
cluster = clusters.create("testing")
print(cluster)
```
```go Go theme={"system"}
cluster := client.Clusters.Create("testing")
fmt.Println(cluster)
```
```plaintext Python theme={"system"}
Cluster(slug='testing-CvufcSxcC9SKfe', display_name='testing')
```
```go Go theme={"system"}
&{testing-CvufcSxcC9SKfe testing}
```
### Cluster Slug
Each cluster has a unique identifier, combining the cluster's name and an automatically generated identifier.
Use this slug to reference the cluster for other operations, like submitting a job or subtasks.
### Listing Clusters
To list all available clusters, use the `all` method:
```python Python theme={"system"}
all_clusters = clusters.all()
print(all_clusters)
```
```go Go theme={"system"}
clusters, err := client.Clusters.List(ctx)
if err != nil {
slog.Error("failed to list clusters", slog.Any("error", err))
return
}
for _, cluster := range clusters {
fmt.Println(cluster)
}
```
```plaintext Python theme={"system"}
[Cluster(slug='testing-CvufcSxcC9SKfe', display_name='testing'),
Cluster(slug='production-EifhUozDpwAJDL', display_name='Production')]
```
```go Go theme={"system"}
&{testing-CvufcSxcC9SKfe testing}
&{production-EifhUozDpwAJDL Production}
```
### Fetching a Specific Cluster
To fetch a specific cluster, use the `find` method and pass the cluster's slug:
```python Python theme={"system"}
cluster = clusters.find("testing-CvufcSxcC9SKfe")
print(cluster)
```
```go Go theme={"system"}
cluster, err := client.Clusters.Get(ctx, "testing-CvufcSxcC9SKfe")
if err != nil {
slog.Error("failed to get cluster", slog.Any("error", err))
return
}
fmt.Println(cluster)
```
```plaintext Python theme={"system"}
Cluster(slug='testing-CvufcSxcC9SKfe', display_name='testing')
```
```go Go theme={"system"}
&{testing-CvufcSxcC9SKfe testing}
```
### Deleting a Cluster
To delete a cluster, use the `delete` method and pass the cluster's slug:
```python Python theme={"system"}
clusters.delete("testing-CvufcSxcC9SKfe")
```
```go Go theme={"system"}
err := client.Clusters.Delete(ctx, "testing-CvufcSxcC9SKfe")
```
## Jobs Across Different Clusters
When [submitting a job](/workflows/concepts/jobs), you need to specify which cluster the job's root task should be executed on.
This allows you to direct the job to a specific set of task runners.
By default, all sub-tasks within a job are also submitted to the same cluster, but this can be overridden to submit sub-tasks to different clusters if needed.
See the example below for a job that spans across multiple clusters.
```python Python theme={"system"}
from tilebox.workflows import Task, ExecutionContext, Client
class MultiCluster(Task):
def execute(self, context: ExecutionContext) -> None:
# this submits a task to the same cluster as the one currently executing this task
same_cluster = context.submit_subtask(DummyTask())
other_cluster = context.submit_subtask(
DummyTask(),
# this task runs only on a task runner in the "other-cluster" cluster
cluster="other-cluster-As3dcSb3D9SAdK",
# dependencies can be specified across clusters
depends_on=[same_cluster],
)
class DummyTask(Task):
def execute(self, context: ExecutionContext) -> None:
pass
# submit a job to the "testing" cluster
client = Client()
job_client = client.jobs()
job = job_client.submit(
"my-job",
MultiCluster(),
cluster="testing-CvufcSxcC9SKfe",
)
```
```go Go theme={"system"}
package main
import (
"context"
"github.com/tilebox/tilebox-go/workflows/v1"
"github.com/tilebox/tilebox-go/workflows/v1/subtask"
)
type MultiCluster struct{}
func (t *MultiCluster) Execute(ctx context.Context) error {
// this submits a task to the same cluster as the one currently executing this task
sameCluster, err := workflows.SubmitSubtask(ctx, &DummyTask{})
if err != nil {
return err
}
otherCluster, err := workflows.SubmitSubtask(
ctx,
&DummyTask{},
// this task runs only on a task runner in the "other-cluster" cluster
subtask.WithClusterSlug("other-cluster-As3dcSb3D9SAdK"),
// dependencies can be specified across clusters
subtask.WithDependencies(sameCluster),
)
if err != nil {
return err
}
_ = otherCluster
return nil
}
type DummyTask struct{}
func main() {
ctx := context.Background()
client := workflows.NewClient()
// submit a job to the "testing" cluster
_, _ = client.Jobs.Submit(
ctx,
"my-job",
[]workflows.Task{
&MultiCluster{},
},
job.WithClusterSlug("testing-CvufcSxcC9SKfe"),
)
}
```
This workflow requires at least two task runners to complete. One must be in the "testing" cluster, and the other must be in the "other-cluster" cluster.
If no task runners are available in the "other-cluster," the task submitted to that cluster will remain queued until a task runner is available.
It won't execute on a task runner in the "testing" cluster, even if the task runner has the `DummyTask` registered.
# Jobs
Source: https://docs.tilebox.com/workflows/concepts/jobs
A job is a specific execution of a workflow with designated input parameters. It consists of one or more tasks that can run in parallel or sequentially, based on their dependencies. Submitting a job involves creating a root task with specific input parameters, which may trigger the execution of other tasks within the same job.
## Submission
To execute a [task](/workflows/concepts/tasks), it must be initialized with concrete inputs and submitted as a job. The task will then run within the context of the job, and if it generates sub-tasks, those will also execute as part of the same job.
After submitting a job, the root task is scheduled for execution, and any [eligible task runner](/workflows/concepts/task-runners#task-selection) can pick it up and execute it.
First, instantiate a job client by calling the `jobs` method on the workflow client.
```python Python theme={"system"}
from tilebox.workflows import Client
client = Client()
job_client = client.jobs()
```
```go Go theme={"system"}
import "github.com/tilebox/tilebox-go/workflows/v1"
client := workflows.NewClient()
jobClient := client.Jobs
```
After obtaining a job client, submit a job using the [submit](/api-reference/python/tilebox.workflows/JobClient.submit) method. You need to provide a name for the job, an instance of the root [task](/workflows/concepts/tasks), and an optional [cluster](/workflows/concepts/clusters) to execute the root task on.
```python Python theme={"system"}
# import your own workflow
from my_workflow import MyTask
job = job_client.submit('my-job', MyTask("some", "parameters"))
```
```go Go theme={"system"}
job, err := client.Jobs.Submit(ctx, "my-job",
[]workflows.Task{
&MyTask{
Some: "parameters",
},
},
)
if err != nil {
slog.Error("Failed to submit job", slog.Any("error", err))
return
}
```
Once a job is submitted, it's immediately scheduled for execution. The root task will be picked up and executed as soon as an [eligible task runner](/workflows/concepts/task-runners#task-selection) is available.
## Retry Handling
[Tasks support retry handling](/workflows/concepts/tasks#retry-handling) for failed executions. This applies to the root task of a job as well, where you can specify the number of retries using the `max_retries` argument of the `submit` method.
```python Python theme={"system"}
from my_workflow import MyFlakyTask
job = job_client.submit('my-job', MyFlakyTask(), max_retries=5)
```
```go Go theme={"system"}
myJob, err := client.Jobs.Submit(ctx, "my-job",
[]workflows.Task{
&MyFlakyTask{},
},
job.WithMaxRetries(5),
)
```
In this example, if `MyFlakyTask` fails, it will be retried up to five times before being marked as failed.
## Submitting to a specific cluster
Jobs default to running on the [default cluster](/workflows/concepts/clusters#default-cluster).
You can specify another cluster to run the root task on using the `cluster` argument of the `submit` method.
```python Python theme={"system"}
from my_workflow import MyFlakyTask
job = job_client.submit('my-job', MyFlakyTask(), cluster="dev-cluster")
```
```go Go theme={"system"}
myJob, err := client.Jobs.Submit(ctx, "my-job",
[]workflows.Task{
&MyFlakyTask{},
},
job.WithClusterSlug("dev-cluster"),
)
```
Only runners listening on the specified cluster can pick up the task.
## Querying jobs
You can query jobs in a given time range using the `query` method on the job client.
```python Python theme={"system"}
jobs = job_client.query(("2025-01-01", "2025-02-01"))
print(jobs)
```
```go Go theme={"system"}
import (
"time"
workflows "github.com/tilebox/tilebox-go/workflows/v1"
"github.com/tilebox/tilebox-go/workflows/v1/job"
"github.com/tilebox/tilebox-go/query"
)
interval := query.NewTimeInterval(
time.Date(2025, 1, 1, 0, 0, 0, 0, time.UTC),
time.Date(2025, 2, 1, 0, 0, 0, 0, time.UTC),
)
jobs, err := workflows.Collect(client.Jobs.Query(ctx,
job.WithTemporalExtent(interval),
))
if err != nil {
slog.Error("Failed to query jobs", slog.Any("error", err))
return
}
for _, job := range jobs {
fmt.Println(job)
}
```
## Retrieving a specific job
When you submit a job, it's assigned a unique identifier that can be used to retrieve it later.
You can use the `find` method on the job client to get a job by its ID.
```python Python theme={"system"}
job = job_client.submit('my-job', MyTask("some", "parameters"))
print(job.id) # 018dd029-58ca-74e5-8b58-b4f99d610f9a
# Later, in another process or machine, retrieve job info
job = job_client.find("018dd029-58ca-74e5-8b58-b4f99d610f9a")
```
```go Go theme={"system"}
myJob, err := client.Jobs.Submit(ctx, "my-job",
[]workflows.Task{
&helloworld.HelloTask{
Some: "parameters",
},
},
)
if err != nil {
slog.Error("Failed to submit job", slog.Any("error", err))
return
}
// 018dd029-58ca-74e5-8b58-b4f99d610f9a
slog.Info("Job submitted", slog.String("job_id", myJob.ID.String()))
// Later, in another process or machine, retrieve job info
job, err := client.Jobs.Get(ctx, uuid.MustParse("018dd029-58ca-74e5-8b58-b4f99d610f9a"))
```
`find` is also a useful tool for fetching a jobs state after a while, to check if it's still running or has already completed.
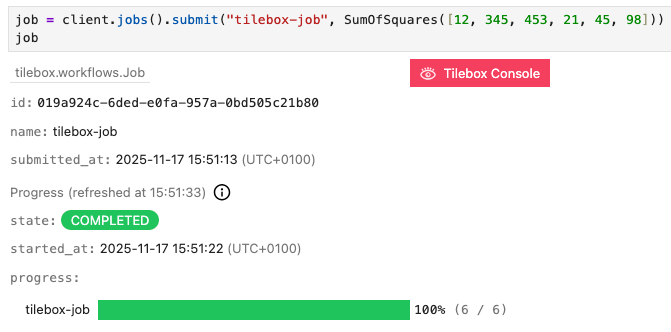
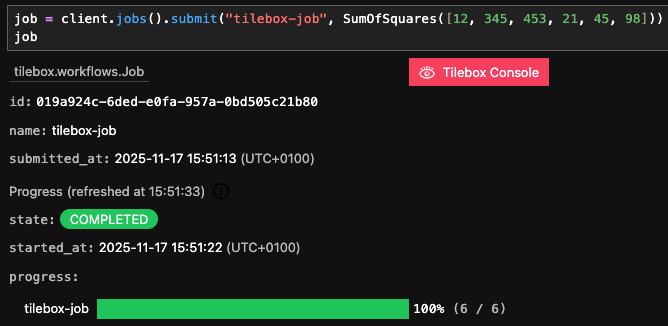
In interactive environments such as Jupyter notebooks, the job object also provides a rich display of the job's state and progress, if it's used as the last expression in a cell.
 ## States
Every Job is always in exactly one of the following states:


Submitted
The Job hasn't started yet, all it's tasks are queued and it wasn't canceled by the user.


Running
At least one task of the job is currently running.


Started
The job has started, some tasks are already `COMPUTED`, but others are still `QUEUED`, waiting for an [eligible task runner](/workflows/concepts/task-runners#task-selection) to pick them up. However no task is currently `RUNNING`.


Completed
The job has successfully completed. Every task of the job succeeded and is `COMPUTED`.


Failed
At least one task of the job has failed, causing the execution of the remaining tasks to be halted. You can [retry](#retries) the job to resume execution from the point of failure.


Canceled
The job was canceled upon user request. You can [retry](#retries) the job to resume execution from the point of cancellation.
The state of a job is determined by the states of all it's tasks. For a list of possible task states, see the [task state](/workflows/concepts/tasks#task-states) documentation.
You can programmatically check the state of a job by inspecting it's `state` field.
```python Python theme={"system"}
from tilebox.workflows.data import JobState
job = job_client.find("018dd029-58ca-74e5-8b58-b4f99d610f9a")
print("Job is running:", job.state == JobState.RUNNING)
```
```go Go theme={"system"}
job, err := client.Jobs.Get(ctx, uuid.MustParse("018dd029-58ca-74e5-8b58-b4f99d610f9a"))
fmt.Println("Job is running:", job.State == workflows.JobRunning)
```
```plaintext Output theme={"system"}
Job is running: True
```
## Visualization
Visualizing the execution of a job can be helpful. The Tilebox workflow orchestrator tracks all tasks in a job, including [sub-tasks](/workflows/concepts/tasks#task-composition-and-subtasks) and [dependencies](/workflows/concepts/tasks#dependencies). This enables the visualization of the execution of a job as a graph diagram.
`display` is designed for use in an [interactive environment](/sdks/python/sample-notebooks#interactive-environments) such as a Jupyter notebook. In non-interactive environments, use [visualize](/api-reference/python/tilebox.workflows/JobClient.visualize), which returns the rendered diagram as an SVG string.
Visualization isn't supported in Go yet.
```python Python theme={"system"}
job = job_client.find("some-job-id") # or a recently submitted job
# Then visualize it
job_client.display(job)
```
The following diagram represents the job execution as a graph. Each task is shown as a node, with edges indicating sub-task relationships. The diagram also uses color coding to display the state of each task.

 Below is another visualization of a job currently being executed by multiple task runners.

 From the diagram, the following can be inferred:
* The root task, `MyTask`, has been executed, is marked as `COMPUTED` and submitted three sub-tasks.
* At least three task runners are available, as three tasks currently are executed simultaneously.
* The `SubTask` that is still executing has not generated any sub-tasks yet, as sub-tasks are queued for execution only after the parent task finishes and becomes computed.
* The queued `DependentTask` requires the `LeafTask` to complete before it can be executed.
Job visualizations are meant for development and debugging. They are not suitable for large jobs with hundreds of tasks, as the diagrams may become too complex. Currently, visualizations are limited to jobs with a maximum of 200 tasks.
### Customizing Task Display Names
The text representing a task in the diagram defaults to a tasks class name. You can customize this by modifying the `display` field of the `current_task` object in the task's execution context. The maximum length for a display name is 1024 characters, with any overflow truncated. Line breaks using `\n` are supported as well.
```python Python theme={"system"}
from tilebox.workflows import Task, ExecutionContext
class RootTask(Task):
num_subtasks: int
def execute(self, context: ExecutionContext):
context.current_task.display = f"Root({self.num_subtasks})"
for i in range(self.num_subtasks):
context.submit_subtask(SubTask(i))
class SubTask(Task):
index: int
def execute(self, context: ExecutionContext):
context.current_task.display = f"Leaf Nr. {self.index}"
job = job_client.submit('custom-display-names', RootTask(3))
job_client.display(job)
```
```go Go theme={"system"}
type RootTask struct {
NumSubtasks int
}
func (t *RootTask) Execute(ctx context.Context) error {
err := workflows.SetTaskDisplay(ctx, fmt.Sprintf("Root(%d)", t.NumSubtasks))
if err != nil {
return fmt.Errorf("failed to set task display: %w", err)
}
for i := range t.NumSubtasks {
_, err := workflows.SubmitSubtask(ctx, &SubTask{Index: i})
if err != nil {
return fmt.Errorf("failed to submit subtask: %w", err)
}
}
return nil
}
type SubTask struct {
Index int
}
func (t *SubTask) Execute(ctx context.Context) error {
err := workflows.SetTaskDisplay(ctx, fmt.Sprintf("Leaf Nr. %d", t.Index))
if err != nil {
return fmt.Errorf("failed to set task display: %w", err)
}
return nil
}
// in main
job, err := client.Jobs.Submit(ctx, "custom-display-names",
[]workflows.Task{&RootTask{
NumSubtasks: 3,
}},
)
```

 ## Cancellation
You can cancel a job at any time. When a job is canceled, no queued tasks will be picked up by task runners and executed even if task runners are idle. Tasks that are already being executed will finish their execution and not be interrupted. All sub-tasks spawned from such tasks after the cancellation will not be picked up by task runners.
Use the `cancel` method on the job client to cancel a job.
```python Python theme={"system"}
job = job_client.submit('my-job', MyTask())
# After a short while, the job gets canceled
job_client.cancel(job)
```
```go Go theme={"system"}
job, err := client.Jobs.Submit(ctx, "my-job",
[]workflows.Task{&MyTask{}},
)
if err != nil {
slog.Error("Failed to submit job", slog.Any("error", err))
return
}
// After a short while, the job gets canceled
err = client.Jobs.Cancel(ctx, job.ID)
```
A canceled job can be resumed at any time by [retrying](#retries) it.
If any task in a job fails, the job is automatically canceled to avoid executing irrelevant tasks. Future releases will allow configuring this behavior for each task to meet specific requirements.
## Retries
If a task fails due to a bug or lack of resources, there is no need to resubmit the entire job. You can simply retry the job, and it will resume from the point of failure. This ensures that all the work that was already done up until the point of the failure isn't lost.
Future releases may introduce automatic retries for certain failure conditions, which can be useful for handling temporary issues.
Below is an example of a failing job due to a bug in the task's implementation. The following workflow processes a list of movie titles and queries the [OMDb API](http://www.omdbapi.com/) for each movie's release date.
```python Python theme={"system"}
from urllib.parse import urlencode
import httpx
from tilebox.workflows import Task, ExecutionContext
class MoviesStats(Task):
titles: list[str]
def execute(self, context: ExecutionContext) -> None:
for title in self.titles:
context.submit_subtask(PrintMovieStats(title))
class PrintMovieStats(Task):
title: str
def execute(self, context: ExecutionContext) -> None:
params = {"t": self.title, "apikey": ""}
url = "http://www.omdbapi.com/?" + urlencode(params)
response = httpx.get(url).json()
# set the display name of the task to the title of the movie:
context.current_task.display = response["Title"]
print(f"{response['Title']} was released on {response['Released']}")
```
```go Go theme={"system"}
package movie
import (
"context"
"encoding/json"
"fmt"
"io"
"net/http"
"net/url"
"github.com/tilebox/tilebox-go/workflows/v1"
)
type MoviesStats struct {
Titles []string
}
func (t *MoviesStats) Execute(ctx context.Context) error {
for _, title := range t.Titles {
_, err := workflows.SubmitSubtask(ctx, &PrintMovieStats{Title: title})
if err != nil {
return fmt.Errorf("failed to submit subtask: %w", err)
}
}
return nil
}
type Movie struct {
Title *string `json:"Title"`
Released *string `json:"Released"`
}
type PrintMovieStats struct {
Title string
}
func (t *PrintMovieStats) Execute(ctx context.Context) error {
apiURL := fmt.Sprintf("http://www.omdbapi.com/?t=%s&apikey=%s", url.QueryEscape(t.Title), "")
response, err := http.Get(apiURL)
if err != nil {
return fmt.Errorf("failed to fetch movie: %w", err)
}
defer response.Body.Close()
body, err := io.ReadAll(response.Body)
if err != nil {
return fmt.Errorf("failed to read response: %w", err)
}
var movie Movie
err = json.Unmarshal(body, &movie)
if err != nil {
return fmt.Errorf("failed to unmarshal response: %w", err)
}
// set the display name of the task to the title of the movie:
err := workflows.SetTaskDisplay(ctx, *movie.Title)
if err != nil {
return fmt.Errorf("failed to set task display: %w", err)
}
fmt.Printf("%s was released on %s\n", *movie.Title, *movie.Released)
return nil
}
```
Submitting the workflow as a job reveals a bug in the `PrintMovieStats` task.
```python Python theme={"system"}
job = job_client.submit('movies-stats', MoviesStats([
"The Matrix",
"Shrek 2",
"Tilebox - The Movie",
"The Avengers",
]))
job_client.display(job)
```
```go Go theme={"system"}
job, err := client.Jobs.Submit(ctx, "movies-stats",
[]workflows.Task{&MoviesStats{
Titles: []string{
"The Matrix",
"Shrek 2",
"Tilebox - The Movie",
"The Avengers",
},
}},
)
```

 One of the `PrintMovieStats` tasks fails with a `KeyError`. This error occurs when a movie title is not found by the [OMDb API](http://www.omdbapi.com/), leading to a response without the `Title` and `Released` fields.
Console output from the task runners confirms this:
```plaintext Output theme={"system"}
The Matrix was released on 31 Mar 1999
Shrek 2 was released on 19 May 2004
ERROR: Task PrintMovieStats failed with exception: KeyError('Title')
```
The corrected version of `PrintMovieStats` is as follows:
```python Python theme={"system"}
class PrintMovieStats(Task):
title: str
def execute(self, context: ExecutionContext) -> None:
params = {"t": self.title, "apikey": ""}
url = "http://www.omdbapi.com/?" + urlencode(params)
response = httpx.get(url).json()
if "Title" in response and "Released" in response:
context.current_task.display = response["Title"]
print(f"{response['Title']} was released on {response['Released']}")
else:
context.current_task.display = f"NotFound: {self.title}"
print(f"Could not find the release date for {self.title}")
```
```go Go theme={"system"}
type PrintMovieStats struct {
Title string
}
func (t *PrintMovieStats) Execute(ctx context.Context) error {
url2 := fmt.Sprintf("http://www.omdbapi.com/?t=%s&apikey=%s", url.QueryEscape(t.Title), "")
response, err := http.Get(url2)
if err != nil {
return fmt.Errorf("failed to fetch movie: %w", err)
}
defer response.Body.Close()
body, err := io.ReadAll(response.Body)
if err != nil {
return fmt.Errorf("failed to read response: %w", err)
}
var movie Movie
err = json.Unmarshal(body, &movie)
if err != nil {
return fmt.Errorf("failed to unmarshal response: %w", err)
}
if movie.Released != nil && movie.Title != nil {
err := workflows.SetTaskDisplay(ctx, *movie.Title)
if err != nil {
return fmt.Errorf("failed to set task display: %w", err)
}
fmt.Printf("%s was released on %s\n", *movie.Title, *movie.Released)
} else {
err := workflows.SetTaskDisplay(ctx, fmt.Sprintf("NotFound: %s", t.Title))
if err != nil {
return fmt.Errorf("failed to set task display: %w", err)
}
fmt.Printf("Could not find the release date for %s\n", t.Title)
}
return nil
}
```
With this fix, and after redeploying the task runners with the updated `PrintMovieStats` implementation, you can retry the job:
```python Python theme={"system"}
job_client.retry(job)
job_client.display(job)
```
```go Go theme={"system"}
_, err := client.Jobs.Retry(ctx, job.ID)
```

 Now the console output shows:
```plaintext Output theme={"system"}
Could not find the release date for Tilebox - The Movie
The Avengers was released on 04 May 2012
```
The output confirms that only two tasks were executed, resuming from the point of failure instead of re-executing all tasks.
The job was retried and succeeded. The two tasks that completed before the failure were not re-executed.
# Task Runners
Source: https://docs.tilebox.com/workflows/concepts/task-runners
Task runners are the execution agents within the Tilebox Workflows ecosystem that execute tasks. They can be deployed in different computing environments, including on-premise servers and cloud-based auto-scaling clusters. Task runners execute tasks as scheduled by the workflow orchestrator, ensuring they have the necessary resources and environment for effective execution.
## Implementing a Task Runner
A task runner is a continuously running process that listens for new tasks to execute. You can start multiple task runner processes to execute tasks concurrently. When a task runner receives a task, it executes it and reports the results back to the workflow orchestrator. The task runner also handles any errors that occur during task execution, reporting them to the orchestrator as well.
To execute a task, at least one task runner must be running and available. If no task runners are available, tasks will remain queued until one becomes available.
To create and start a task runner, follow these steps:
Instantiate a client connected to the Tilebox Workflows API.
Select or create a [cluster](/workflows/concepts/clusters) and specify its slug when creating a task runner.
If no cluster is specified, the task runner will use the default cluster.
Register tasks by specifying the task classes that the task runner can execute as a list to the `runner` method.
Call the `run_forever` method of the task runner to listen for new tasks until the task runner process is shut down.
Here is a simple example demonstrating these steps:
```python Python theme={"system"}
from tilebox.workflows import Client
# your own workflow:
from my_workflow import MyTask, OtherTask
def main():
client = Client() # 1. connect to the Tilebox Workflows API
runner = client.runner(
cluster= "dev-cluster" # 2. select a cluster to join (optional, omit to use the default cluster)
tasks=[MyTask, OtherTask] # 3. register tasks
)
runner.run_forever() # 4. listen for new tasks to execute
if __name__ == "__main__":
main()
```
```go Go theme={"system"}
package main
import (
"context"
"log/slog"
"github.com/tilebox/tilebox-go/workflows/v1"
"github.com/tilebox/tilebox-go/workflows/v1/runner"
// your own workflow:
"github.com/my_org/myworkflow"
)
func main() {
ctx := context.Background()
// 1. connect to the Tilebox Workflows API
client := workflows.NewClient()
// 2. select a cluster to join (optional, omit to use the default cluster)
runner, err := client.NewTaskRunner(ctx, runner.WithClusterSlug("dev-cluster"))
if err != nil {
slog.Error("failed to create task runner", slog.Any("error", err))
return
}
// 3. register tasks
err = runner.RegisterTasks(
&myworkflow.MyTask{},
&myworkflow.OtherTask{},
)
if err != nil {
slog.Error("failed to register task", slog.Any("error", err))
return
}
// 4. listen for new tasks to execute
runner.Run(ctx)
}
```
To start the task runner locally, run it as a script:
```bash Python theme={"system"}
> python task_runner.py
```
```bash Go theme={"system"}
> go run .
```
## Task Selection
For a task runner to pick up a submitted task, the following conditions must be met:
1. The [cluster](/workflows/concepts/clusters) where the task was submitted must match the task runner's cluster.
2. The task runner must have a registered task that matches the [task identifier](/workflows/concepts/tasks#task-identifiers) of the submitted task.
3. The version of the task runner's registered task must be [compatible](/workflows/concepts/tasks#semantic-versioning) with the submitted task's version.
If a task meets these conditions, the task runner executes it. Otherwise, the task runner remains idle until a matching task is available.
Often, multiple submitted tasks match the conditions for execution. In that case, the task runner selects one of the tasks to execute, and the remaining tasks stay in a queue until the selected task is completed or another task runner becomes available.
## Parallelism
You can start multiple task runner instances in parallel to execute tasks concurrently. Each task runner listens for new tasks and executes them as they become available. This allows for high parallelism and can be used to scale the execution of tasks to handle large workloads.
To test this, run multiple instances of the task runner script in different terminal windows on your local machine, or use a tool like [call-in-parallel](https://github.com/tilebox/call-in-parallel) to start the task runner script multiple times.
For example, to start five task runners in parallel, use the following command:
```bash theme={"system"}
> call-in-parallel -n 5 -- python task_runner.py
```
## Deploying Task Runners
Task runners are continuously running processes that can be deployed in different computing environments. The only requirement for deploying task runners is access to the Tilebox Workflows API. Once this is met, task runners can be deployed in many different environments, including:
* On-premise servers
* Cloud-based virtual machines
* Cloud-based auto-scaling clusters
## Scaling
One key benefit of task runners is their **ability to scale even while workflows are executing**. You can start new task runners at any time, and they can immediately pick up queued tasks to execute. It's not necessary to have an entire processing cluster available at the start of a workflow, as task runners can be started and stopped as needed.
This is particularly beneficial in cloud environments, where task runners can be automatically started and stopped based on current workload, measured by metrics such as CPU usage. Here's an example scenario:
1. A single instance of a task runner is actively waiting for work in a cloud environment.
2. A large workload is submitted to the workflow orchestrator, prompting the task runner to pick up the first task.
3. The first task creates new sub-tasks for processing, which the task runner also picks up.
4. As the workload increases, the task runner's CPU usage rises, triggering the cloud environment to automatically start new task runner instances.
5. Newly started task runners begin executing queued tasks, distributing the workload among all available task runners.
6. Once the workload decreases, the cloud environment automatically stops some task runners.
7. The first task runner completes the remaining work until everything is done.
8. The first task runner remains idle until new tasks arrive.
CPU usage-based auto scaling is just one method to scale task runners. Other metrics, such as memory usage or network bandwidth, are also supported by many cloud environments. In a future release, configuration options for scaling task runners based on custom metrics (for example the number of queued tasks) are planned.
## Distributed Execution
Task runners can be distributed across different compute environments. For instance, some data stored on-premise may need pre-processing, while further processing occurs in the cloud. A job might involve tasks that filter relevant on-premise data and publish it to the cloud, and other tasks that read data from the cloud and process it. In such scenarios, a task runners can run on-premise and another in a cloud environments, resulting in them effectively collaborating on the same job.
Another advantage of distributed task runners is executing workflows that require specific hardware for certain tasks. For example, one task might need a GPU, while another requires extensive memory.
Here's an example of a distributed workflow:
```python Python theme={"system"}
from tilebox.workflows import Task, ExecutionContext
class DistributedWorkflow(Task):
def execute(self, context: ExecutionContext) -> None:
download_task = context.submit_subtask(DownloadData())
process_task = context.submit_subtask(
ProcessData(),
depends_on=[download_task],
)
class DownloadData(Task):
"""
Download a dataset and store it in a shared internal bucket.
Requires a good network connection for high download bandwidth.
"""
def execute(self, context: ExecutionContext) -> None:
pass
class ProcessData(Task):
"""
Perform compute-intensive processing of a dataset.
The dataset must be available in an internal bucket.
Requires access to a GPU for optimal performance.
"""
def execute(self, context: ExecutionContext) -> None:
pass
```
```go Go theme={"system"}
package distributed
import (
"context"
"fmt"
"github.com/tilebox/tilebox-go/workflows/v1"
"github.com/tilebox/tilebox-go/workflows/v1/subtask"
)
type DistributedWorkflow struct{}
func (t *DistributedWorkflow) Execute(ctx context.Context) error {
downloadTask, err := workflows.SubmitSubtask(ctx, &DownloadData{})
if err != nil {
return fmt.Errorf("failed to submit download subtask: %w", err)
}
_, err = workflows.SubmitSubtask(ctx, &ProcessData{}, subtask.WithDependencies(downloadTask))
if err != nil {
return fmt.Errorf("failed to submit process subtask: %w", err)
}
return nil
}
// DownloadData Download a dataset and store it in a shared internal bucket.
// Requires a good network connection for high download bandwidth.
type DownloadData struct{}
func (t *DownloadData) Execute(ctx context.Context) error {
return nil
}
// ProcessData Perform compute-intensive processing of a dataset.
// The dataset must be available in an internal bucket.
// Requires access to a GPU for optimal performance.
type ProcessData struct{}
func (t *ProcessData) Execute(ctx context.Context) error {
return nil
}
```
To achieve distributed execution for this workflow, no single task runner capable of executing all three of the tasks is set up.
Instead, two task runners, each capable of executing one of the tasks are set up: one in a high-speed network environment and the other with GPU access.
When the distributed workflow runs, the first task runner picks up the `DownloadData` task, while the second picks up the `ProcessData` task.
The `DistributedWorkflow` does not require specific hardware, so it can be registered with both runners and executed by either one.
```python Python theme={"system"}
from tilebox.workflows import Client
client = Client()
high_network_speed_runner = client.runner(
tasks=[DownloadData, DistributedWorkflow]
)
high_network_speed_runner.run_forever()
```
```go Go theme={"system"}
package main
import (
"context"
"log/slog"
"github.com/tilebox/tilebox-go/workflows/v1"
)
func main() {
ctx := context.Background()
client := workflows.NewClient()
highNetworkSpeedRunner, err := client.NewTaskRunner(ctx)
if err != nil {
slog.Error("failed to create task runner", slog.Any("error", err))
return
}
err = highNetworkSpeedRunner.RegisterTasks(
&DownloadData{},
&DistributedWorkflow{},
)
if err != nil {
slog.Error("failed to register tasks", slog.Any("error", err))
return
}
highNetworkSpeedRunner.RunForever(ctx)
}
```
```python Python theme={"system"}
from tilebox.workflows import Client
client = Client()
gpu_runner = client.runner(
tasks=[ProcessData, DistributedWorkflow]
)
gpu_runner.run_forever()
```
```go Go theme={"system"}
package main
import (
"context"
"log/slog"
"github.com/tilebox/tilebox-go/workflows/v1"
)
func main() {
ctx := context.Background()
client := workflows.NewClient()
gpuRunner, err := client.NewTaskRunner(ctx)
if err != nil {
slog.Error("failed to create task runner", slog.Any("error", err))
return
}
err = gpuRunner.RegisterTasks(
&ProcessData{},
&DistributedWorkflow{},
)
if err != nil {
slog.Error("failed to register tasks", slog.Any("error", err))
return
}
gpuRunner.RunForever(ctx)
}
```
Now, both `download_task_runner.py` and `gpu_task_runner.py` are started, in parallel, on different machines with the required hardware for each. When `DistributedWorkflow` is submitted, it executes on one of the two runners, and it's submitted sub-tasks are handled by the appropriate runner.
In this case, since `ProcessData` depends on `DownloadData`, the GPU task runner remains idle until the download completion, then picks up the processing task.
You can also differentiate between task runners by specifying different [clusters](/workflows/concepts/clusters) and choosing specific clusters for sub-task submissions. For more details, see the [Clusters](/workflows/concepts/clusters) section.
## Task Failures
If an unhandled exception occurs during task execution, the task runner captures it and reports it back to the workflow orchestrator. The orchestrator then marks the task as failed, leading to [job cancellation](/workflows/concepts/jobs#cancellation) to prevent further tasks of the same job-that may not be relevant anymore-from being executed.
A task failure does not result in losing all previous work done by the job. If the failure is fixable—by fixing a bug in a task implementation, ensuring the task has necessary resources, or simply retrying it due to a flaky network connection—it may be worth [retrying](/workflows/concepts/jobs#retries) the job.
When retrying a job, all failed tasks are added back to the queue, allowing a task runner to potentially execute them. If execution then succeeds, the job continues smoothly. Otherwise, the task will remain marked as failed and can be retried again if desired.
If fixing a failure requires modifying the task implementation, it's important to deploy the updated version to the [task runners](/workflows/concepts/task-runners) before retrying the job. Otherwise, a task runner could pick up the original, faulty implementation again, leading to another failure.
## Task idempotency
Since a task may be retried, it's possible that a task is executed more than once. Depending on where in the execution of the task it failed, it may have already performed some side effects, such as writing to a database, or sending a message to a queue. Because of that it's crucial to ensure that tasks are [idempotent](https://en.wikipedia.org/wiki/Idempotence). Idempotent tasks can be executed multiple times without altering the outcome beyond the first successful execution.
A special case of idempotency involves submitting sub-tasks. After a task calls `context.submit_subtask` and then fails and is retried, those submitted sub-tasks of an earlier failed execution are automatically removed, ensuring that they can be safely submitted again when the task is retried.
## Runner Crashes
Tilebox Workflows has an internal mechanism to handle unexpected task runner crashes. When a task runner picks up a task, it periodically sends a heartbeat to the workflow orchestrator. If the orchestrator does not receive this heartbeat for a defined duration, it marks the task as failed and automatically attempts to [retry](/workflows/concepts/jobs#retries) it up to 10 times. This allows another task runner to pick up the task and continue executing the job.
This mechanism ensures that scenarios such as power outages, hardware failures, or dropped network connections are handled effectively, preventing any task from remaining in a running state indefinitely.
## Observability
Task runners are continuously running processes, making it essential to monitor their health and performance. You can achieve observability by collecting and analyzing logs, metrics, and traces from task runners. Tilebox Workflows provides tools to enable this data collection and analysis. To learn how to configure task runners for observability, head over to the [Observability](/workflows/observability) section.
# Understanding and Creating Tasks
Source: https://docs.tilebox.com/workflows/concepts/tasks
A Task is the smallest unit of work, designed to perform a specific operation. Each task represents a distinct operation or process that can be executed, such as processing data, performing calculations, or managing resources. Tasks can operate independently or as components of a more complex set of connected tasks known as a Workflow. Tasks are defined by their code, inputs, and dependencies on other tasks. To create tasks, you need to define the input parameters and specify the action to be performed during execution.
## Creating a Task
To create a task in Tilebox, define a class that extends the `Task` base class and implements the `execute` method. The `execute` method is the entry point for the task where its logic is defined. It's called when the task is executed.
```python Python theme={"system"}
from tilebox.workflows import Task, ExecutionContext
class MyFirstTask(Task):
def execute(self, context: ExecutionContext):
print("Hello World!")
```
```go Go theme={"system"}
type MyFirstTask struct{}
func (t *MyFirstTask) Execute(ctx context.Context) error {
slog.Info("Hello World!")
return nil
}
```
This example demonstrates a simple task that prints "Hello World!" to the console.
For python, the key components of this task are:
`MyFirstTask` is a subclass of the `Task` class, which serves as the base class for all defined tasks. It provides the essential structure for a task. Inheriting from `Task` automatically makes the class a `dataclass`, which is useful [for specifying inputs](#input-parameters). Additionally, by inheriting from `Task`, the task is automatically assigned an [identifier based on the class name](#task-identifiers).
The `execute` method is the entry point for executing the task. This is where the task's logic is defined. It's invoked by a [task runner](/workflows/concepts/task-runners) when the task runs and performs the task's operation.
The `context` argument is an `ExecutionContext` instance that provides access to an [API for submitting new tasks](/api-reference/python/tilebox.workflows/ExecutionContext.submit_subtask) as part of the same job and features like [shared caching](/api-reference/python/tilebox.workflows/ExecutionContext.job_cache).
For Go, the key components are:
`MyFirstTask` is a struct that implements the `Task` interface. It represents the task to be executed.
The `Execute` method is the entry point for executing the task. This is where the task's logic is defined. It's invoked by a [task runner](/workflows/concepts/task-runners) when the task runs and performs the task's operation.
The code samples on this page do not illustrate how to execute the task. That will be covered in the
[next section on task runners](/workflows/concepts/task-runners). The reason for that is that executing tasks is a separate concern from implementing tasks.
## Input Parameters
Tasks often require input parameters to operate. These inputs can range from simple values to complex data structures. By inheriting from the `Task` class, the task is treated as a Python `dataclass`, allowing input parameters to be defined as class attributes.
Tasks must be **serializable to JSON or to protobuf** because they may be distributed across a cluster of [task runners](/workflows/concepts/task-runners).
In Go, task parameters must be exported fields of the task struct (starting with an uppercase letter), otherwise they will not be serialized to JSON.
Supported types for input parameters include:
* Basic types such as `str`, `int`, `float`, `bool`
* Lists and dictionaries of basic types
* Nested data classes that are also JSON-serializable or protobuf-serializable
```python Python theme={"system"}
class ParametrizableTask(Task):
message: str
number: int
data: dict[str, str]
def execute(self, context: ExecutionContext):
print(self.message * self.number)
task = ParametrizableTask("Hello", 3, {"key": "value"})
```
```go Go theme={"system"}
type ParametrizableTask struct {
Message string
Number int
Data map[string]string
}
func (t *ParametrizableTask) Execute(context.Context) error {
slog.Info(strings.Repeat(t.Message, t.Number))
return nil
}
task := &ParametrizableTask{
message: "Hello",
number: 3,
data: map[string]string{"key": "value"},
}
```
## Task Composition and subtasks
Until now, tasks have performed only a single operation. But tasks can be more powerful. **Tasks can submit other tasks as subtasks.** This allows for a modular workflow design, breaking down complex operations into simpler, manageable parts. Additionally, the execution of subtasks is automatically parallelized whenever possible.
```python Python theme={"system"}
class ParentTask(Task):
num_subtasks: int
def execute(self, context: ExecutionContext) -> None:
for i in range(self.num_subtasks):
context.submit_subtask(ChildTask(i))
class ChildTask(Task):
index: int
def execute(self, context: ExecutionContext) -> None:
print(f"Executing ChildTask {self.index}")
# after submitting this task, a task runner may pick it up and execute it
# which will result in 5 ChildTasks being submitted and executed as well
task = ParentTask(5)
```
```go Go theme={"system"}
type ParentTask struct {
NumSubtasks int
}
func (t *ParentTask) Execute(ctx context.Context) error {
for i := range t.NumSubtasks {
_, err := workflows.SubmitSubtask(ctx, &ChildTask{Index: i})
if err != nil {
return err
}
}
return nil
}
type ChildTask struct {
Index int
}
func (t *ChildTask) Execute(context.Context) error {
slog.Info("Executing ChildTask", slog.Int("index", t.Index))
return nil
}
// after submitting this task, a task runner may pick it up and execute it
// which will result in 5 ChildTasks being submitted and executed as well
task := &ParentTask{numSubtasks: 5}
```
In this example, a `ParentTask` submits `ChildTask` tasks as subtasks. The number of subtasks to be submitted is based on the `num_subtasks` attribute of the `ParentTask`. The `submit_subtask` method takes an instance of a task as its argument, meaning the task to be submitted must be instantiated with concrete parameters first.
Parent task do not have access to results of subtasks, instead, tasks can use [shared caching](/workflows/caches#storing-and-retrieving-data) to share data between tasks.
By submitting a task as a subtask, its execution is scheduled as part of the same job as the parent task. Compared to just directly invoking the subtask's `execute` method, this allows the subtask's execution to occur on a different machine or in parallel with other subtasks. To learn more about how tasks are executed, see the section on [task runners](/workflows/concepts/task-runners).
### Larger subtasks example
A practical workflow example showcasing task composition might help illustrate the capabilities of tasks. Below is an example of a set of tasks forming a workflow capable of downloading a set number of random dog images from the internet. The [Dog API](https://thedogapi.com/) can be used to get the image URLs, and then download them. Implementing this using Task Composition could look like this:
```python Python theme={"system"}
import httpx # pip install httpx
from pathlib import Path
class DownloadRandomDogImages(Task):
num_images: int
def execute(self, context: ExecutionContext) -> None:
url = f"https://api.thedogapi.com/v1/images/search?limit={self.num_images}"
response = httpx.get(url)
for dog_image in response.json():
context.submit_subtask(DownloadImage(dog_image["url"]))
class DownloadImage(Task):
url: str
def execute(self, context: ExecutionContext) -> None:
file = Path("dogs") / self.url.split("/")[-1]
response = httpx.get(self.url)
with file.open("wb") as file:
file.write(response.content)
```
```go Go theme={"system"}
package dogs
import (
"context"
"encoding/json"
"fmt"
"io"
"net/http"
"os"
"strings"
"github.com/tilebox/tilebox-go/workflows/v1"
)
type DogImage struct {
ID string `json:"id"`
URL string `json:"url"`
Width *int `json:"width"`
Height *int `json:"height"`
}
type DownloadRandomDogImages struct {
NumImages int
}
func (t *DownloadRandomDogImages) Execute(ctx context.Context) error {
url := fmt.Sprintf("https://api.thedogapi.com/v1/images/search?limit=%d", t.NumImages)
response, err := http.Get(url)
if err != nil {
return fmt.Errorf("failed to download images: %w", err)
}
defer response.Body.Close()
body, err := io.ReadAll(response.Body)
if err != nil {
return fmt.Errorf("failed to read response: %w", err)
}
var dogImages []DogImage
err = json.Unmarshal(body, &dogImages)
if err != nil {
return err
}
for _, dogImage := range dogImages {
_, err := workflows.SubmitSubtask(ctx, &DownloadImage{URL: dogImage.URL})
if err != nil {
return err
}
}
return nil
}
type DownloadImage struct {
URL string
}
func (t *DownloadImage) Execute(context.Context) error {
response, err := http.Get(t.URL)
if err != nil {
return fmt.Errorf("failed to download image: %w", err)
}
defer response.Body.Close()
body, err := io.ReadAll(response.Body)
if err != nil {
return fmt.Errorf("failed to read response: %w", err)
}
err = os.MkdirAll("dogs", 0o755)
if err != nil {
return fmt.Errorf("failed to create dogs directory: %w", err)
}
elements := strings.Split(t.URL, "/")
file := fmt.Sprintf("dogs/%s", elements[len(elements)-1])
return os.WriteFile(file, body, 0o600)
}
```
This example consists of the following tasks:
`DownloadRandomDogImages` fetches a specific number of random dog image URLs from an API. It then submits a `DownloadImage` task for each received image URL.
`DownloadImage` downloads an image from a specified URL and saves it to a file.
Together, these tasks create a workflow that downloads random dog images from the internet. The relationship between the two tasks and their formation as a workflow becomes clear when `DownloadRandomDogImages` submits `DownloadImage` tasks as subtasks.
Visualizing the execution of such a workflow is akin to a tree structure where the `DownloadRandomDogImages` task is the root, and the `DownloadImage` tasks are the leaves. For instance, when downloading five random dog images, the following tasks are executed.
```python Python theme={"system"}
from tilebox.workflows import Client
client = Client()
jobs = client.jobs()
job = jobs.submit(
"download-dog-images",
DownloadRandomDogImages(5),
)
# now our deployed task runners will pick up the task and execute it
jobs.display(job)
```
```go Go theme={"system"}
ctx := context.Background()
client := workflows.NewClient()
job, err := client.Jobs.Submit(ctx, "download-dog-images",
[]workflows.Task{
&helloworld.DownloadRandomDogImages{
NumImages: 5,
},
},
)
if err != nil {
slog.Error("Failed to submit job", slog.Any("error", err))
return
}
// now our deployed task runners will pick up the task and execute it
```

 In total, six tasks are executed: the `DownloadRandomDogImages` task and five `DownloadImage` tasks. The `DownloadImage` tasks can execute in parallel, as they are independent. If more than one task runner is available, the Tilebox Workflow Orchestrator **automatically parallelizes** the execution of these tasks.
Check out [job\_client.display](/workflows/concepts/jobs#visualization) to learn how this visualization was automatically generated from the task executions.
## Task States
Every task goes through a set of states during its lifetime. When submitted, either as a job or as a subtask, it starts in the `QUEUED` state and transitions to `RUNNING` when a task runner picks it up. If the task executes successfully, it transitions to `COMPUTED`. If the task fails, it transitions to `FAILED`.
As soon as all subtasks of a task are also `COMPUTED`, the task is considered `COMPLETED`, allowing dependent tasks to be executed.
The table below summarizes the different task states and their meanings.
| Task State | Description |
| ------------- | --------------------------------------------------------------------------------------------------------------------------------------------------------------------------------------------------------------------------------------------- |
| **Queued** | The task is queued and waiting for execution. Any [eligible](/workflows/concepts/task-runners#task-selection) task runner can pick it up and execute it, as soon as it's parent task is `COMPUTED` and all it's dependencies are `COMPLETED`. |
| **Running** | The task is currently being executed by a task runner. |
| **Computed** | The task has successfully been computed, but still has outstanding subtasks. |
| **Completed** | The task has successfully been computed, and all it's subtasks are also computed, making it `COMPLETED`. This is the final state of a task. Only once a task has been `COMPLETED`, dependent tasks can be executed. |
| **Failed** | The task has been executed but encountered an error. |

 ## Map-Reduce Pattern
Often times the input to a task is a list, with elements that should then be **mapped** to individual subtasks, whose results are later aggregated in a **reduce** step. This pattern is commonly known as [MapReduce](https://en.wikipedia.org/wiki/MapReduce) and a common pattern in workflows. In Tilebox, the reduce step is typically defined as a separate task that depends on all the map tasks.
For example, the workflow below applies this pattern to a list of numbers to calculate the sum of all squares of the numbers. The `Square` task takes a single number and squares it, and the `Sum` task reduces the list of squared numbers to a single sum.
```python Python theme={"system"}
class SumOfSquares(Task):
numbers: list[int]
def execute(self, context: ExecutionContext) -> None:
# 1. Map
square_tasks = context.submit_subtasks(
[Square(num) for num in self.numbers]
)
# 2. Reduce
sum_task = context.submit_subtask(Sum(), depends_on=square_tasks)
class Square(Task): # The map step
num: int
def execute(self, context: ExecutionContext) -> None:
result = self.num ** 2
# typically the output of a task is a large dataset,
# so we save individual results into a shared cache
context.job_cache.group("squares")[str(self.num)] = str(result).encode()
context.current_task.display = f"Square({self.num})"
class Sum(Task): # The reduce step
def execute(self, context: ExecutionContext) -> None:
result = 0
# access our cached results from the map step
squares = context.job_cache.group("squares")
for key in squares:
result += int(squares[key].decode())
print("Sum of squares is:", result)
```
Submitting a job of the `SumOfSquares` task and running it with a task runner can be done as follows:
```python Python theme={"system"}
from tilebox.workflows import Client
from tilebox.workflows.cache import InMemoryCache
client = Client()
jobs = client.jobs()
job = jobs.submit(
"sum-of-squares",
SumOfSquares([12, 345, 453, 21, 45, 98]),
)
client.runner(tasks=[SumOfSquares, Square, Sum], cache=InMemoryCache()).run_all()
jobs.display(job)
```
```plaintext Output theme={"system"}
Sum of squares is: 336448
```

 ## Recursive subtasks
Tasks can not only submit other tasks as subtasks, but also instances of themselves. This allows for a recursive breakdown of a task into smaller chunks. Such recursive decomposition algorithms are referred to as [divide and conquer algorithms](https://en.wikipedia.org/wiki/Divide-and-conquer_algorithm).
For example, the `RecursiveTask` below is a valid task that submits smaller instances of itself as subtasks.
When implementing a recursive task, it's important to define a base case that stops the recursion. Otherwise, the task will keep submitting subtasks indefinitely, resulting in an infinite loop.
```python Python theme={"system"}
class RecursiveTask(Task):
num: int
def execute(self, context: ExecutionContext) -> None:
print(f"Executing RecursiveTask with num={self.num}")
# if num < 2, we reached the base case and stop recursion
if self.num >= 2:
context.submit_subtask(RecursiveTask(self.num // 2))
```
```go Go theme={"system"}
type RecursiveTask struct {
Num int
}
func (t *RecursiveTask) Execute(ctx context.Context) error {
slog.Info("Executing RecursiveTask", slog.Int("num", t.Num))
// if num < 2, we reached the base case and stop recursion
if t.Num >= 2 {
_, err := workflows.SubmitSubtask(ctx, &RecursiveTask{Num: t.Num / 2})
if err != nil {
return err
}
}
return nil
}
```
### Recursive subtask example
An example for this is the [random dog images workflow](#larger-subtasks-example) mentioned earlier. In the previous implementation, downloading images was already parallelized. But the initial orchestration of the individual download tasks was not parallelized, because `DownloadRandomDogImages` was responsible for fetching all random dog image URLs and only submitted the individual download tasks once all URLs were retrieved. For a large number of images this setup can bottleneck the entire workflow.
To improve this, recursive subtask submission decomposes a `DownloadRandomDogImages` task with a high number of images into two smaller `DownloadRandomDogImages` tasks, each fetching half. This process can be repeated until a specified threshold is met, at which point the Dog API can be queried directly for image URLs. That way, image downloads start as soon as the first URLs are retrieved, without initial waiting.
An implementation of this recursive submission may look like this:
```python Python theme={"system"}
class DownloadRandomDogImages(Task):
num_images: int
def execute(self, context: ExecutionContext) -> None:
if self.num_images > 4:
half = self.num_images // 2
remaining = self.num_images - half # account for odd numbers
context.submit_subtask(DownloadRandomDogImages(half))
context.submit_subtask(DownloadRandomDogImages(remaining))
else:
url = f"https://api.thedogapi.com/v1/images/search?limit={self.num_images}"
response = httpx.get(url)
for dog_image in response.json()[:self.num_images]:
context.submit_subtask(DownloadImage(dog_image["url"]))
```
```go Go theme={"system"}
type DownloadRandomDogImages struct {
NumImages int
}
func (t *DownloadRandomDogImages) Execute(ctx context.Context) error {
if t.NumImages > 4 {
half := t.NumImages / 2
remaining := t.NumImages - half // account for odd numbers
_, err := workflows.SubmitSubtask(ctx, &DownloadRandomDogImages{NumImages: half})
if err != nil {
return err
}
_, err = workflows.SubmitSubtask(ctx, &DownloadRandomDogImages{NumImages: remaining})
if err != nil {
return err
}
} else {
url := fmt.Sprintf("https://api.thedogapi.com/v1/images/search?limit=%d", t.NumImages)
response, err := http.Get(url)
if err != nil {
return fmt.Errorf("failed to download images: %w", err)
}
defer response.Body.Close()
body, err := io.ReadAll(response.Body)
if err != nil {
return fmt.Errorf("failed to read response: %w", err)
}
var dogImages []DogImage
err = json.Unmarshal(body, &dogImages)
if err != nil {
return err
}
for _, dogImage := range dogImages {
_, err := workflows.SubmitSubtask(ctx, &DownloadImage{URL: dogImage.URL})
if err != nil {
return err
}
}
}
return nil
}
```
With this implementation, downloading a large number of images (for example, 9) results in the following tasks being executed:

 ## Retry Handling
By default, when a task fails to execute, it's marked as failed. In some cases, it may be useful to retry the task multiple times before marking it as a failure. This is particularly useful for tasks dependent on external services that might be temporarily unavailable.
Tilebox Workflows allows you to specify the number of retries for a task using the `max_retries` argument of the `submit_subtask` method.
Check out the example below to see how this might look like in practice.
A failed task may be picked up by any available runner and not necessarily the same one that it failed on.
```python Python theme={"system"}
import random
class RootTask(Task):
def execute(self, context: ExecutionContext) -> None:
context.submit_subtask(FlakyTask(), max_retries=5)
class FlakyTask(Task):
def execute(self, context: ExecutionContext) -> None:
print(f"Executing FlakyTask")
if random.random() < 0.1:
raise Exception("FlakyTask failed randomly")
```
```go Go theme={"system"}
package flaky
import (
"context"
"errors"
"log/slog"
"math/rand/v2"
"github.com/tilebox/tilebox-go/workflows/v1"
"github.com/tilebox/tilebox-go/workflows/v1/subtask"
)
type RootTask struct{}
func (t *RootTask) Execute(ctx context.Context) error {
_, err := workflows.SubmitSubtask(ctx, &FlakyTask{},
subtask.WithMaxRetries(5),
)
return err
}
type FlakyTask struct{}
func (t *FlakyTask) Execute(context.Context) error {
slog.Info("Executing FlakyTask")
if rand.Float64() < 0.1 {
return errors.New("FlakyTask failed randomly")
}
return nil
}
```
## Dependencies
Tasks often rely on other tasks. For example, a task that processes data might depend on a task that fetches that data. **Tasks can express their dependencies on other tasks** by using the `depends_on` argument of the [`submit_subtask`](/api-reference/python/tilebox.workflows/ExecutionContext.submit_subtask) method. This means that a dependent task will only execute after the task it relies on has successfully completed.
The `depends_on` argument accepts a list of tasks, enabling a task to depend on multiple other tasks.
A workflow with dependencies might look like this:
```python Python theme={"system"}
class RootTask(Task):
def execute(self, context: ExecutionContext) -> None:
first_task = context.submit_subtask(
PrintTask("Executing first")
)
second_task = context.submit_subtask(
PrintTask("Executing second"),
depends_on=[first_task],
)
third_task = context.submit_subtask(
PrintTask("Executing last"),
depends_on=[second_task],
)
class PrintTask(Task):
message: str
def execute(self, context: ExecutionContext) -> None:
print(self.message)
```
```go Go theme={"system"}
type RootTask struct{}
func (t *RootTask) Execute(ctx context.Context) error {
firstTask, err := workflows.SubmitSubtask(
ctx,
&PrintTask{Message: "Executing first"},
)
if err != nil {
return err
}
secondTask, err := workflows.SubmitSubtask(
ctx,
&PrintTask{Message: "Executing second"},
subtask.WithDependencies(firstTask),
)
if err != nil {
return err
}
_, err = workflows.SubmitSubtask(
ctx,
&PrintTask{Message: "Executing last"},
subtask.WithDependencies(secondTask),
)
if err != nil {
return err
}
return nil
}
type PrintTask struct {
Message string
}
func (t *PrintTask) Execute(context.Context) error {
slog.Info("PrintTask", slog.String("message", t.Message))
return nil
}
```
The `RootTask` submits three `PrintTask` tasks as subtasks. These tasks depend on each other, meaning the second task executes only after the first task has successfully completed, and the third only executes after the second completes. The tasks are executed sequentially.
If a task upon which another task depends submits subtasks, those subtasks must also execute before the dependent task begins execution.
### Dependencies Example
A practical example is a workflow that fetches news articles from an API and processes them using the [News API](https://newsapi.org/).
```python Python theme={"system"}
from pathlib import Path
import json
from collections import Counter
import httpx # pip install httpx
class NewsWorkflow(Task):
category: str
max_articles: int
def execute(self, context: ExecutionContext) -> None:
fetch_task = context.submit_subtask(FetchNews(self.category, self.max_articles))
context.submit_subtask(PrintHeadlines(), depends_on=[fetch_task])
context.submit_subtask(MostFrequentAuthors(), depends_on=[fetch_task])
class FetchNews(Task):
category: str
max_articles: int
def execute(self, context: ExecutionContext) -> None:
url = f"https://newsapi.org/v2/top-headlines?category={self.category}&pageSize={self.max_articles}&country=us&apiKey=API_KEY"
news = httpx.get(url).json()
# check out our documentation page on caches to learn
# about a better way of passing data between tasks
Path("news.json").write_text(json.dumps(news))
class PrintHeadlines(Task):
def execute(self, context: ExecutionContext) -> None:
news = json.loads(Path("news.json").read_text())
for article in news["articles"]:
print(f"{article['publishedAt'][:10]}: {article['title']}")
class MostFrequentAuthors(Task):
def execute(self, context: ExecutionContext) -> None:
news = json.loads(Path("news.json").read_text())
authors = [article["author"] for article in news["articles"]]
for author, count in Counter(authors).most_common():
print(f"Author {author} has written {count} articles")
# now submit a job, and then visualize it
job = job_client.submit("process-news",
NewsWorkflow(category="science", max_articles=5),
)
```
```go Go theme={"system"}
package news
import (
"context"
"encoding/json"
"fmt"
"io"
"log/slog"
"net/http"
"os"
"time"
"github.com/tilebox/tilebox-go/workflows/v1"
"github.com/tilebox/tilebox-go/workflows/v1/subtask"
)
const newsAPIKey = "YOUR_API_KEY"
type NewsWorkflow struct {
Category string
MaxArticles int
}
func (t *NewsWorkflow) Execute(ctx context.Context) error {
fetchTask, err := workflows.SubmitSubtask(ctx, &FetchNews{
Category: t.Category,
MaxArticles: t.MaxArticles,
})
if err != nil {
return err
}
_, err = workflows.SubmitSubtask(ctx, &PrintHeadlines{}, subtask.WithDependencies(fetchTask))
if err != nil {
return err
}
_, err = workflows.SubmitSubtask(ctx, &MostFrequentAuthors{}, subtask.WithDependencies(fetchTask))
if err != nil {
return err
}
return nil
}
type News struct {
Status string `json:"status"`
TotalResults int `json:"totalResults"`
Articles []struct {
Source struct {
ID *string `json:"id"`
Name string `json:"name"`
} `json:"source"`
Author *string `json:"author"`
Title string `json:"title"`
Description *string `json:"description"`
URL string `json:"url"`
URLToImage *string `json:"urlToImage"`
PublishedAt time.Time `json:"publishedAt"`
Content *string `json:"content"`
} `json:"articles"`
}
type FetchNews struct {
Category string
MaxArticles int
}
func (t *FetchNews) Execute(context.Context) error {
url := fmt.Sprintf("https://newsapi.org/v2/top-headlines?category=%s&pageSize=%d&country=us&apiKey=%s", t.Category, t.MaxArticles, newsAPIKey)
response, err := http.Get(url)
if err != nil {
return fmt.Errorf("failed to download news: %w", err)
}
defer response.Body.Close()
body, err := io.ReadAll(response.Body)
if err != nil {
return fmt.Errorf("failed to read response: %w", err)
}
// check out our documentation page on caches to learn
// about a better way of passing data between tasks
return os.WriteFile("news.json", body, 0o600)
}
type PrintHeadlines struct{}
func (t *PrintHeadlines) Execute(context.Context) error {
newsBytes, err := os.ReadFile("news.json")
if err != nil {
return fmt.Errorf("failed to read news: %w", err)
}
var news News
err = json.Unmarshal(newsBytes, &news)
if err != nil {
return fmt.Errorf("failed to unmarshal news: %w", err)
}
for _, article := range news.Articles {
slog.Info("Article", slog.Time("published_at", article.PublishedAt), slog.String("title", article.Title))
}
return nil
}
type MostFrequentAuthors struct{}
func (t *MostFrequentAuthors) Execute(context.Context) error {
newsBytes, err := os.ReadFile("news.json")
if err != nil {
return fmt.Errorf("failed to read news: %w", err)
}
var news News
err = json.Unmarshal(newsBytes, &news)
if err != nil {
return fmt.Errorf("failed to unmarshal news: %w", err)
}
authors := make(map[string]int)
for _, article := range news.Articles {
if article.Author == nil {
continue
}
authors[*article.Author]++
}
for author, count := range authors {
slog.Info("Author", slog.String("author", author), slog.Int("count", count))
}
return nil
}
// in main now submit a job, and then visualize it
/*
job, err := client.Jobs.Submit(ctx, "process-news",
[]workflows.Task{
&NewsWorkflow{
Category: "science",
MaxArticles: 5,
},
},
)
*/
```
```plaintext Output theme={"system"}
2024-02-15: NASA selects ultraviolet astronomy mission but delays its launch two years - SpaceNews
2024-02-15: SpaceX launches Space Force mission from Cape Canaveral - Orlando Sentinel
2024-02-14: Saturn's largest moon most likely uninhabitable - Phys.org
2024-02-14: AI Unveils Mysteries of Unknown Proteins' Functions - Neuroscience News
2024-02-14: Anthropologists' research unveils early stone plaza in the Andes - Phys.org
Author Jeff Foust has written 1 articles
Author Richard Tribou has written 1 articles
Author Jeff Renaud has written 1 articles
Author Neuroscience News has written 1 articles
Author Science X has written 1 articles
```

 This workflow consists of four tasks:
| Task | Dependencies | Description |
| ------------------- | ------------ | ----------------------------------------------------------------------------------------------------------------------- |
| NewsWorkflow | - | The root task of the workflow. It spawns the other tasks and sets up the dependencies between them. |
| FetchNews | - | A task that fetches news articles from the API and writes the results to a file, which is then read by dependent tasks. |
| PrintHeadlines | FetchNews | A task that prints the headlines of the news articles to the console. |
| MostFrequentAuthors | FetchNews | A task that counts the number of articles each author has written and prints the result to the console. |
An important aspect is that there is no dependency between the `PrintHeadlines` and `MostFrequentAuthors` tasks. This means they can execute in parallel, which the Tilebox Workflow Orchestrator will do, provided multiple task runners are available.
In this example, the results from `FetchNews` are stored in a file. This is not the recommended method for passing data between tasks. When executing on a distributed cluster, the existence of a file written by a dependent task cannot be guaranteed. Instead, it's better to use a [shared cache](/workflows/caches).
## Task Identifiers
A task identifier is a unique string used by the Tilebox Workflow Orchestrator to identify the task. It's used by [task runners](/workflows/concepts/task-runners) to map submitted tasks to a task class and execute them. It also serves as the default name in execution visualizations as a tree of tasks.
If unspecified, the identifier of a task defaults to the class name. For instance, the identifier of the `PrintHeadlines` task in the previous example is `"PrintHeadlines"`. This is good for prototyping, but not recommended for production, as changing the class name also changes the identifier, which can lead to issues during refactoring. It also prevents different tasks from sharing the same class name.
To address this, Tilebox Workflows offers a way to explicitly specify the identifier of a task. This is done by overriding the `identifier` method of the `Task` class. This method should return a unique string identifying the task. This decouples the task's identifier from its class name, allowing you to change the identifier without renaming the class. It also allows tasks with the same class name to have different identifiers. The `identifier` method can also specify a version number for the task—see the section on [semantic versioning](#semantic-versioning) below for more details.
```python Python theme={"system"}
class MyTask(Task):
def execute(self, context: ExecutionContext) -> None:
pass
# MyTask has the identifier "MyTask" and the default version of "v0.0"
class MyTask2(Task):
@staticmethod
def identifier() -> tuple[str, str]:
return "tilebox.com/example_workflow/MyTask", "v1.0"
def execute(self, context: ExecutionContext) -> None:
pass
# MyTask2 has the identifier "tilebox.com/example_workflow/MyTask" and the version "v1.0"
```
```go Go theme={"system"}
type MyTask struct{}
func (t *MyTask) Execute(context.Context) error {
return nil
}
// MyTask has the identifier "MyTask" and the default version of "v0.0"
type MyTask2 struct{}
func (t *MyTask2) Identifier() workflows.TaskIdentifier {
return workflows.NewTaskIdentifier("tilebox.com/example_workflow/MyTask", "v1.0")
}
func (t *MyTask2) Execute(context.Context) error {
return nil
}
// MyTask2 has the identifier "tilebox.com/example_workflow/MyTask" and the version "v1.0"
```
In python, the `identifier` method must be defined as either a `classmethod` or a `staticmethod`, meaning it can be called without instantiating the class.
## Semantic Versioning
As seen in the previous section, the `identifier` method can return a tuple of two strings, where the first string is the identifier and the second string is the version number. This allows for semantic versioning of tasks.
Versioning is important for managing changes to a task's execution method. It allows for new features, bug fixes, and changes while ensuring existing workflows operate as expected. Additionally, it enables multiple versions of a task to coexist, enabling gradual rollout of changes without interrupting production deployments.
You assign a version number by overriding the `identifier` method of the task class. It must return a tuple of two strings: the first is the [identifier](#task-identifiers) and the second is the version number, which must match the pattern `vX.Y` (where `X` and `Y` are non-negative integers). `X` is the major version number and `Y` is the minor version.
For example, this task has the identifier `"tilebox.com/example_workflow/MyTask"` and the version `"v1.3"`:
```python Python theme={"system"}
class MyTask(Task):
@staticmethod
def identifier() -> tuple[str, str]:
return "tilebox.com/example_workflow/MyTask", "v1.3"
def execute(self, context: ExecutionContext) -> None:
pass
```
```go Go theme={"system"}
type MyTask struct{}
func (t *MyTask) Identifier() workflows.TaskIdentifier {
return workflows.NewTaskIdentifier("tilebox.com/example_workflow/MyTask", "v1.3")
}
func (t *MyTask) Execute(context.Context) error {
return nil
}
```
When a task is submitted as part of a job, the version from which it's submitted is recorded and may differ from the version on the task runner executing the task.
When task runners execute a task, they require a registered task with a matching identifier and compatible version number. A compatible version is where the major version number on the task runner matches that of the submitted task, and the minor version number on the task runner is equal to or greater than that of the submitted task.
Examples of compatible version numbers include:
* `MyTask` is submitted as part of a job. The version is `"v1.3"`.
* A task runner with version `"v1.3"` of `MyTask` would executes this task.
* A task runner with version `"v1.5"` of `MyTask` would also executes this task.
* A task runner with version `"v1.2"` of `MyTask` would not execute this task, as its minor version is lower than that of the submitted task.
* A task runner with version `"v2.5"` of `MyTask` would not execute this task, as its major version differs from that of the submitted task.
## Conclusion
Tasks form the foundation of Tilebox Workflows. By understanding how to create and manage tasks, you can leverage Tilebox's capabilities to automate and optimize your workflows. Experiment with defining your own tasks, utilizing subtasks, managing dependencies, and employing semantic versioning to develop robust and efficient workflows.
# Tilebox Workflows
Source: https://docs.tilebox.com/workflows/introduction
The Tilebox workflow orchestrator is a parallel processing engine. It simplifies the creation of dynamic tasks that can be executed across various computing environments, including on-premise and auto-scaling clusters in public clouds.
This section provides guides showcasing how to use the Tilebox workflow orchestrator effectively. Here are some of the key learning areas:
Create tasks using the Tilebox Workflow Orchestrator.
Learn how to submit jobs to the workflow orchestrator, which schedules tasks for execution.
Learn how to set up task runners to execute tasks in a distributed manner.
Understand how to gain insights into task executions using observability features like tracing and logging.
Learn to configure shared data access for all tasks of a job using caches.
Trigger jobs based on events or schedules, such as new data availability or CRON schedules.
## Terminology
Before exploring Tilebox Workflows in depth, familiarize yourself with some common terms used throughout this section.
A Task is the smallest unit of work, designed to perform a specific operation. Each task represents a distinct operation or process that can be executed, such as processing data, performing calculations, or managing resources. Tasks can operate independently or as components of a more complex set of connected tasks known as a Workflow. Tasks are defined by their code, inputs, and dependencies on other tasks. To create tasks, you need to define the input parameters and specify the action to be performed during execution.
A job is a specific execution of a workflow with designated input parameters. It consists of one or more tasks that can run in parallel or sequentially, based on their dependencies. Submitting a job involves creating a root task with specific input parameters, which may trigger the execution of other tasks within the same job.
Task runners are the execution agents within the Tilebox Workflows ecosystem that execute tasks. They can be deployed in different computing environments, including on-premise servers and cloud-based auto-scaling clusters. Task runners execute tasks as scheduled by the workflow orchestrator, ensuring they have the necessary resources and environment for effective execution.
Clusters are a logical grouping for task runners. Using clusters, you can scope certain tasks to a specific group of task runners. Tasks, which are always submitted to a specific cluster, are only executed on task runners assigned to the same cluster.
Caches are shared storage that enable data storage and retrieval across tasks within a single job. They store intermediate results and share data among tasks, enabling distributed computing and reducing redundant data processing.
Observability refers to the feature set in Tilebox Workflows that provides visibility into the execution of tasks and jobs. Tools like tracing and logging allow users to monitor performance, diagnose issues, and gain insights into job operations, enabling efficient troubleshooting and optimization.
# Automations
Source: https://docs.tilebox.com/workflows/near-real-time/automations
Process data in near-real-time by triggering jobs based on external events
This feature is only available in the Python SDK.
## Introduction
Tilebox Workflows can execute jobs in two ways: a one-time execution triggered by a user, typically a batch processing, and near-real-time execution based on specific external events.
By defining trigger conditions, you can automatically submit jobs based on external events.
Tilebox Workflows currently supports the following trigger conditions:
Trigger jobs based on a Cron schedule.
Trigger jobs after objects are created or modified in a storage location such as a cloud bucket.
Dataset Event Triggers, which will trigger jobs when new data points are ingested into a Tilebox dataset, are on the roadmap. Stay tuned for updates.
## Automations
To create a trigger, define a special task that serves as a prototype. In response to a trigger condition met, this task will be submitted as a new job. Such tasks are referred to as automations.
Each automation has a [task identifier](/workflows/concepts/tasks#task-identifiers), a [version](/workflows/concepts/tasks#semantic-versioning), and [input parameters](/workflows/concepts/tasks#input-parameters), just like regular tasks.
Automations also automatically provide a special `trigger` attribute that contains information about the event that initiated the task's execution.
Go doesn't support registering automations yet, please use python or the console instead.
## Automation Client
The Tilebox Workflows client includes a sub-client for managing automations. You can create this sub-client by calling the `automations` method on the main client instance.
### Listing Registered Automations
To list all registered automations, use the `all` method on the automation client.
```python Python theme={"system"}
from tilebox.workflows import Client
client = Client()
automations = client.automations()
automations = automations.all()
print(automations)
```
```plaintext Output theme={"system"}
[
AutomationPrototype(
name='Run MyCronTask every hour at 15 minutes past the hour',
prototype=TaskSubmission(
cluster_slug='dev-cluster',
identifier=TaskIdentifier(name='MyCronTask', version='v0.0'),
input=b'{"message": "Hello"},
dependencies=[],
display='MyCronTask',
max_retries=0),
storage_event_triggers=[],
cron_triggers=[CronTrigger(schedule='15 * * * *')],
)
]
```
### Registering Automations
To register an automation, use the `create_*_automation` methods specific to each trigger type provided by the automation client. Refer to the documentation for each trigger type for more details.
## Overview in the Tilebox Console
You can also use the Tilebox Console to manage automations. Visit [the automations section](https://console.tilebox.com/workflows/automations) to check it out.
 You can also register new automations or edit and delete existing ones directly from the console.
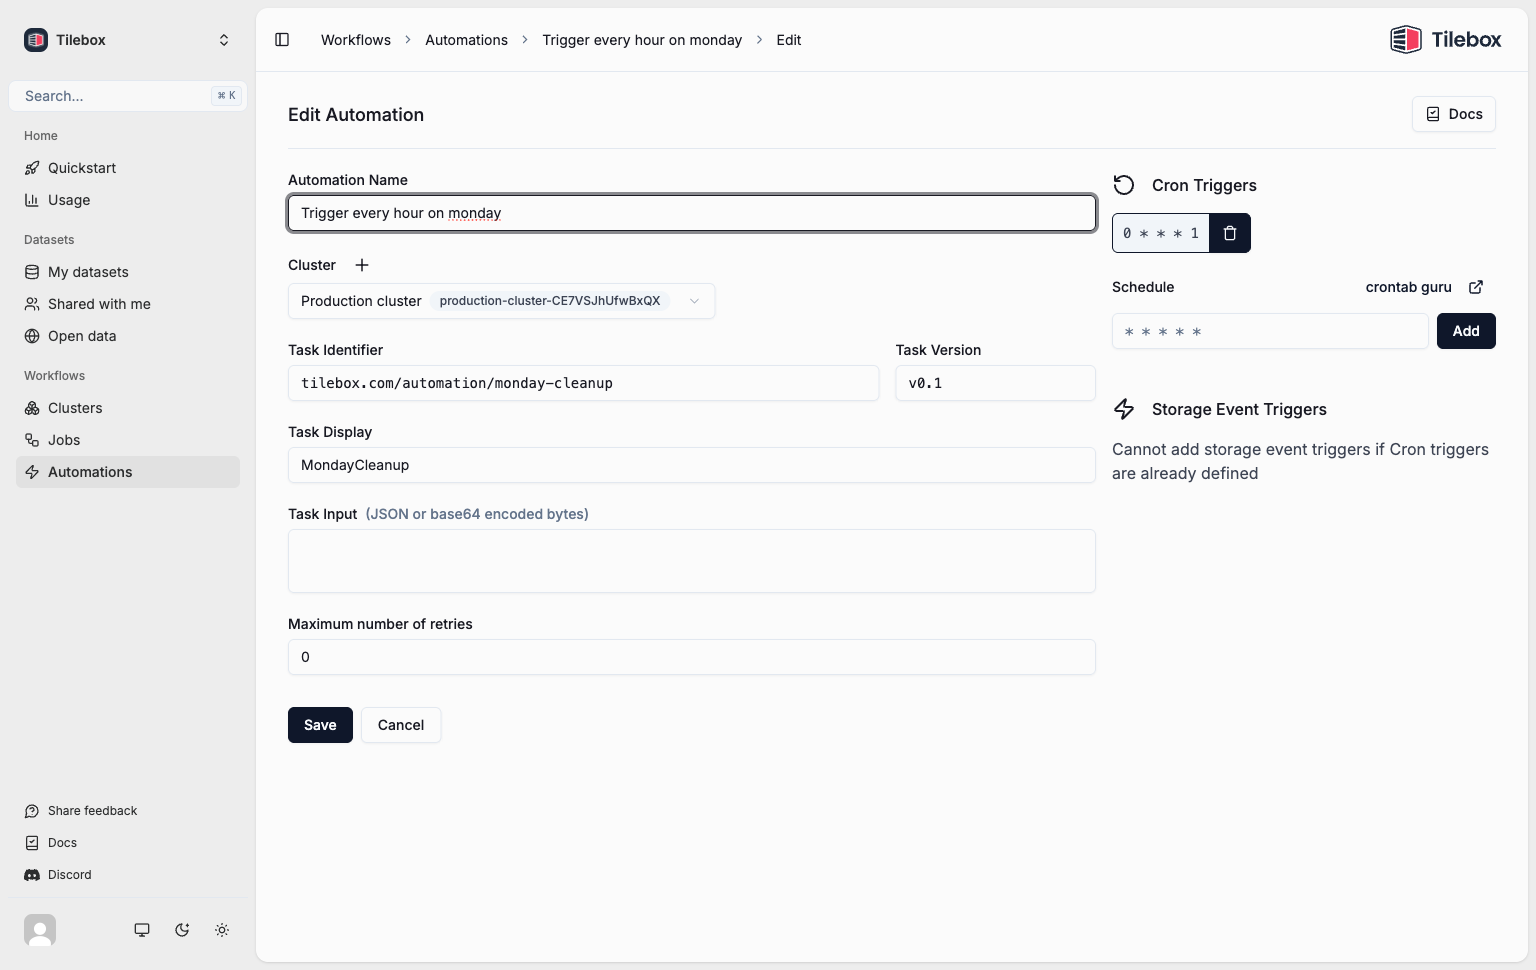
 # Cron triggers
Source: https://docs.tilebox.com/workflows/near-real-time/cron
Trigger jobs based on a Cron schedule.
This feature is only available in the Python SDK.
## Creating Cron tasks
Cron tasks run repeatedly on a specified [cron](https://en.wikipedia.org/wiki/Cron) schedule.
To create a Cron task, use `tilebox.workflows.automations.CronTask` as your tasks base class instead of the regular `tilebox.workflows.Task`.
```python Python theme={"system"}
from tilebox.workflows import ExecutionContext
from tilebox.workflows.automations import CronTask
class MyCronTask(CronTask):
message: str
def execute(self, context: ExecutionContext) -> None:
print(f"Hello {self.message} from a Cron Task!")
# self.trigger is an attribute of the CronTask class,
# which contains information about the trigger event
# that caused this task to be submitted as part of a job
print(f"This task was triggered at {self.trigger.time}")
```
## Registering a Cron trigger
After implementing a Cron task, register it to be triggered according to a Cron schedule.
When the Cron expression matches, a new job is submitted consisting of a single task instance derived from the Cron task prototype.
```python Python theme={"system"}
from tilebox.workflows import Client
client = Client()
automations = client.automations()
cron_automation = automations.create_cron_automation(
"my-cron-automation", # name of the cron automation
MyCronTask(message="World"), # the task (and its input parameters) to run repeatedly
cron_schedules=[
"12 * * * *", # run every hour at minute 12
"45 18 * * *", # run every day at 18:45
"30 13 * * 3", # run every Wednesday at 13:30
],
)
```
The syntax for specifying the cron triggers is a [CRON expression](https://en.wikipedia.org/wiki/Cron#CRON_expression).
A helpful tool to test your cron expressions is [crontab.guru](https://crontab.guru/).
## Starting a Cron Task Runner
With the Cron automation registered, a job is submitted whenever the Cron expression matches. But unless a [task runner](/workflows/concepts/task-runners) is available to execute the Cron task the submitted jobs remain in a task queue.
Once an [eligible task runner](/workflows/concepts/task-runners#task-selection) becomes available, all jobs in the queue are executed.
```python Python theme={"system"}
from tilebox.workflows import Client
client = Client()
runner = client.runner(tasks=[MyCronTask])
runner.run_all()
```
If this task runner runs continuously, its output may resemble the following:
```plaintext Output theme={"system"}
Hello World from a Cron Task!
This task was triggered at 2023-09-25 16:12:00
Hello World from a Cron Task!
This task was triggered at 2023-09-25 17:12:00
Hello World from a Cron Task!
This task was triggered at 2023-09-25 18:12:00
Hello World from a Cron Task!
This task was triggered at 2023-09-25 18:45:00
Hello World from a Cron Task!
This task was triggered at 2023-09-25 19:12:00
```
## Inspecting in the Console
The [Tilebox Console](https://console.tilebox.com/workflows/automations) provides a straightforward way to inspect all registered Cron automations.

 Use the console to view, edit, and delete the registered Cron automations.
## Deleting Cron automations
To delete a registered Cron automation, use `automations.delete`. After deletion, no new jobs will be submitted by that Cron trigger. Past jobs already triggered will still remain queued.
```python Python theme={"system"}
from tilebox.workflows import Client
client = Client()
automations = client.automations()
# delete the automation as returned by create_cron_automation
automations.delete(cron_automation)
# or manually by id:
automations.delete("0190bafc-b3b8-88c4-008b-a5db044380d0")
```
## Submitting Cron jobs manually
You can submit Cron tasks as regular tasks for testing purposes or as part of a larger workflow. To do so, instantiate the task with a specific trigger time using the `once` method.
Submitting a job with a Cron task using `once` immediately schedules the task, and a runner may pick it up and execute it. The trigger time set in the `once` method does not influence the execution time; it only sets the `self.trigger.time` attribute for the Cron task.
```python Python theme={"system"}
from datetime import datetime, timezone
job_client = client.jobs()
# create a Cron task prototype
task = MyCronTask(message="Hello")
# submitting it directly won't work: raises ValueError:
# job_client.submit("manual-cron-job", task)
# instead trigger a cron task with the current time as the trigger time
job_client.submit("manual-cron-job", task.once())
# or specify a trigger time in the past or future
# irrespective of the trigger time, the task will always be scheduled to run immediately
job_client.submit(
"manual-cron-job",
task.once(datetime(2030, 12, 12, 15, 15, tzinfo=timezone.utc))
)
```
# Storage Event Triggers
Source: https://docs.tilebox.com/workflows/near-real-time/storage-events
Trigger jobs after objects are created or modified in a storage location
This feature is only available in the Python SDK.
## Creating a Storage Event Task
Storage Event Tasks are automations triggered when objects are created or modified in a [storage location](#storage-locations).
To create a Storage Event task, use `tilebox.workflows.automations.StorageEventTask` as your tasks base class instead of the regular `tilebox.workflows.Task`.
```python Python theme={"system"}
from tilebox.workflows import ExecutionContext
from tilebox.workflows.automations import StorageEventTask, StorageEventType
from tilebox.workflows.observability.logging import get_logger
logger = get_logger()
class LogObjectCreation(StorageEventTask):
head_bytes: int
def execute(self, context: ExecutionContext) -> None:
# self.trigger is an attribute of the StorageEventTask class,
# which contains information about the storage event that triggered this task
if self.trigger.type == StorageEventType.CREATED:
path = self.trigger.location
logger.info(f"A new object was created: {path}")
# trigger.storage is a storage client for interacting with the storage
# location that triggered the event
# using it, we can read the object to get its content as a bytes object
data = self.trigger.storage.read(path)
logger.info(f"The object's file size is {len(data)} bytes")
logger.info(f"The object's first {self.head_bytes} bytes are: {data[:self.head_bytes]}")
```
## Storage Locations
Storage Event tasks are triggered when objects are created or modified in a storage location. This location can be a cloud storage bucket or a local file system. Tilebox supports the following storage locations:
### Registering a Storage Location
To make a storage location available within Tilebox workflows, it must be registered first. This involves specifying the location and setting up a notification system that forwards events to Tilebox, enabling task triggering. The setup varies depending on the storage location type.
For example, a GCP storage bucket is integrated by setting up a [PubSub Notification with a push subscription](https://cloud.google.com/storage/docs/pubsub-notifications). A local file system requires installing a filesystem watcher. To set up a storage location registered with Tilebox, please [get in touch](mailto:engineering@tilebox.com).
### Listing Available Storage Locations
To list all available storage locations, use the `all` method on the storage location client.
```python Python theme={"system"}
from tilebox.workflows import Client
client = Client()
automations_client = client.automations()
storage_locations = automations_client.storage_locations()
print(storage_locations)
```
```plaintext Output theme={"system"}
[
StorageLocation(
location="gcp-project:gcs-bucket-fab3fa2",
type=StorageType.GCS,
),
StorageLocation(
location="s3-bucket-263af15",
type=StorageType.S3,
),
StorageLocation(
location='/path/to/a/local/folder',
type=StorageType.FS,
),
]
```
### Reading Files from a Storage Location
Once a storage location is registered, you can read files from it using the `read` method on the storage client.
```python Python theme={"system"}
gcs_bucket = storage_locations[0]
s3_bucket = storage_locations[1]
local_folder = storage_locations[2]
gcs_object = gcs_bucket.read("my-object.txt")
s3_object = s3_bucket.read("my-object.txt")
local_object = local_folder.read("my-object.txt")
```
The `read` method instantiates a client for the specific storage location. This requires that
the storage location is accessible by a task runner and may require credentials for cloud storage
or physical/network access to a locally mounted file system.
To set up authentication and enable access to a GCS storage bucket, check out the [Google Client docs for authentication](https://cloud.google.com/docs/authentication/client-libraries#python).
## Registering a Storage Event Trigger
After implementing a Storage Event task, register it to trigger each time a storage event occurs. This registration submits a new job consisting of a single task instance derived from the registered Storage Event task prototype.
```python Python theme={"system"}
from tilebox.workflows import Client
client = Client()
automations = client.automations()
storage_event_automation = automations.create_storage_event_automation(
"log-object-creations", # name of the storage event automation
LogObjectCreation(head_bytes=20), # the task (and its input parameters) to run repeatedly
triggers=[
# you can specify a glob pattern:
# run every time a .txt file is created anywhere in the gcs bucket
(gcs_bucket, "**.txt"),
],
)
```
The syntax for specifying glob patterns follows [Standard Wildcards](https://tldp.org/LDP/GNU-Linux-Tools-Summary/html/x11655.htm).
Additionally, you can use `**` as a super-asterisk, a matching operator not sensitive to slash separators.
Here are some examples of valid glob patterns:
| Pattern | Matches |
| ----------- | ---------------------------------------------------------------------------- |
| `*.ext` | Any file ending in `.ext` in the root directory |
| `**/*.ext` | Any file ending in `.ext` in any subdirectory, but not in the root directory |
| `**.ext` | Any file ending in `.ext` in any subdirectory, including the root directory |
| `folder/*` | Any file directly in a `folder` subdirectory |
| `folder/**` | Any file directly or recursively part of a `folder` subdirectory |
| `[a-z].txt` | Matches `a.txt`, `b.txt`, etc. |
## Start a Storage Event Task Runner
With the Storage Event automation registered, a job is submitted whenever a storage event occurs. But unless a [task runner](/workflows/concepts/task-runners) is available to execute the Storage Event task the submitted jobs remain in a task queue.
Once an [eligible task runner](/workflows/concepts/task-runners#task-selection) becomes available, all jobs in the queue are executed.
```python Python theme={"system"}
from tilebox.workflows import Client
client = Client()
runner = client.runner(tasks=[LogObjectCreation])
runner.run_forever()
```
### Triggering an Event
Creating an object in the bucket where the task is registered results in a job being submitted:
```bash Creating an object theme={"system"}
echo "Hello World" > my-object.txt
gcloud storage cp my-object.txt gs://gcs-bucket-fab3fa2
```
Inspecting the task runner output reveals that the job was submitted and the task executed:
```plaintext Output theme={"system"}
2024-09-25 16:51:45,621 INFO A new object was created: my-object.txt
2024-09-25 16:51:45,857 INFO The object's file size is 12 bytes
2024-09-25 16:51:45,858 INFO The object's first 20 bytes are: b'Hello World\n'
```
## Inspecting in the Console
The [Tilebox Console](https://console.tilebox.com/workflows/automations) provides an easy way to inspect all registered storage event automations.
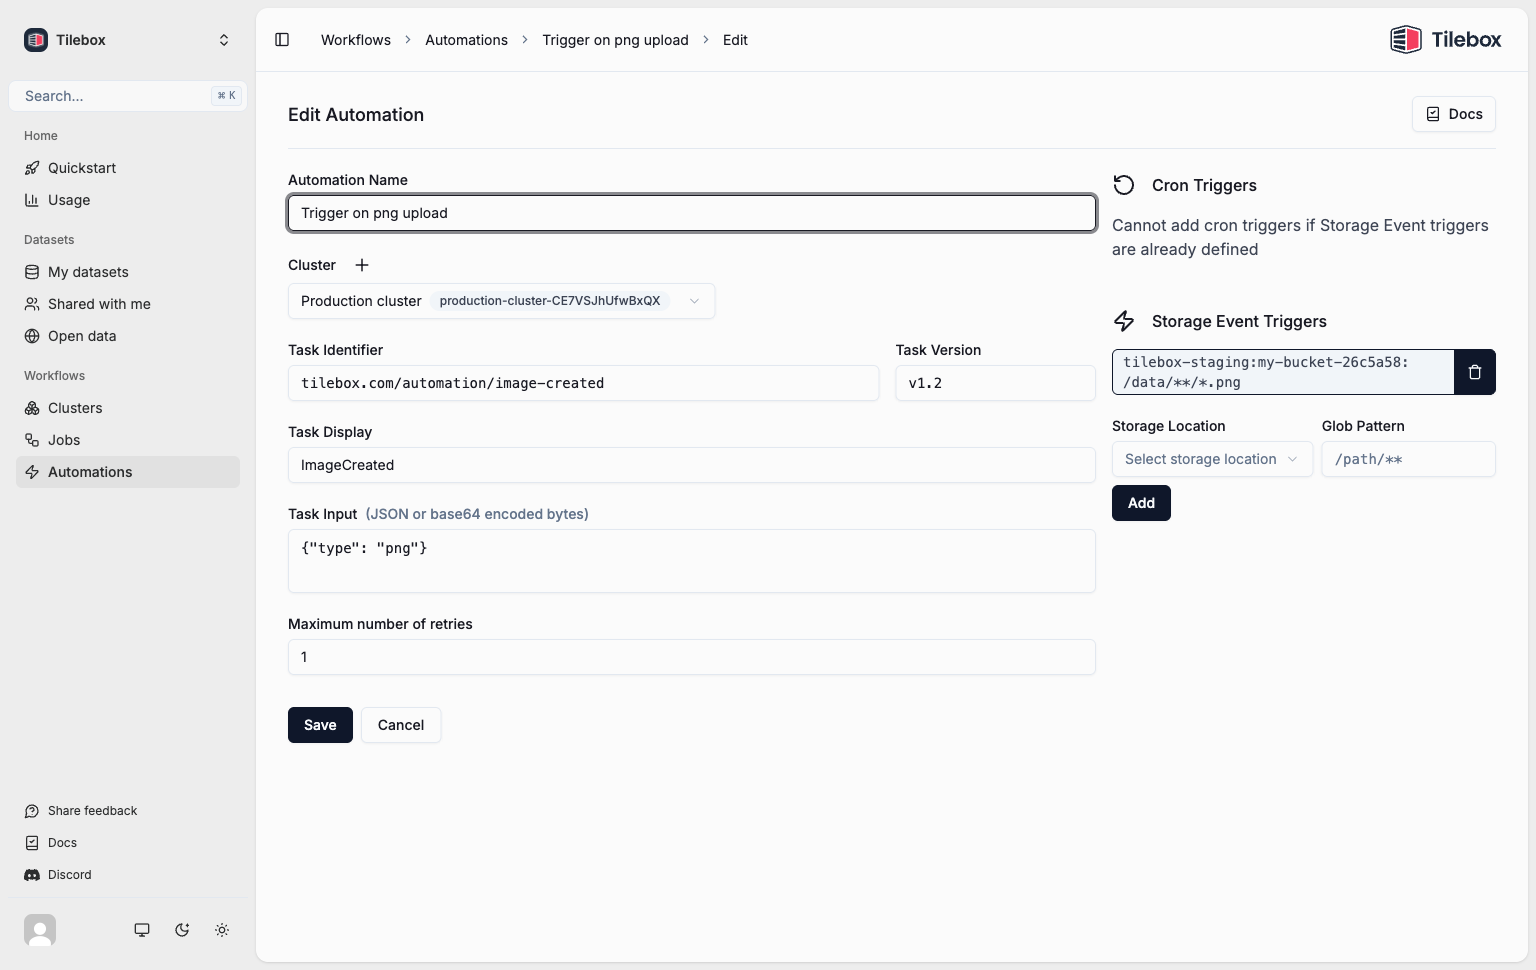
 ## Deleting Storage Event automations
To delete a registered storage event automation, use `automations.delete`. After deletion, no new jobs will be submitted by the storage event trigger. Past jobs already triggered will still remain queued.
```python Python theme={"system"}
from tilebox.workflows import Client
client = Client()
automations = client.automations()
# delete the automation as returned by create_storage_event_automation
automations.delete(storage_event_automation)
# or manually by id:
automations.delete("0190bafc-b3b8-88c4-008b-a5db044380d0")
```
## Submitting Storage Event jobs manually
You can submit Storage event tasks as regular tasks for testing purposes or as part of a larger workflow. To do so, instantiate the task with a specific storage location and object name using the `once` method.
```python Python theme={"system"}
job_client = client.jobs()
task = LogObjectCreation(head_bytes=20)
# submitting it directly won't work; raises ValueError:
# job_client.submit("manual-storage-event-job", task)
# instead, we specify a trigger condition, and submit a job manually
job_client.submit(
"manual-storage-event-job",
# simulate an event that occurred in the gcs bucket for the object "my-object.txt"
task.once(gcs_bucket, "my-object.txt"),
)
```
# Logging
Source: https://docs.tilebox.com/workflows/observability/logging
Set up distributed logging using the OpenTelemetry logging protocol
## Overview
Tilebox workflows are designed for distributed execution, making it essential to set up logging to a centralized system. Tilebox supports OpenTelemetry logging, which simplifies sending log messages from your tasks to a chosen backend. Collecting and visualizing logs from a distributed cluster of task runners in a tool like [Axiom](https://axiom.co/) can look like this:
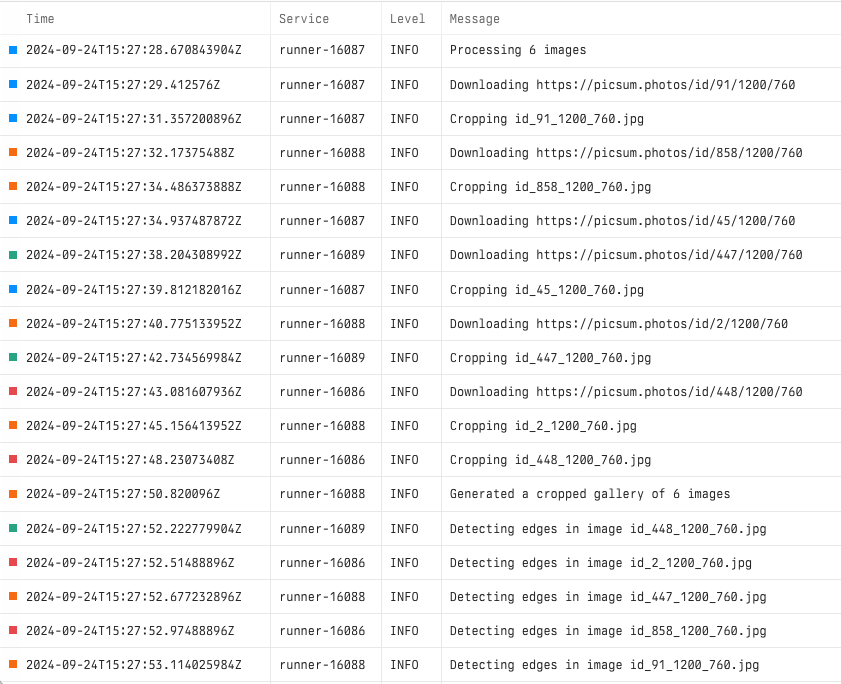
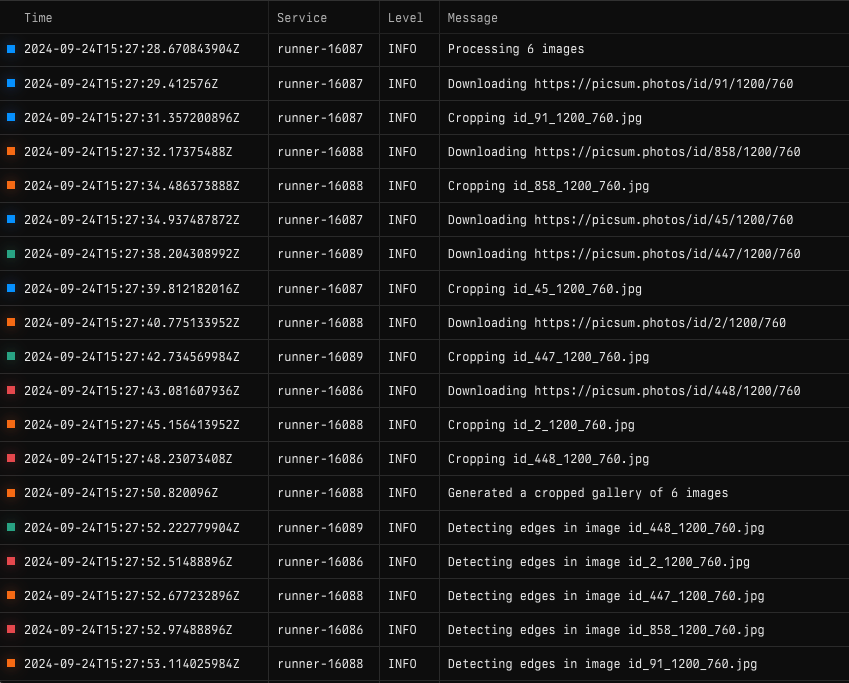 ## Configure logging
The Tilebox workflow SDKs include support for exporting OpenTelemetry logs. To enable logging, call the appropriate configuration functions during the startup of your[task runner](/workflows/concepts/task-runners). Then, use the provided `logger` to send log messages from your tasks.
To configure logging with Axiom, you first need to create a [Axiom Dataset](https://axiom.co/docs/reference/datasets) to export your workflow logs to. You will also need an [Axiom API key](https://axiom.co/docs/reference/tokens) with the necessary write permissions for your Axiom dataset.
```python Python theme={"system"}
from tilebox.workflows import Client, Task, ExecutionContext
from tilebox.workflows.observability.logging import configure_otel_logging_axiom
# your own workflow:
from my_workflow import MyTask
def main():
configure_otel_logging_axiom(
# specify an Axiom dataset to export logs to
dataset="my-axiom-logs-dataset",
# along with an Axiom API key with ingest permissions for that dataset
api_key="my-axiom-api-key",
)
# the task runner will export logs from
# the executed tasks to the specified dataset
client = Client()
runner = client.runner(tasks=[MyTask])
runner.run_forever()
if __name__ == "__main__":
main()
```
```go Go theme={"system"}
package main
import (
"context"
"log/slog"
"github.com/tilebox/tilebox-go/examples/workflows/axiom"
"github.com/tilebox/tilebox-go/observability"
"github.com/tilebox/tilebox-go/observability/logger"
"github.com/tilebox/tilebox-go/workflows/v1"
)
// specify a service name and version to identify the instrumenting application in traces and logs
var service = &observability.Service{Name: "task-runner", Version: "dev"}
func main() {
ctx := context.Background()
// Setup OpenTelemetry logging and slog
// It uses AXIOM_API_KEY and AXIOM_LOGS_DATASET from the environment
axiomHandler, shutdownLogger, err := logger.NewAxiomHandlerFromEnv(ctx, service,
logger.WithLevel(slog.LevelInfo), // export logs at info level and above as OTEL logs
)
defer shutdownLogger(ctx)
if err != nil {
slog.Error("failed to set up axiom log handler", slog.Any("error", err))
return
}
tileboxLogger := logger.New( // initialize a slog.Logger
axiomHandler, // export logs to the Axiom handler
logger.NewConsoleHandler(logger.WithLevel(slog.LevelWarn)), // and additionally, export WARN and ERROR logs to stdout
)
slog.SetDefault(tileboxLogger) // all future slog calls will be forwarded to the tilebox logger
client := workflows.NewClient()
taskRunner, err := client.NewTaskRunner(ctx)
if err != nil {
slog.Error("failed to create task runner", slog.Any("error", err))
return
}
err = taskRunner.RegisterTasks(&MyTask{})
if err != nil {
slog.Error("failed to register tasks", slog.Any("error", err))
return
}
taskRunner.RunForever(ctx)
}
```
Setting the environment variables `AXIOM_API_KEY` and `AXIOM_LOGS_DATASET` allows you to omit these arguments in the `configure_otel_logging_axiom` function.
If you are using another OpenTelemetry-compatible backend besides Axiom, such as OpenTelemetry Collector or Jaeger, you can configure logging by specifying the URL endpoint to export log messages to.
```python Python theme={"system"}
from tilebox.workflows import Client
from tilebox.workflows.observability.logging import configure_otel_logging
# your own workflow:
from my_workflow import MyTask
def main():
configure_otel_logging(
# specify an endpoint to export logs to, such as a
# locally running instance of OpenTelemetry Collector
endpoint="http://localhost:4318/v1/logs",
# optional headers for each request
headers={"Authorization": "Bearer some-api-key"},
)
# the task runner will export logs from
# the executed tasks to the specified endpoint
client = Client()
runner = client.runner(tasks=[MyTask])
runner.run_forever()
if __name__ == "__main__":
main()
```
```go Go theme={"system"}
package main
import (
"context"
"log/slog"
"github.com/tilebox/tilebox-go/examples/workflows/opentelemetry"
"github.com/tilebox/tilebox-go/observability"
"github.com/tilebox/tilebox-go/observability/logger"
"github.com/tilebox/tilebox-go/workflows/v1"
)
// specify a service name and version to identify the instrumenting application in traces and logs
var service = &observability.Service{Name: "task-runner", Version: "dev"}
func main() {
ctx := context.Background()
endpoint := "http://localhost:4318"
headers := map[string]string{
"Authorization": "Bearer ",
}
// Setup an OpenTelemetry log handler, exporting logs to an OTEL compatible log endpoint
otelHandler, shutdownLogger, err := logger.NewOtelHandler(ctx, service,
logger.WithEndpointURL(endpoint),
logger.WithHeaders(headers),
logger.WithLevel(slog.LevelInfo), // export logs at info level and above as OTEL logs
)
defer shutdownLogger(ctx)
if err != nil {
slog.Error("failed to set up otel log handler", slog.Any("error", err))
return
}
tileboxLogger := logger.New( // initialize a slog.Logger
otelHandler, // export logs to the OTEL handler
logger.NewConsoleHandler(logger.WithLevel(slog.LevelWarn)), // and additionally, export WARN and ERROR logs to stdout
)
slog.SetDefault(tileboxLogger) // all future slog calls will be forwarded to the tilebox logger
client := workflows.NewClient()
taskRunner, err := client.NewTaskRunner(ctx)
if err != nil {
slog.Error("failed to create task runner", slog.Any("error", err))
return
}
err = taskRunner.RegisterTasks(&MyTask{})
if err != nil {
slog.Error("failed to register tasks", slog.Any("error", err))
return
}
taskRunner.RunForever(ctx)
}
```
If you set the environment variable `OTEL_LOGS_ENDPOINT`, you can omit that argument in the `configure_otel_logging` function.
To log messages to the standard console output, use the `configure_console_logging` function.
```python Python theme={"system"}
from tilebox.workflows import Client
from tilebox.workflows.observability.logging import configure_console_logging
# your own workflow:
from my_workflow import MyTask
def main():
configure_console_logging()
# the task runner will print log messages from
# the executed tasks to the console
client = Client()
runner = client.runner(tasks=[MyTask])
runner.run_forever()
if __name__ == "__main__":
main()
```
```go Go theme={"system"}
package main
import (
"context"
"log/slog"
"github.com/tilebox/tilebox-go/examples/workflows/opentelemetry"
"github.com/tilebox/tilebox-go/observability/logger"
"github.com/tilebox/tilebox-go/workflows/v1"
)
func main() {
ctx := context.Background()
tileboxLogger := logger.New(logger.NewConsoleHandler(logger.WithLevel(slog.LevelWarn)))
slog.SetDefault(tileboxLogger) // all future slog calls will be forwarded to the tilebox logger
client := workflows.NewClient()
taskRunner, err := client.NewTaskRunner(ctx)
if err != nil {
slog.Error("failed to create task runner", slog.Any("error", err))
return
}
err = taskRunner.RegisterTasks(&MyTask{})
if err != nil {
slog.Error("failed to register tasks", slog.Any("error", err))
return
}
taskRunner.RunForever(ctx)
}
```
The console logging backend is not recommended for production use. Log messages will be emitted to the standard output of each task runner rather than a centralized logging system. It is intended for local development and testing of workflows.
## Emitting log messages
Use the logger provided by the Tilebox SDK to emit log messages from your tasks. You can then use it to send log messages to the [configured logging backend](#configure-logging).
Log messages emitted within a task's `execute` method are also automatically recorded as span events for the current [job trace](/workflows/observability/tracing).
```python Python theme={"system"}
import logging
from tilebox.workflows import Task, ExecutionContext
from tilebox.workflows.observability.logging import get_logger
logger = get_logger()
class MyTask(Task):
def execute(self, context: ExecutionContext) -> None:
# emit a log message to the configured OpenTelemetry backend
logger.info("Hello world from configured logger!")
```
```go Go theme={"system"}
package tasks
import (
"context"
"log/slog"
)
type MyTask struct{}
func (t *MyTask) Execute(context.Context) error {
// emit a log message to the configured OpenTelemetry backend
slog.Info("Hello world from configured logger!")
return nil
}
```
## Logging task runner internals
In python, Tilebox task runners also internally use a logger. By default, it's set to the WARNING level, but you can change it by explicitly configuring a logger for the workflows client when constructing the task runner.
```python Python theme={"system"}
from tilebox.workflows import Client
from tilebox.workflows.observability.logging import configure_otel_logging_axiom
from tilebox.workflows.observability.logging import get_logger
# configure Axiom or another logging backend
configure_otel_logging_axiom(
dataset="my-axiom-logs-dataset",
api_key="my-axiom-api-key",
)
# configure a logger for the Tilebox client at the INFO level
client = Client()
client.configure_logger(get_logger(level=logging.INFO))
# now the task runner inherits this logger and uses
# it to emit its own internal log messages as well
runner = client.runner(tasks=[MyTask])
runner.run_forever()
```
# OpenTelemetry Integration
Source: https://docs.tilebox.com/workflows/observability/open-telemetry
Integrate OpenTelemetry into your Tilebox Workflows
## Observability
Effective observability is essential for building reliable workflows. Understanding and monitoring the execution of workflows and their tasks helps ensure correctness and efficiency. This section describes methods to gain insights into your workflow's execution.
## OpenTelemetry
Tilebox Workflows is designed with [OpenTelemetry](https://opentelemetry.io/) in mind, which provides a set of APIs and libraries for instrumenting, generating, collecting, and exporting telemetry data (metrics, logs, and traces) in distributed systems.
Tilebox Workflows currently supports OpenTelemetry for tracing and logging, with plans to include metrics in the future.
## Integrations
Tilebox exports telemetry data using the [OpenTelemetry Protocol](https://opentelemetry.io/docs/specs/otlp/). This allows you to send telemetry data to any OpenTelemetry-compatible backend, such as Axiom or Jaeger.
### Axiom
 Tilebox Workflows has built-in support for Axiom, a cloud-based observability and telemetry platform. The examples and screenshots in this section come from this integration.
To get started, [sign up for a free Axiom account](https://axiom.co/), create an axiom dataset for traces and logs, and generate an API key with ingest permissions for those datasets.
You can then configure Tilebox to export traces and logs to Axiom using [configure\_otel\_tracing\_axiom](/workflows/observability/tracing#axiom) and [configure\_otel\_logging\_axiom](/workflows/observability/logging#axiom).
### Jaeger
 Another popular option is [Jaeger](https://jaegertracing.io/), a popular distributed tracing system. You can use the [OpenTelemetry Collector](https://opentelemetry.io/docs/collector/) to collect telemetry data from Tilebox Workflows and export it to Jaeger.
An all-in-one Jaeger environment can be spun up using Docker:
```bash theme={"system"}
docker run --rm --name jaeger \
-p 5778:5778 \
-p 16686:16686 \
-p 4318:4318 \
jaegertracing/jaeger:2.9.0
```
You can then configure Tilebox to export traces to Jaeger using `configure_otel_tracing`.
```python Python theme={"system"}
from tilebox.workflows import Client
from tilebox.workflows.observability.tracing import configure_otel_tracing
# your own workflow:
from my_workflow import MyTask
def main():
configure_otel_tracing(
# export traces to the local Jaeger instance
endpoint="http://localhost:4318",
)
# the following task runner generates traces for executed tasks and
# exports trace and span data to the specified endpoint
client = Client()
runner = client.runner(tasks=[MyTask])
runner.run_forever()
if __name__ == "__main__":
main()
```
```go Go theme={"system"}
package main
import (
"context"
"log/slog"
"github.com/tilebox/tilebox-go/examples/workflows/opentelemetry"
"github.com/tilebox/tilebox-go/observability"
"github.com/tilebox/tilebox-go/observability/tracer"
"github.com/tilebox/tilebox-go/workflows/v1"
"go.opentelemetry.io/otel"
)
// specify a service name and version to identify the instrumenting application in traces and logs
var service = &observability.Service{Name: "task-runner", Version: "dev"}
func main() {
ctx := context.Background()
endpoint := "http://localhost:4318"
// Setup an OpenTelemetry trace span processor, exporting traces and spans to an OTEL compatible trace endpoint
tileboxTracerProvider, shutdown, err := tracer.NewOtelProvider(ctx, service, tracer.WithEndpointURL(endpoint))
defer shutdown(ctx)
if err != nil {
slog.Error("failed to set up otel span processor", slog.Any("error", err))
return
}
otel.SetTracerProvider(tileboxTracerProvider) // set the tilebox tracer provider as the global OTEL tracer provider
client := workflows.NewClient()
taskRunner, err := client.NewTaskRunner(ctx)
if err != nil {
slog.Error("failed to create task runner", slog.Any("error", err))
return
}
err = taskRunner.RegisterTasks(&MyTask{})
if err != nil {
slog.Error("failed to register tasks", slog.Any("error", err))
return
}
taskRunner.RunForever(ctx)
}
```
The generated workflow traces can then be viewed in the Jaeger UI at [http://localhost:16686](http://localhost:16686).
# Tracing
Source: https://docs.tilebox.com/workflows/observability/tracing
Record the execution of your workflow tasks as OpenTelemetry traces and spans
## Overview
Applying [OpenTelemetry traces](https://opentelemetry.io/docs/concepts/signals/traces/) to the concept of workflows allows you to monitor the execution of your jobs and their individual tasks. Visualizing the trace for a job in a tool like [Axiom](https://axiom.co/) may look like this:
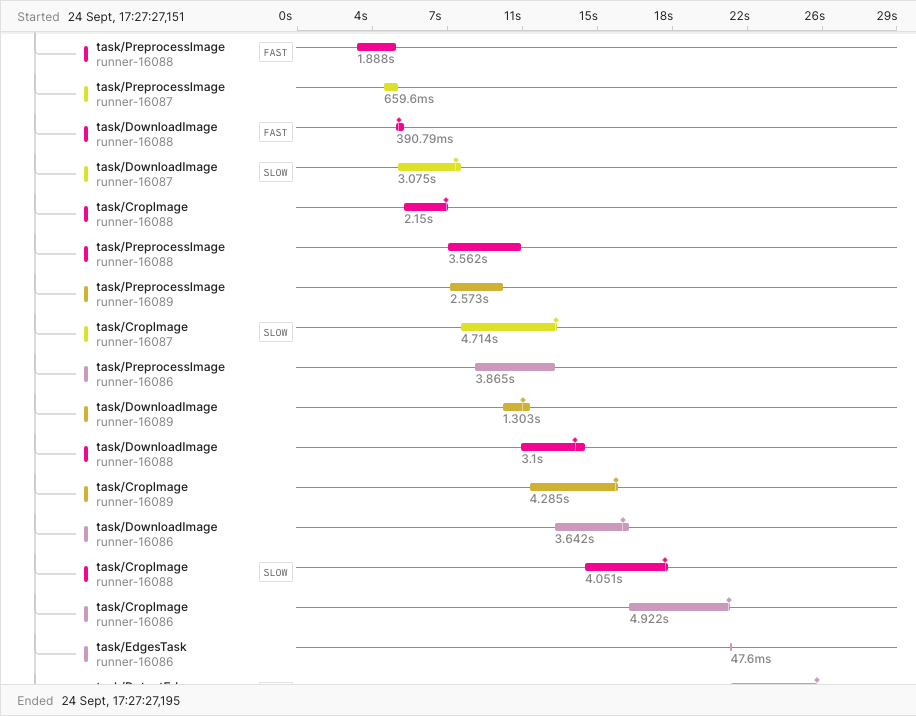
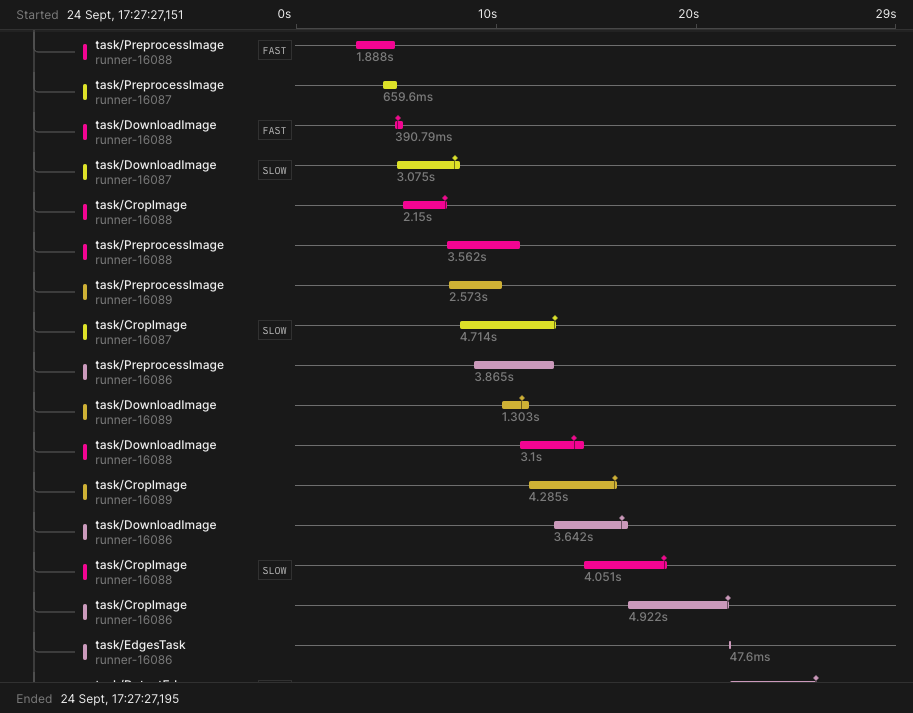 Tracing your workflows enables you to easily observe:
* The order of task execution
* Which tasks run in parallel
* The [task runner](/workflows/concepts/task-runners) handling each task
* The duration of each task
* The outcome of each task (success or failure)
This information helps identify bottlenecks and performance issues, ensuring that your workflows execute correctly.
## Configure tracing
The Tilebox workflow SDKs have built-in support for exporting OpenTelemetry traces. To enable tracing, call the appropriate configuration functions during the startup of your [task runner](/workflows/concepts/task-runners).
To configure tracing with Axiom, you first need to create a [Axiom Dataset](https://axiom.co/docs/reference/datasets) to export your workflow traces to. You will also need an [Axiom API key](https://axiom.co/docs/reference/tokens) with the necessary write permissions for your Axiom dataset.
```python Python theme={"system"}
from tilebox.workflows import Client
from tilebox.workflows.observability.tracing import configure_otel_tracing_axiom
# your own workflow:
from my_workflow import MyTask
def main():
configure_otel_tracing_axiom(
# specify an Axiom dataset to export traces to
dataset="my-axiom-traces-dataset",
# along with an Axiom API key for ingest permissions
api_key="my-axiom-api-key",
)
# the following task runner generates traces for executed tasks and
# exports trace and span data to the specified Axiom dataset
client = Client()
runner = client.runner(tasks=[MyTask])
runner.run_forever()
if __name__ == "__main__":
main()
```
```go Go theme={"system"}
package main
import (
"context"
"log/slog"
"github.com/tilebox/tilebox-go/examples/workflows/axiom"
"github.com/tilebox/tilebox-go/observability"
"github.com/tilebox/tilebox-go/observability/tracer"
"github.com/tilebox/tilebox-go/workflows/v1"
"go.opentelemetry.io/otel"
)
// specify a service name and version to identify the instrumenting application in traces and logs
var service = &observability.Service{Name: "task-runner", Version: "dev"}
func main() {
ctx := context.Background()
// Setup an OpenTelemetry trace span processor, exporting traces and spans to Axiom
// It uses AXIOM_API_KEY and AXIOM_TRACES_DATASET from the environment
tileboxTracerProvider, shutdown, err := tracer.NewAxiomProviderFromEnv(ctx, service)
defer shutdown(ctx)
if err != nil {
slog.Error("failed to set up axiom tracer provider", slog.Any("error", err))
return
}
otel.SetTracerProvider(tileboxTracerProvider) // set the tilebox tracer provider as the global OTEL tracer provider
client := workflows.NewClient()
taskRunner, err := client.NewTaskRunner(ctx)
if err != nil {
slog.Error("failed to create task runner", slog.Any("error", err))
return
}
err = taskRunner.RegisterTasks(&MyTask{})
if err != nil {
slog.Error("failed to register tasks", slog.Any("error", err))
return
}
taskRunner.RunForever(ctx)
}
```
Set the environment variables `AXIOM_API_KEY` and `AXIOM_TRACES_DATASET` to omit those arguments
in the `configure_otel_tracing_axiom` function.
If you are using another OpenTelemetry-compatible backend besides Axiom, like OpenTelemetry Collector or Jaeger, you can configure tracing by specifying the URL endpoint to export traces to.
```python Python theme={"system"}
from tilebox.workflows import Client
from tilebox.workflows.observability.tracing import configure_otel_tracing
# your own workflow:
from my_workflow import MyTask
def main():
configure_otel_tracing(
# specify an endpoint for trace ingestion, such as a
# locally running instance of OpenTelemetry Collector
endpoint="http://localhost:4318/v1/traces",
# optional headers for each request
headers={"Authorization": "Bearer some-api-key"},
)
# the following task runner generates traces for executed tasks and
# exports trace and span data to the specified endpoint
client = Client()
runner = client.runner(tasks=[MyTask])
runner.run_forever()
if __name__ == "__main__":
main()
```
```go Go theme={"system"}
package main
import (
"context"
"log/slog"
"github.com/tilebox/tilebox-go/examples/workflows/opentelemetry"
"github.com/tilebox/tilebox-go/observability"
"github.com/tilebox/tilebox-go/observability/tracer"
"github.com/tilebox/tilebox-go/workflows/v1"
"go.opentelemetry.io/otel"
)
// specify a service name and version to identify the instrumenting application in traces and logs
var service = &observability.Service{Name: "task-runner", Version: "dev"}
func main() {
ctx := context.Background()
endpoint := "http://localhost:4318"
headers := map[string]string{
"Authorization": "Bearer ",
}
// Setup an OpenTelemetry trace span processor, exporting traces and spans to an OTEL compatible trace endpoint
tileboxTracerProvider, shutdown, err := tracer.NewOtelProvider(ctx, service,
tracer.WithEndpointURL(endpoint),
tracer.WithHeaders(headers),
)
defer shutdown(ctx)
if err != nil {
slog.Error("failed to set up otel span processor", slog.Any("error", err))
return
}
otel.SetTracerProvider(tileboxTracerProvider) // set the tilebox tracer provider as the global OTEL tracer provider
client := workflows.NewClient()
taskRunner, err := client.NewTaskRunner(ctx)
if err != nil {
slog.Error("failed to create task runner", slog.Any("error", err))
return
}
err = taskRunner.RegisterTasks(&MyTask{})
if err != nil {
slog.Error("failed to register tasks", slog.Any("error", err))
return
}
taskRunner.RunForever(ctx)
}
```
Set the environment variable `OTEL_TRACES_ENDPOINT` to omit that argument
in the `configure_otel_tracing` function.
Once the runner picks up tasks and executes them, corresponding traces and spans are automatically generated and exported to the configured backend.
# Progress
Source: https://docs.tilebox.com/workflows/progress
Add progress indicators to provide visibility into the execution of a job
Tilebox supports user-defined progress indicators during the execution of a job. This can be useful to provide visibility into the execution and the expected duration of a job, especially for longer running jobs.
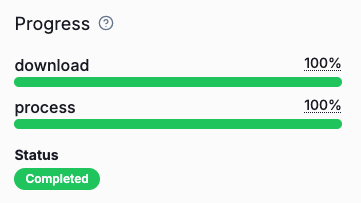
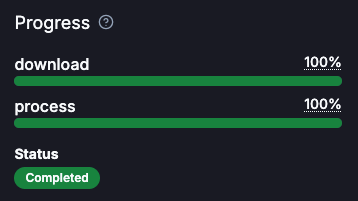 ## Tracking Progress
Progress indicators in Tilebox use a `done` / `total` model. Tasks can increase a `total` value to specify the total work to be done, and the same or any other task can increase a `done` counter to track the amount of work that has already been completed.
Progress tracking is always done at a task level. Each task can report its progress updates, as increases in `done` and `total` independently, and the job's total progress is the sum of all tasks' progress.
```python Python theme={"system"}
from tilebox.workflows import Task, ExecutionContext
class ProgressRootTask(Task):
n: int
def execute(self, context: ExecutionContext) -> None:
# report that 10 units of work need to be done
context.progress().add(self.n) # [!code ++]
for _ in range(self.n):
context.submit_subtask(ProgressSubTask())
class ProgressSubTask(Task):
def execute(self, context: ExecutionContext) -> None:
# report that one unit of work has been completed
context.progress().done(1) # [!code ++]
```
```go Go theme={"system"}
type ProgressRootTask struct {
N int
}
func (t *ProgressRootTask) Execute(ctx context.Context) error {
// report that 10 units of work need to be done
err := workflows.DefaultProgress().Add(ctx, uint64(t.N)) // [!code ++]
if err != nil {
return err
}
for range t.N {
_, err := workflows.SubmitSubtask(ctx, &ProgressSubTask{})
if err != nil {
return err
}
}
return nil
}
type ProgressSubTask struct{}
func (t *ProgressSubTask) Execute(ctx context.Context) error {
// report that one unit of work has been completed
err := workflows.DefaultProgress().Done(ctx, 1) // [!code ++]
if err != nil {
return err
}
return nil
}
```
## Multiple Progress Indicators
A job can have multiple independent progress indicators. This is useful when a job consists of multiple steps, that each benefits from having its own progress indicator.
To create a new progress indicator, call `context.progress(name)` with a unique `name` for the indicator.
```python Python lines focus={5-6,15-18,27-28,33-34,38-39} theme={"system"}
class MultiProgressWorkflowRoot(Task):
n: int
def execute(self, context: ExecutionContext) -> None:
# initialize a progress indicator for the finalize task
context.progress("finalize").add(1)
process = context.submit_subtask(Process(self.n))
context.submit_subtask(Cleanup(), depends_on=[process])
class Process(Task):
n: int
def execute(self, context: ExecutionContext) -> None:
# initialize two progress indicators for the two steps,
# with a total work of n for each
context.progress("step1").add(self.n)
context.progress("step2").add(self.n)
# now submit N subtasks for the two steps
for _ in range(self.n):
step1 = context.submit_subtask(Step1())
context.submit_subtask(Step2(), depends_on=[step1])
class Step1(Task):
def execute(self, context: ExecutionContext) -> None:
# 1 unit of work for step1 is done
context.progress("step1").done(1)
class Step2(Task):
def execute(self, context: ExecutionContext) -> None:
# 1 unit of work for step2 is done
context.progress("step2").done(1)
class Finalize(Task):
def execute(self, context: ExecutionContext) -> None:
# finalize is done
context.progress("finalize").done(1)
```
```go Go lines expandable focus={7,32,37,62,74,86} theme={"system"}
type MultiProgressWorkflowRoot struct {
N int
}
func (t *MultiProgressWorkflowRoot) Execute(ctx context.Context) error {
// initialize a progress indicator for the finalize task
err := workflows.Progress("finalize").Add(ctx, 1)
if err != nil {
return err
}
process, err := workflows.SubmitSubtask(ctx, &Process{N: t.N})
if err != nil {
return err
}
_, err = workflows.SubmitSubtask(ctx, &Cleanup{}, subtask.WithDependencies(process))
if err != nil {
return err
}
return nil
}
type Process struct {
N int
}
func (t *Process) Execute(ctx context.Context) error {
// initialize two progress indicators for the two steps,
// with a total work of n for each
err := workflows.Progress("step1").Add(ctx, uint64(t.N))
if err != nil {
return err
}
err = workflows.Progress("step2").Add(ctx, uint64(t.N))
if err != nil {
return err
}
// now submit N subtasks for the two steps
for range t.N {
step1, err := workflows.SubmitSubtask(ctx, &Step1{})
if err != nil {
return err
}
_, err = workflows.SubmitSubtask(ctx, &Step2{}, subtask.WithDependencies(step1))
if err != nil {
return err
}
}
return nil
}
type Step1 struct{}
func (t *Step1) Execute(ctx context.Context) error {
// 1 unit of work for step1 is done
err := workflows.Progress("step1").Done(ctx, 1)
if err != nil {
return err
}
return nil
}
type Step2 struct{}
func (t *Step2) Execute(ctx context.Context) error {
// 1 unit of work for step2 is done
err := workflows.Progress("step2").Done(ctx, 1)
if err != nil {
return err
}
return nil
}
type Cleanup struct{}
func (t *Cleanup) Execute(ctx context.Context) error {
// finalize is done
err := workflows.Progress("finalize").Done(ctx, 1)
if err != nil {
return err
}
return nil
}
```
## Querying Progress
At any time during a job's execution, you can query the current progress of a job using the `find` method on the job client. The returned job object contains a `progress` field that contains the current progress of the job.
```python Python theme={"system"}
job = job_client.find(job_id)
for indicator in job.progress:
print(f"{indicator.label}: {indicator.done}/{indicator.total}")
```
```go Go theme={"system"}
job, err := client.Jobs.Get(ctx, jobID)
if err != nil {
slog.Error("Failed to get job", slog.Any("error", err))
return
}
for _, indicator := range job.Progress {
fmt.Printf("%s: %d/%d\n", indicator.Label, indicator.Done, indicator.Total)
}
```
```plaintext Output theme={"system"}
finalize: 1/1
step1: 4/4
step2: 4/4
```
### Progress Display in interactive environments
When running in an interactive environment such as a Jupyter notebook and the cell output is a Tilebox job object, the
job is automatically rendered, including its progress indicators.
```python Python theme={"system"}
job = job_client.find(job_id)
job # trigger notebook cell output
```
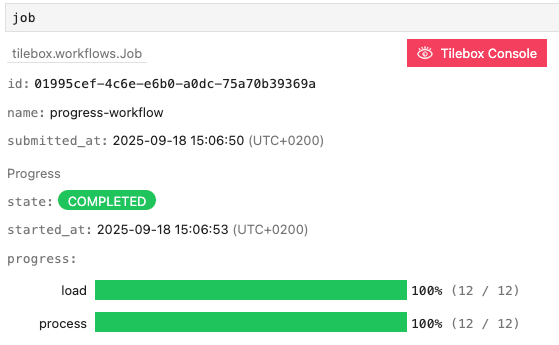
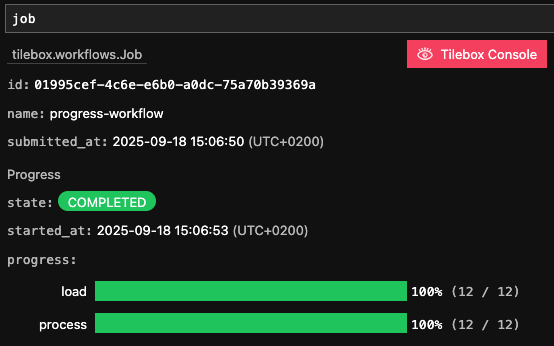 ## Progress idempotency
Since tasks may fail and can subsequently be retried, it's possible that a task is executed more than once. This means that a task may report progress more than once.
To avoid double-counting such progress updates, Tilebox only considers the progress reported by the last execution of a task.
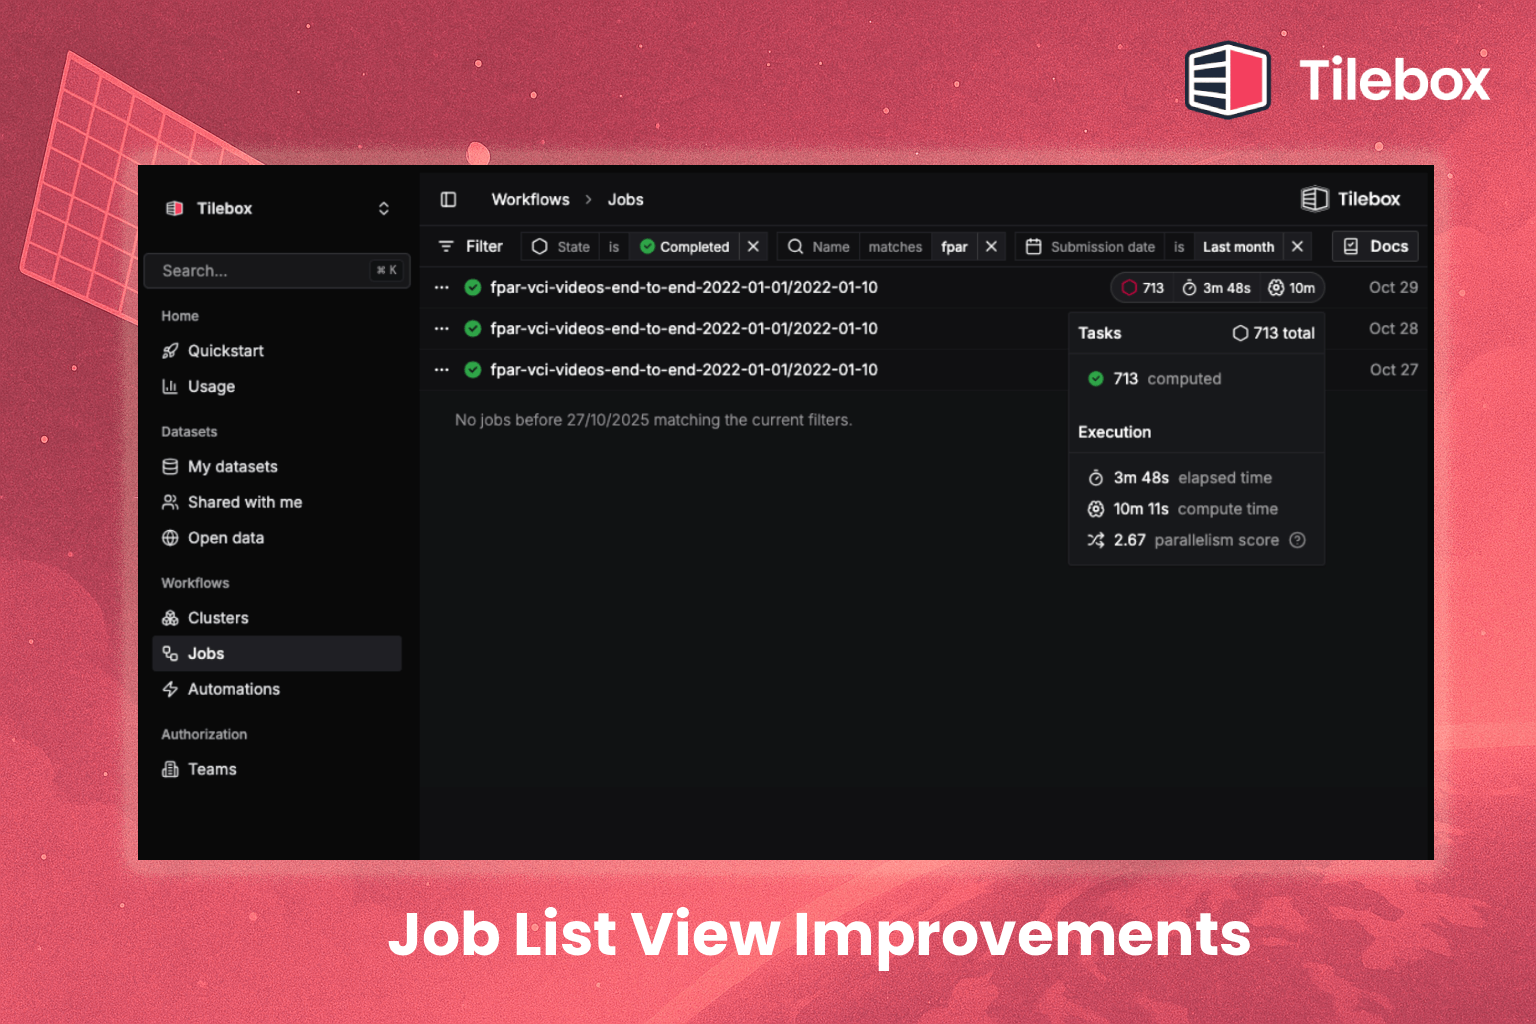 The job list view in the Tilebox Console has been completely redesigned:
* Infinite scrolling for long job lists
* Improved filtering and search
* Filter by state
* Filter by automation
* Filter by time range
* Filter by name
* Or an arbitrary combination of the above
* Better readability and organization
* Added progress indicators
* Added execution stats
* The same new filter options are also available in our [Language SDKs](/sdks)
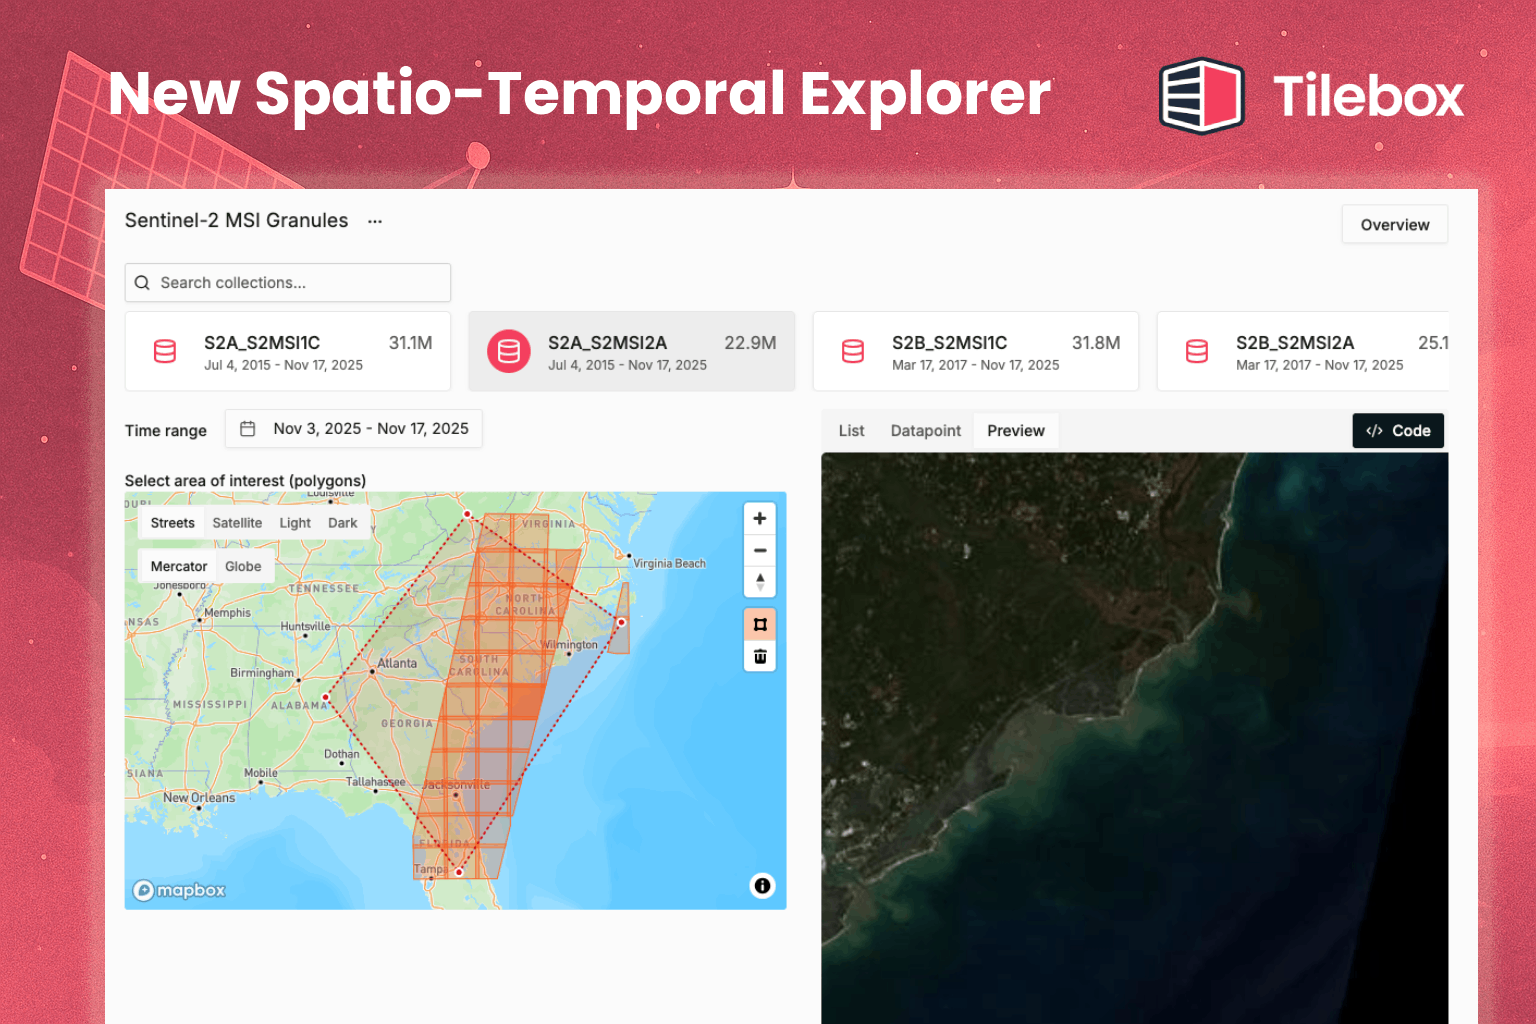 The dataset explorer in the Tilebox Console has received a major upgrade for spatio-temporal datasets:
* Overhaul of the Explorer view for Spatio-temporal datasets
* Display datapoint footprints directly on the map
* Display thumbnails and quicklooks of datapoints directly in the Console
* Added code snippet for storage access to the `Export as Code` dialog
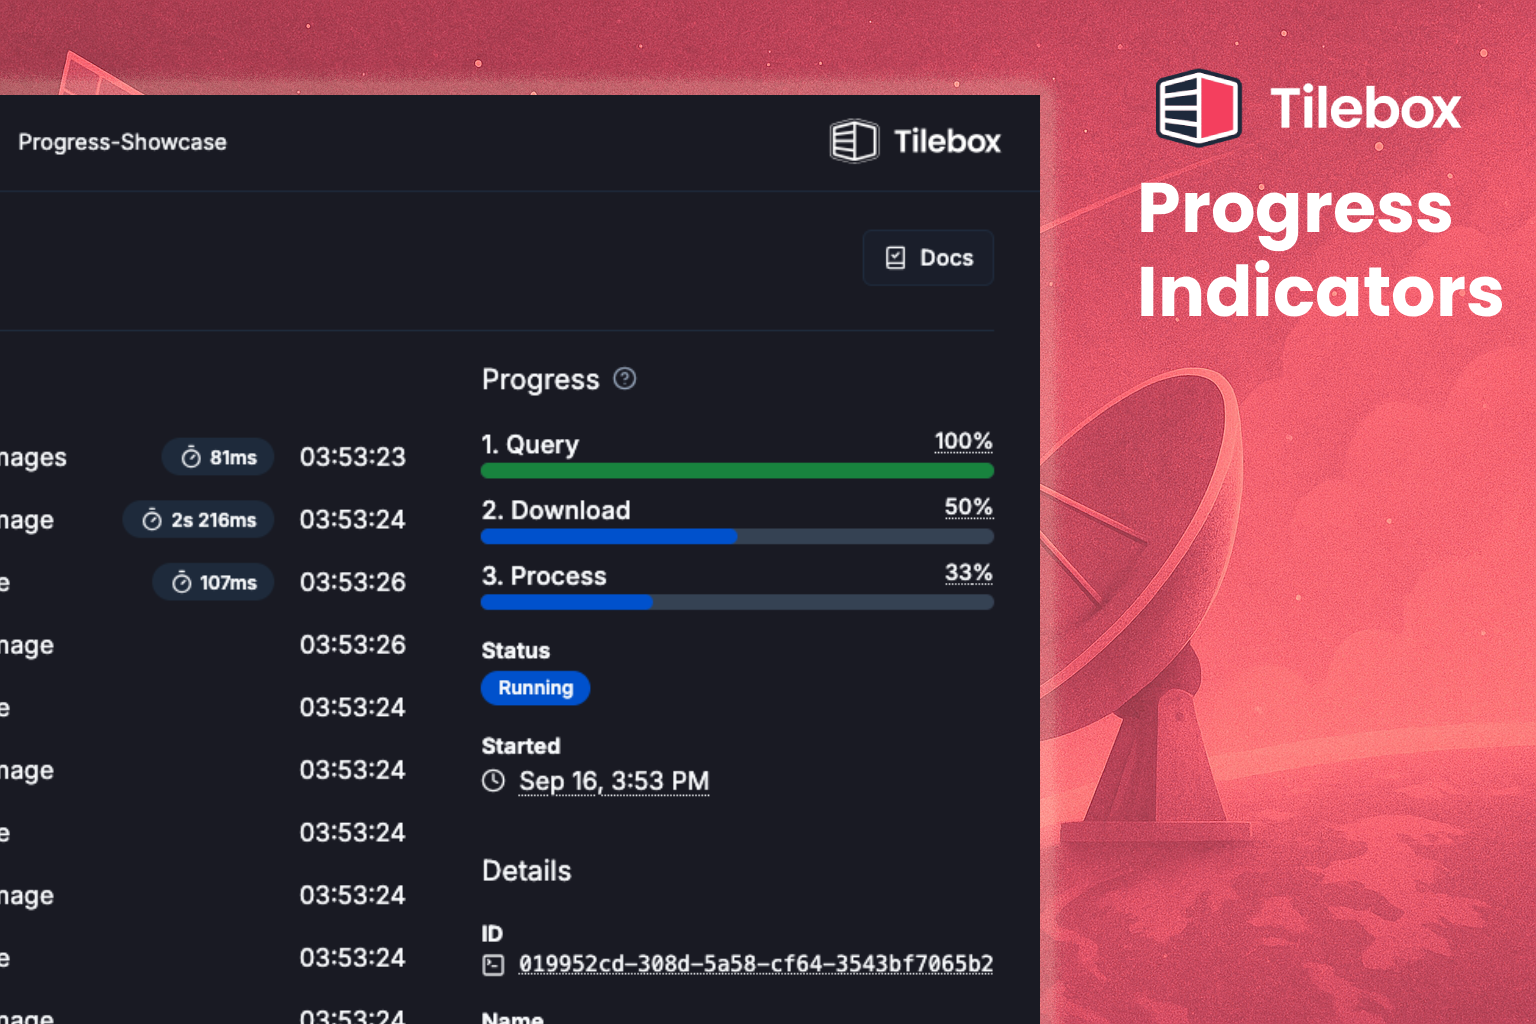 User defined progress indicators for jobs are now available. See the [progress documentation](/workflows/progress) for more details.
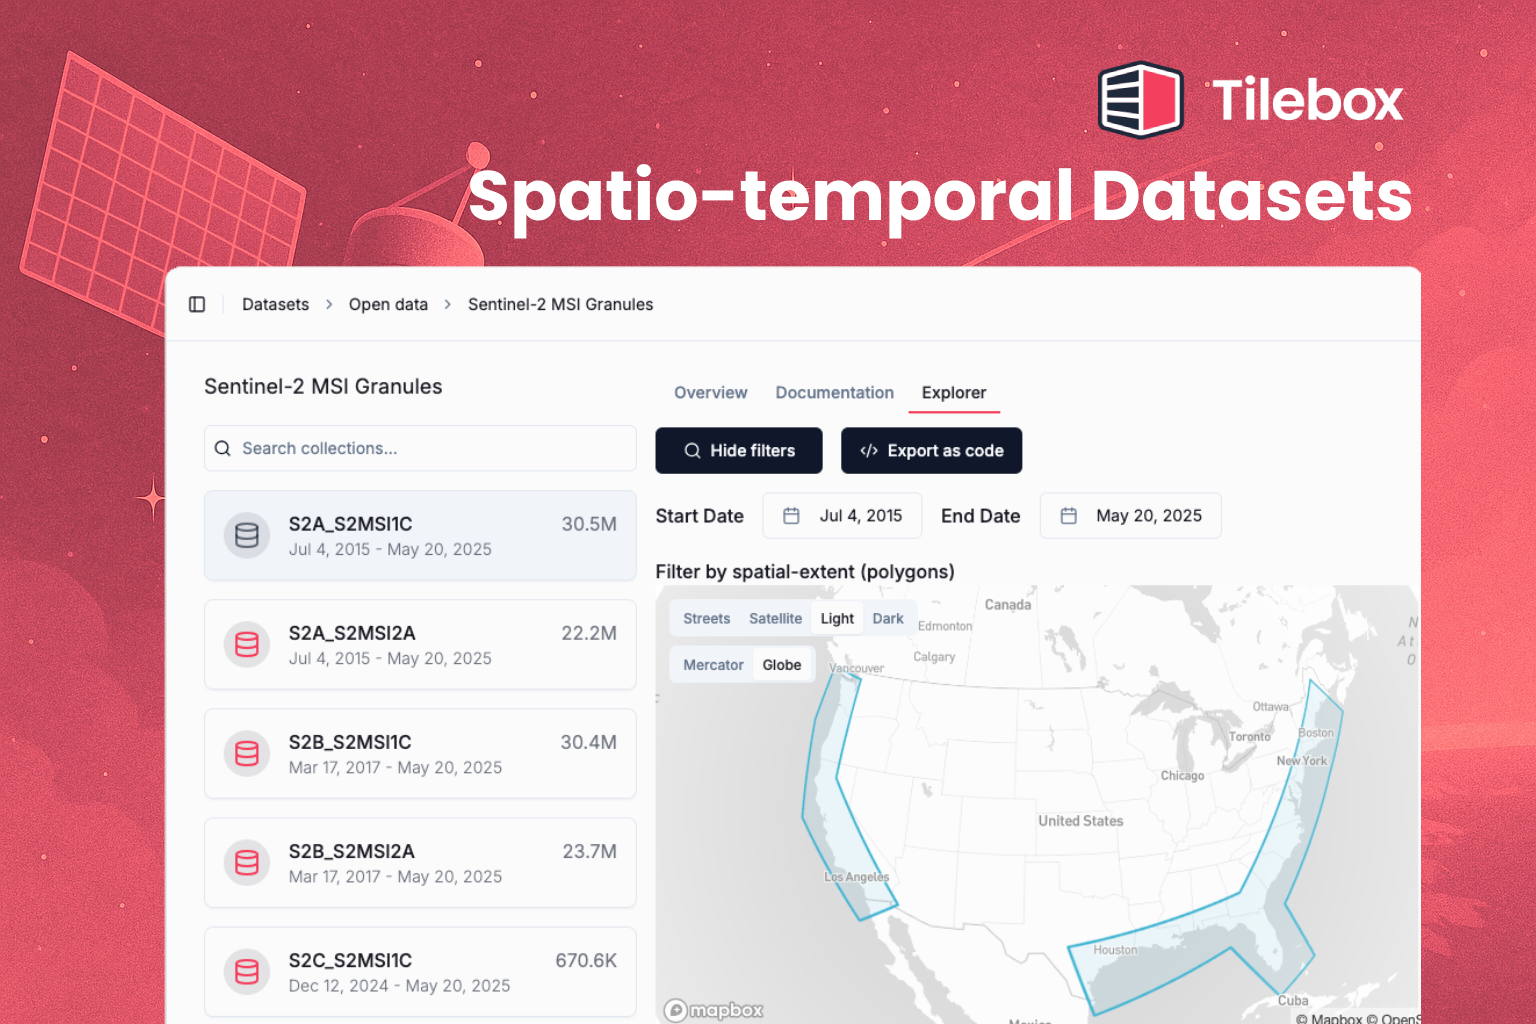 Spatio-temporal datasets are officially out, fully supported in all languages and available as a category to create in custom datasets!
The core problems that spatio-temporal datasets solve are
* finding relevant data quickly (e.g. all Sentinel 2 granules along the US coastline, last year),
* storing auxiliary geographically coded data (e.g. weather station data, ground truth data),
* cataloging higher level data and results
[Here's a short video](https://share.descript.com/view/khO3QJslhgU) on performance and core capabilities.
We're excited about this as cataloging has until now been an unsexy but hard problem, and it's great to finally have a solution out there
**More information**
* [Spatio Temporal datasets documentation](https://docs.tilebox.com/datasets/types/spatiotemporal)
* All open data now supports spatio-temporal queries
* [Create your own spatio-temporal datasets](/guides/datasets/create)
* [Ingesting spatio-temporal data](/datasets/ingest)
 Create your own custom datasets!
* statically typed
* with clients in Python and Go
Use it to organize anything from telemetry, raw payload metadata, auxiliary sensor data, configuration data, or
internal data catalogs.
**Quickstart**
1. Specify the data type in the Console
2. Create a collection
3. Use client.ingest() to ingest a `xarray.Dataset` or `pandas.DataFrame`
4. Query away!
For detailed instructions, check out the [Creating a dataset](/guides/datasets/create) how-to guide.
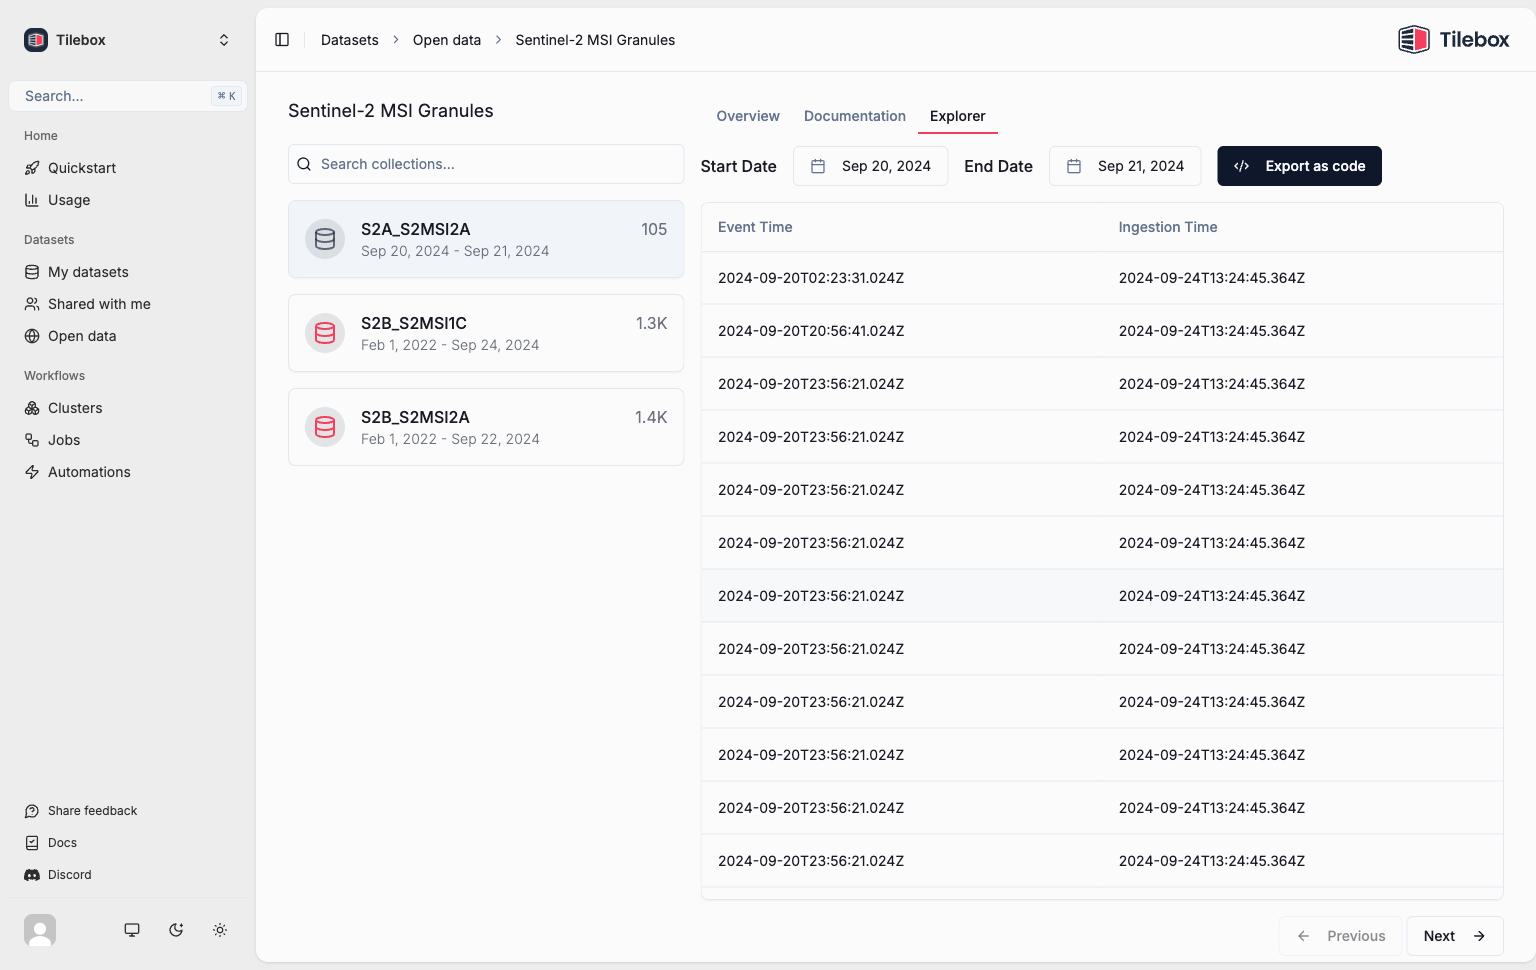
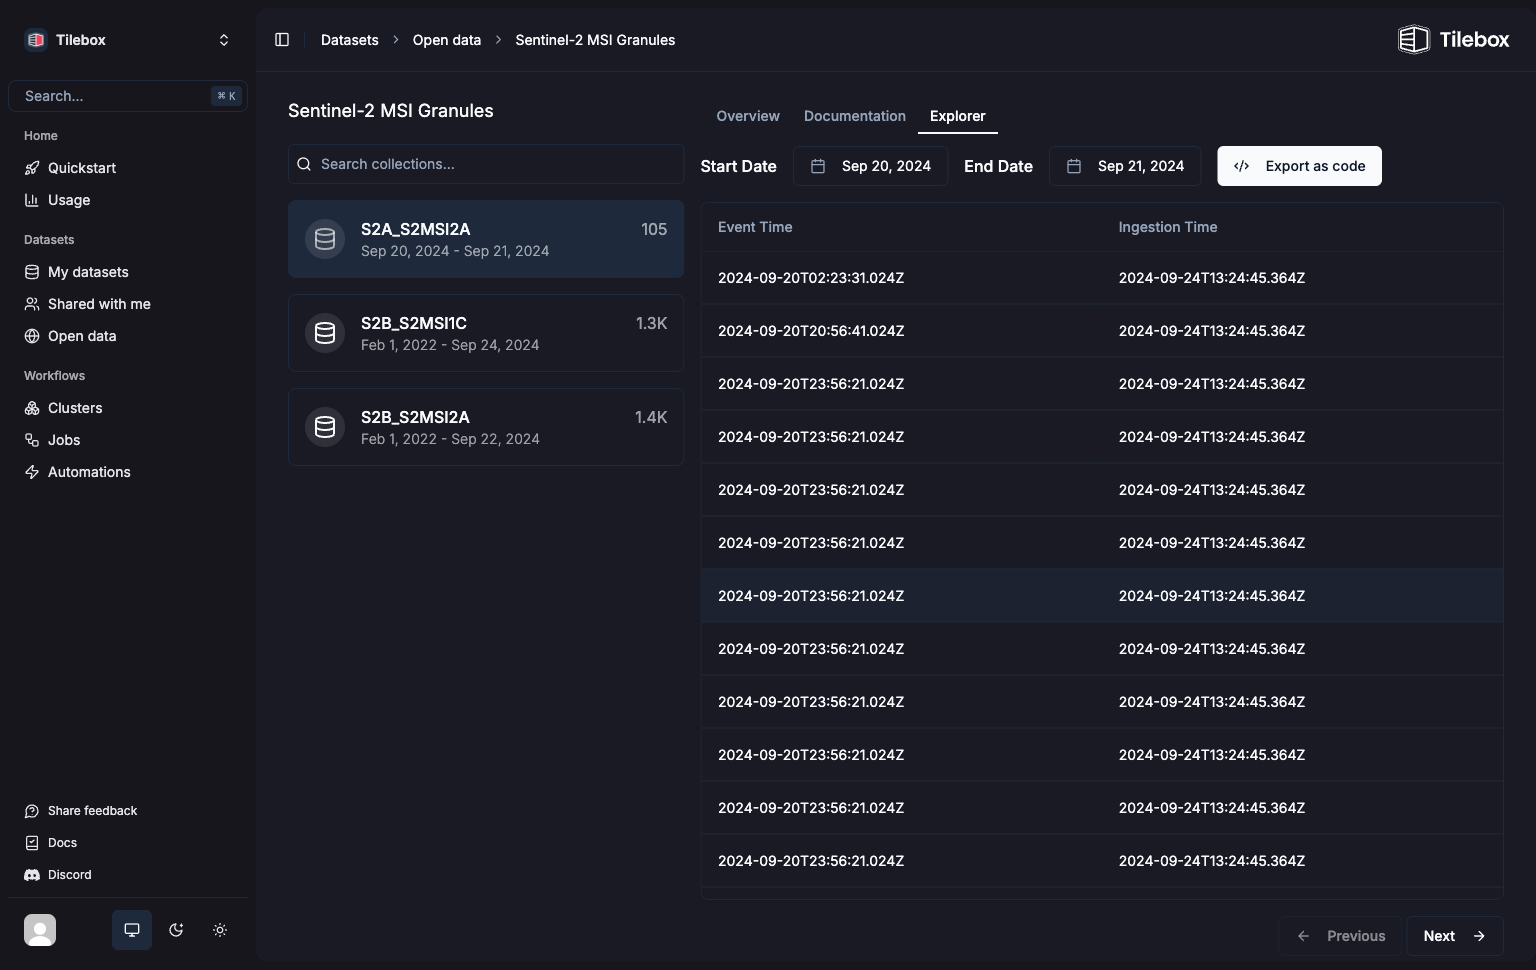 When you click a specific event time in the data point list view, a detailed view of that data point will appear.
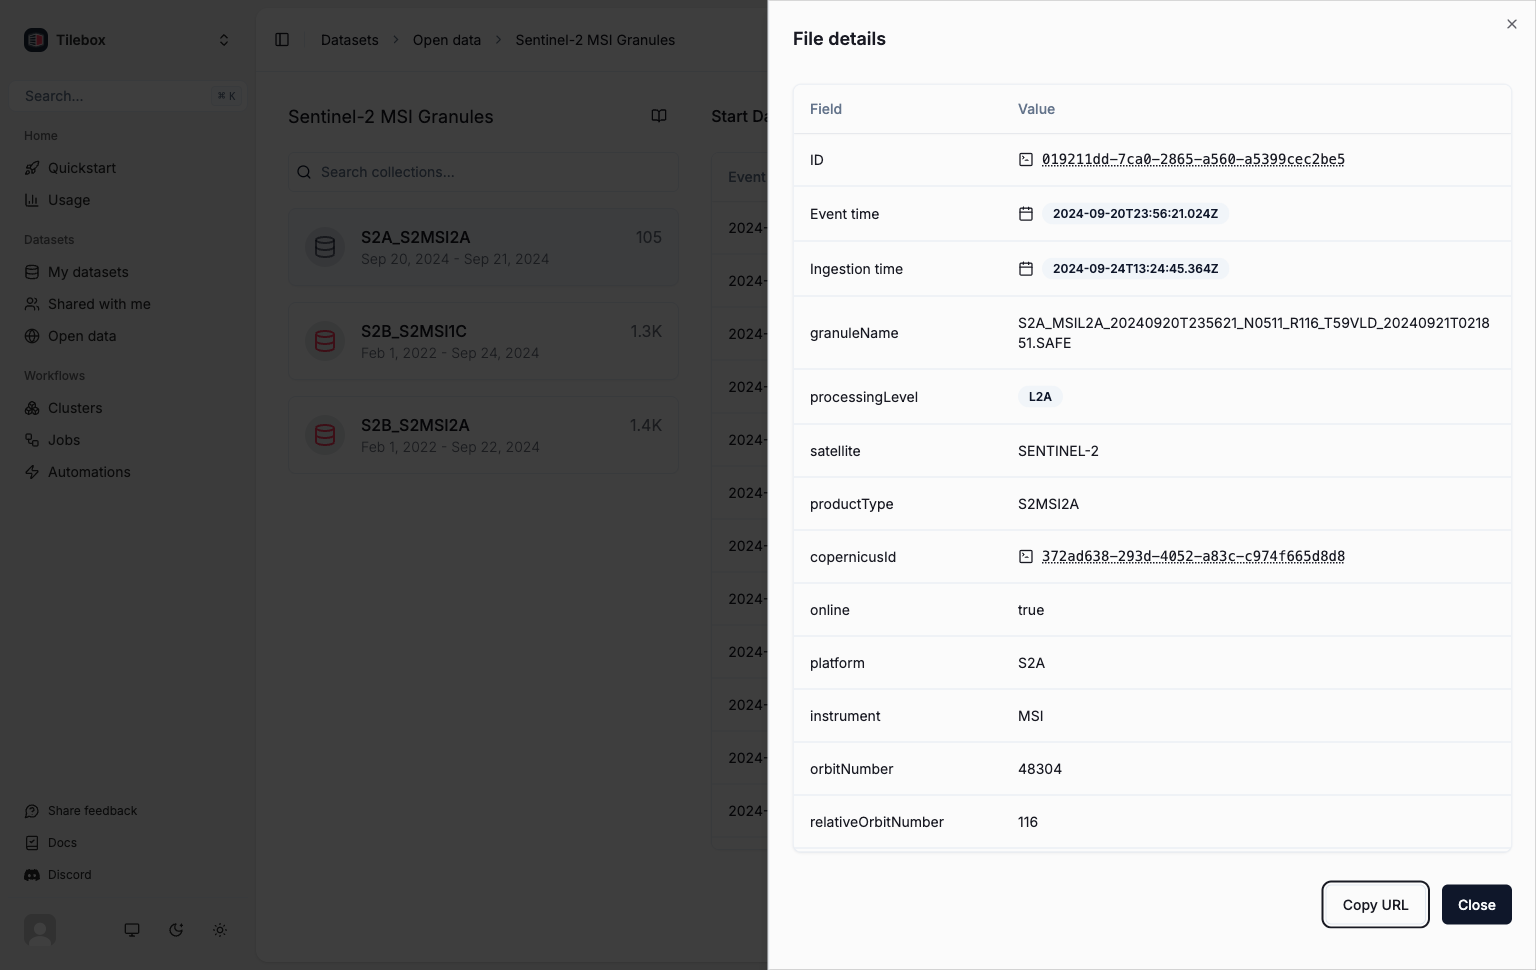
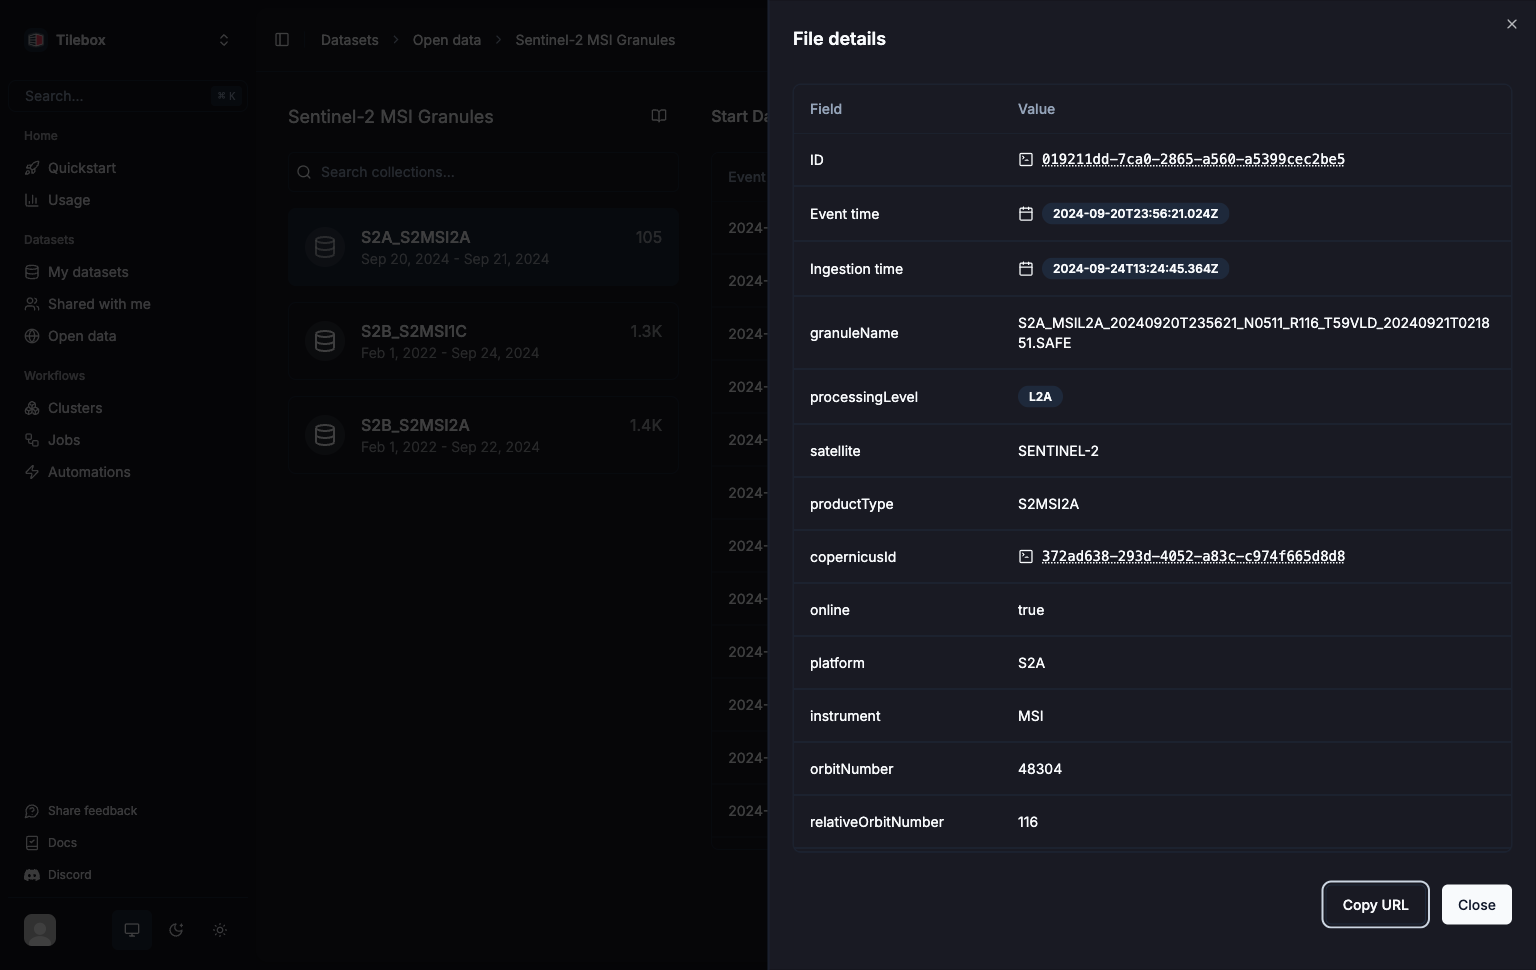 ### Export as Code
After selecting a dataset, collection, and time range, you can export the current selection as a Python code snippet. This will copy a code snippet like the one below to your clipboard.
 ## Account
### API Keys
The API Keys page enables you to manage your API keys. You can create new API keys, revoke existing ones, and view currently active API keys.
 ### Usage
The Usage page allows you to view your current usage of the Tilebox API.
 # Collections
Source: https://docs.tilebox.com/datasets/concepts/collections
Learn about dataset collections
Collections group data points within a dataset. They help represent logical groupings of data points that are commonly queried together.
For example, if your dataset includes data from a specific instrument on different satellites, you can group the data points from each satellite into a collection.
Refer to the examples below for common use cases when working with collections.
These examples assume that you have already created a client and selected a dataset as shown below.
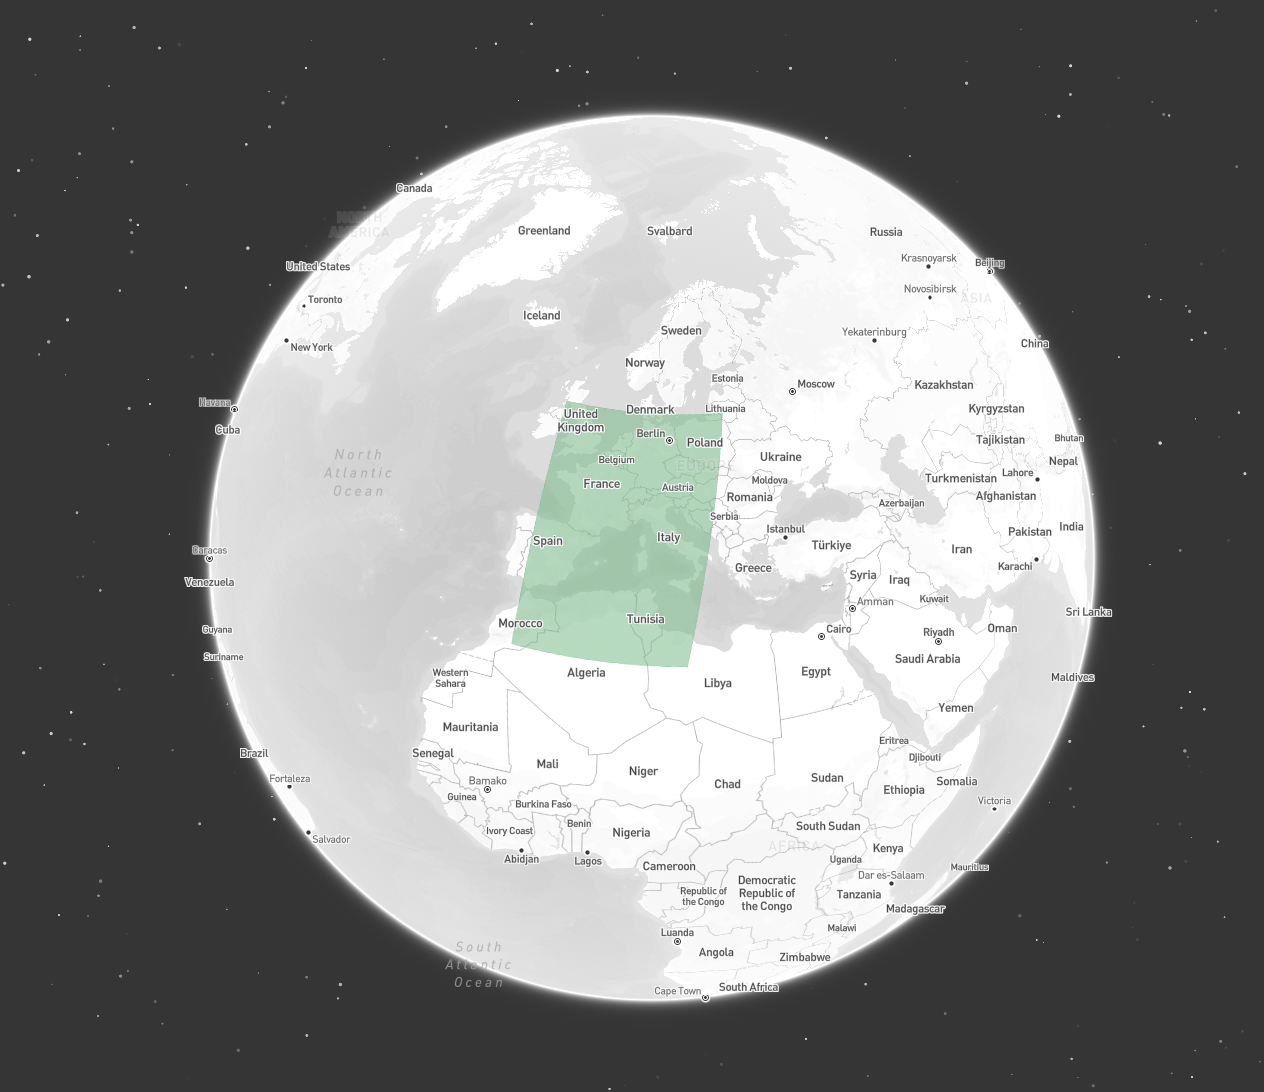
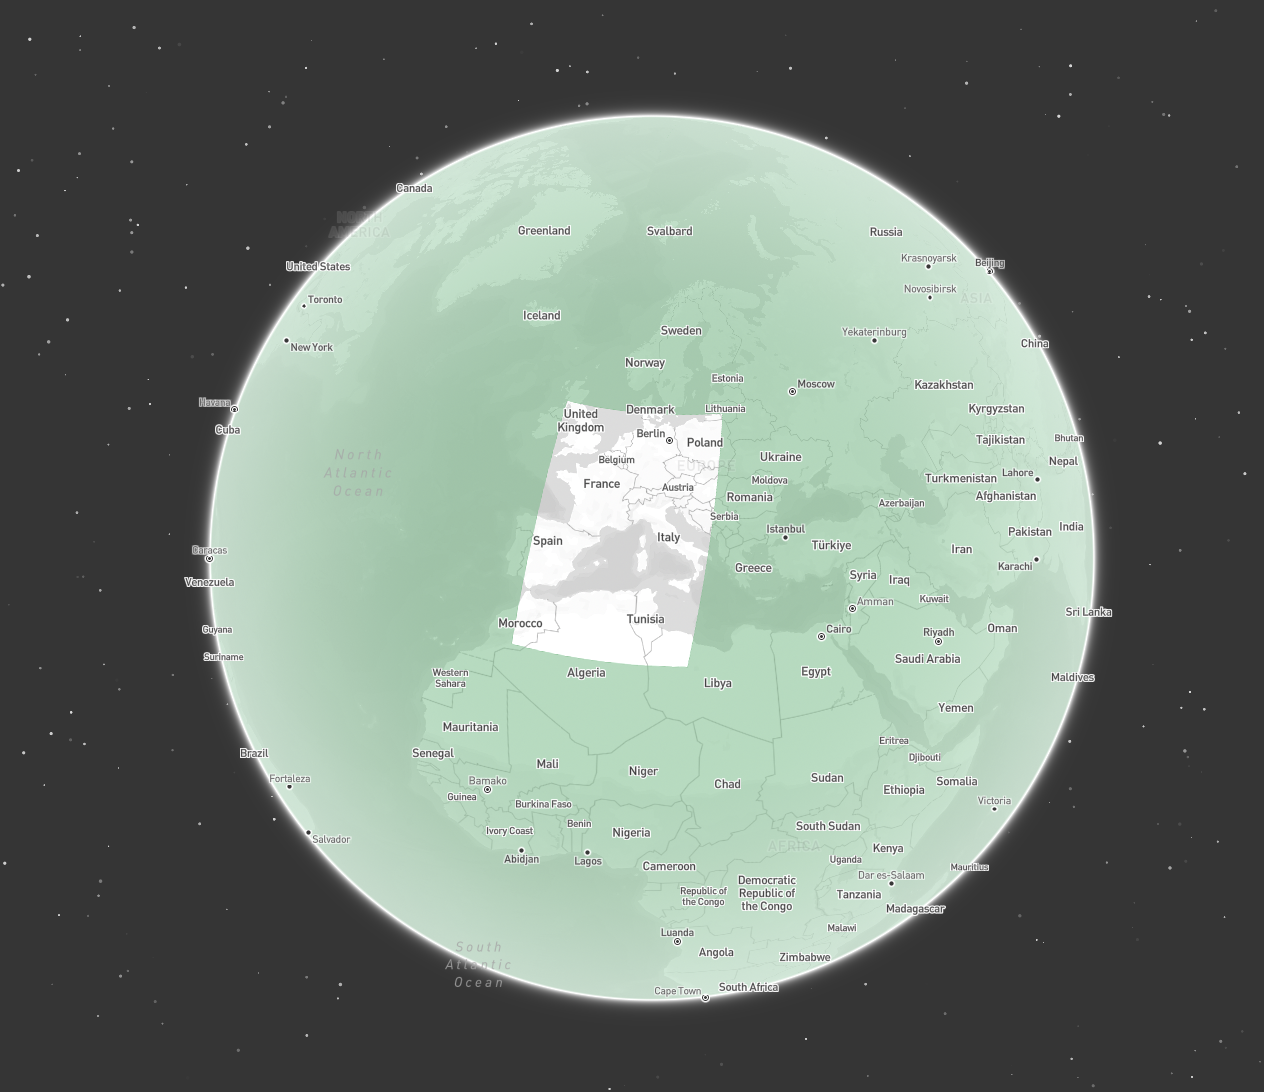
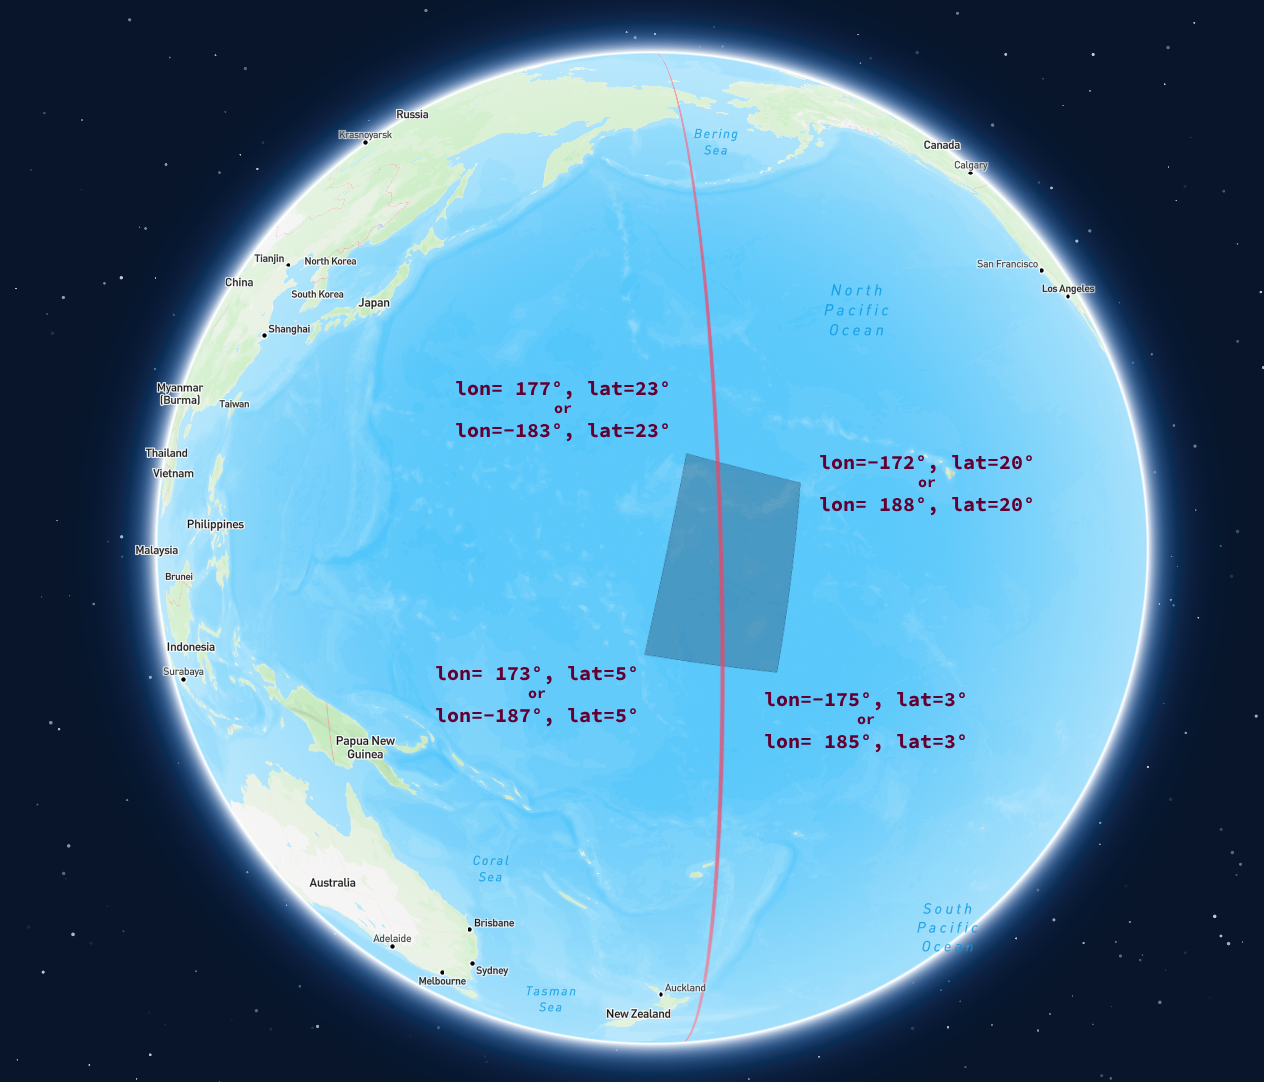
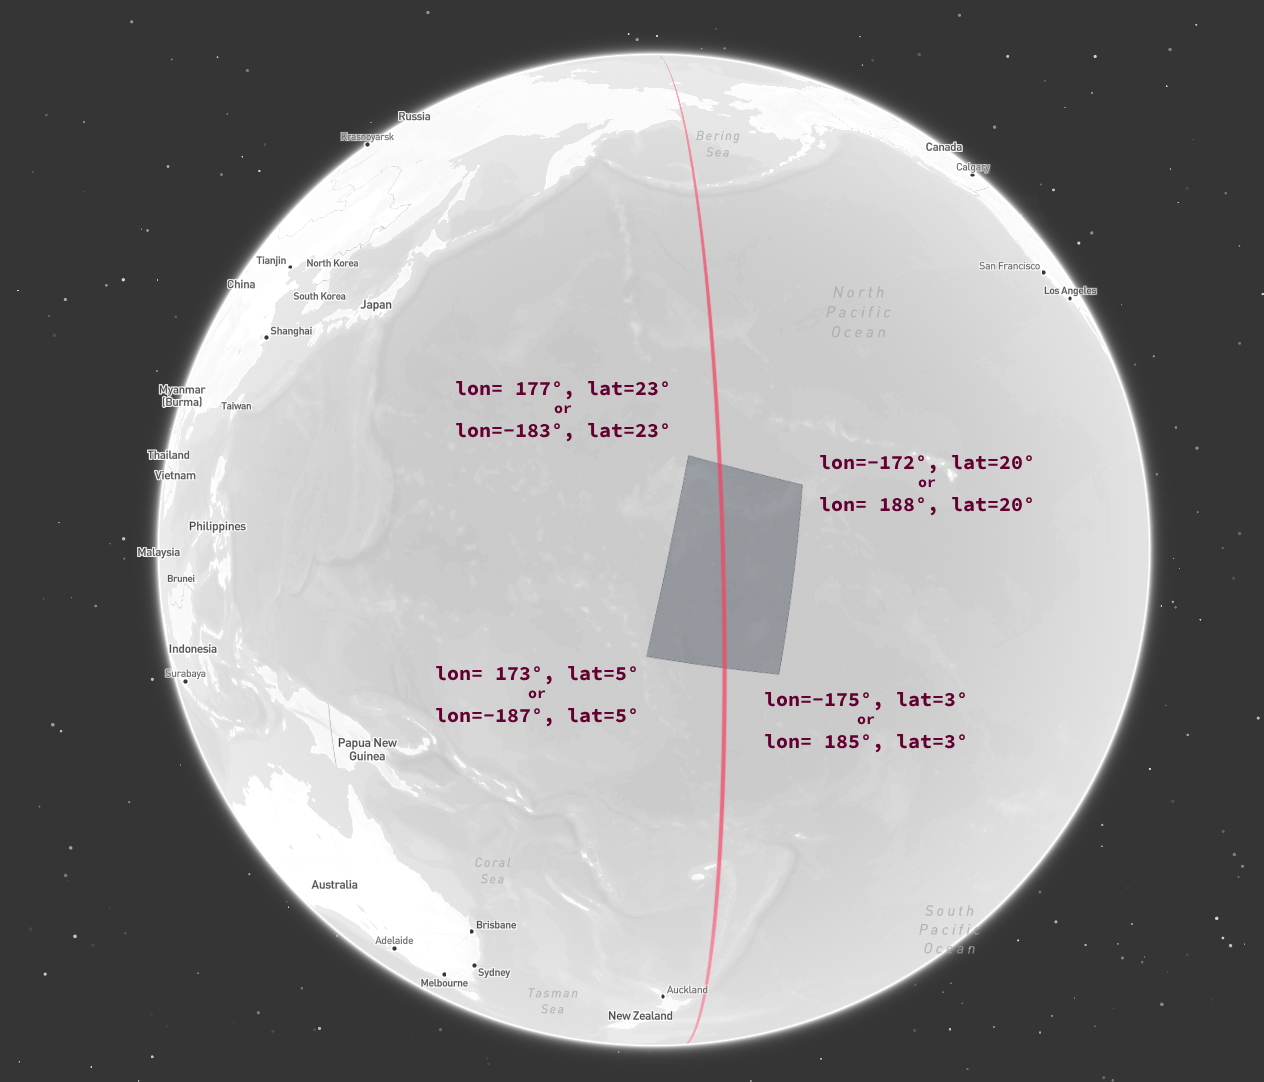 Below are a couple of different ways to express such a geometry.
```plaintext Using exact longitude / latitude coordinates for each point theme={"system"}
POLYGON ((173 5, -175 3, -172 20, 177 23, 173 5))
```
While valid, this representation can cause issues for many libraries performing calculations or visualizations in a Cartesian coordinate system. The line segment from `lon=173` to `lon=-175` is interpreted as a `348-degree` line crossing the null meridian, spanning nearly the entire globe.
Visualizations of such geometries often appear as shown below.
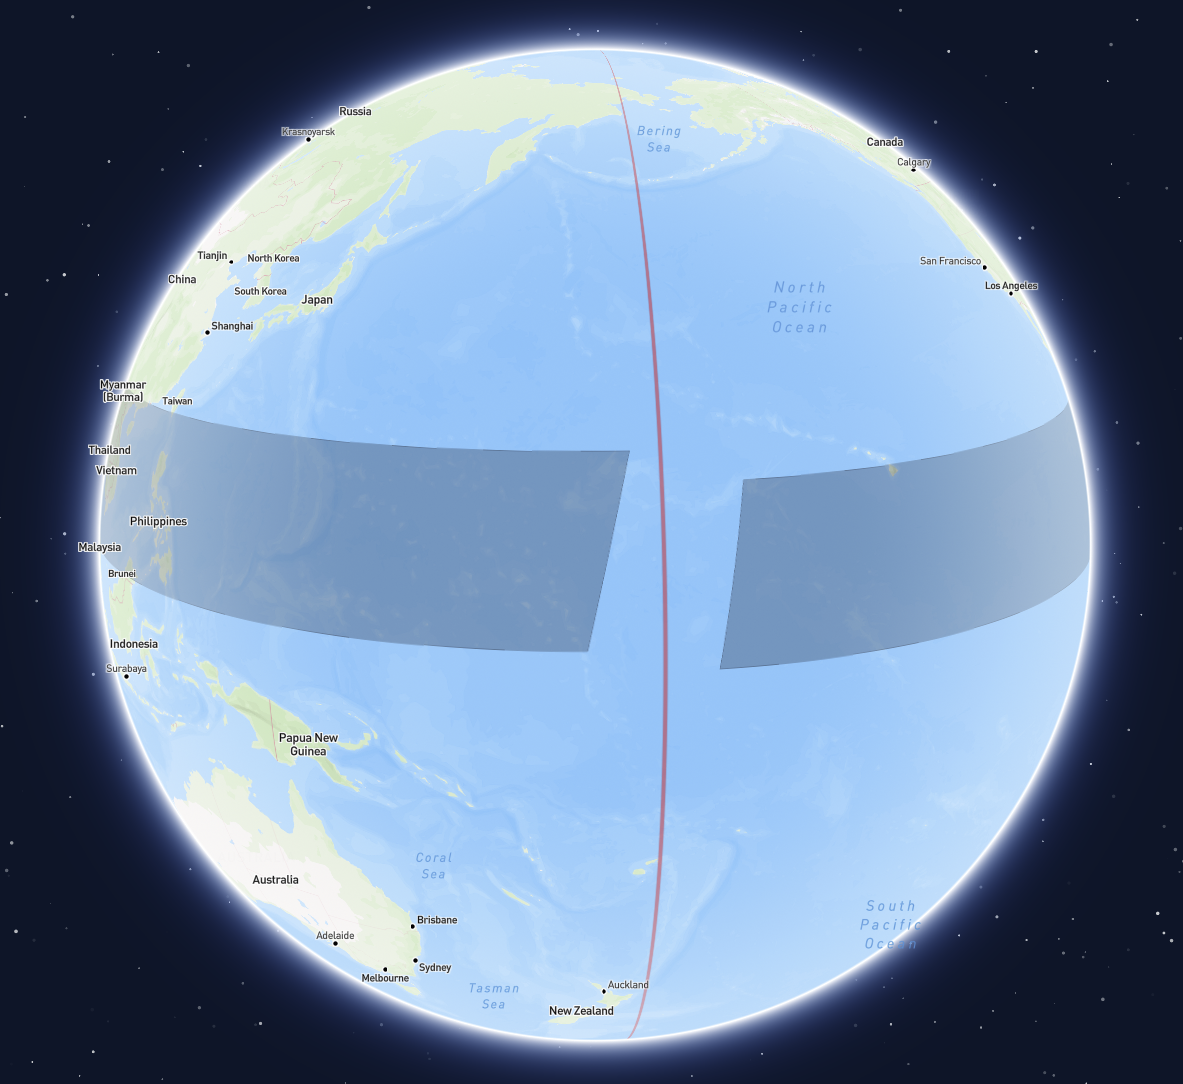
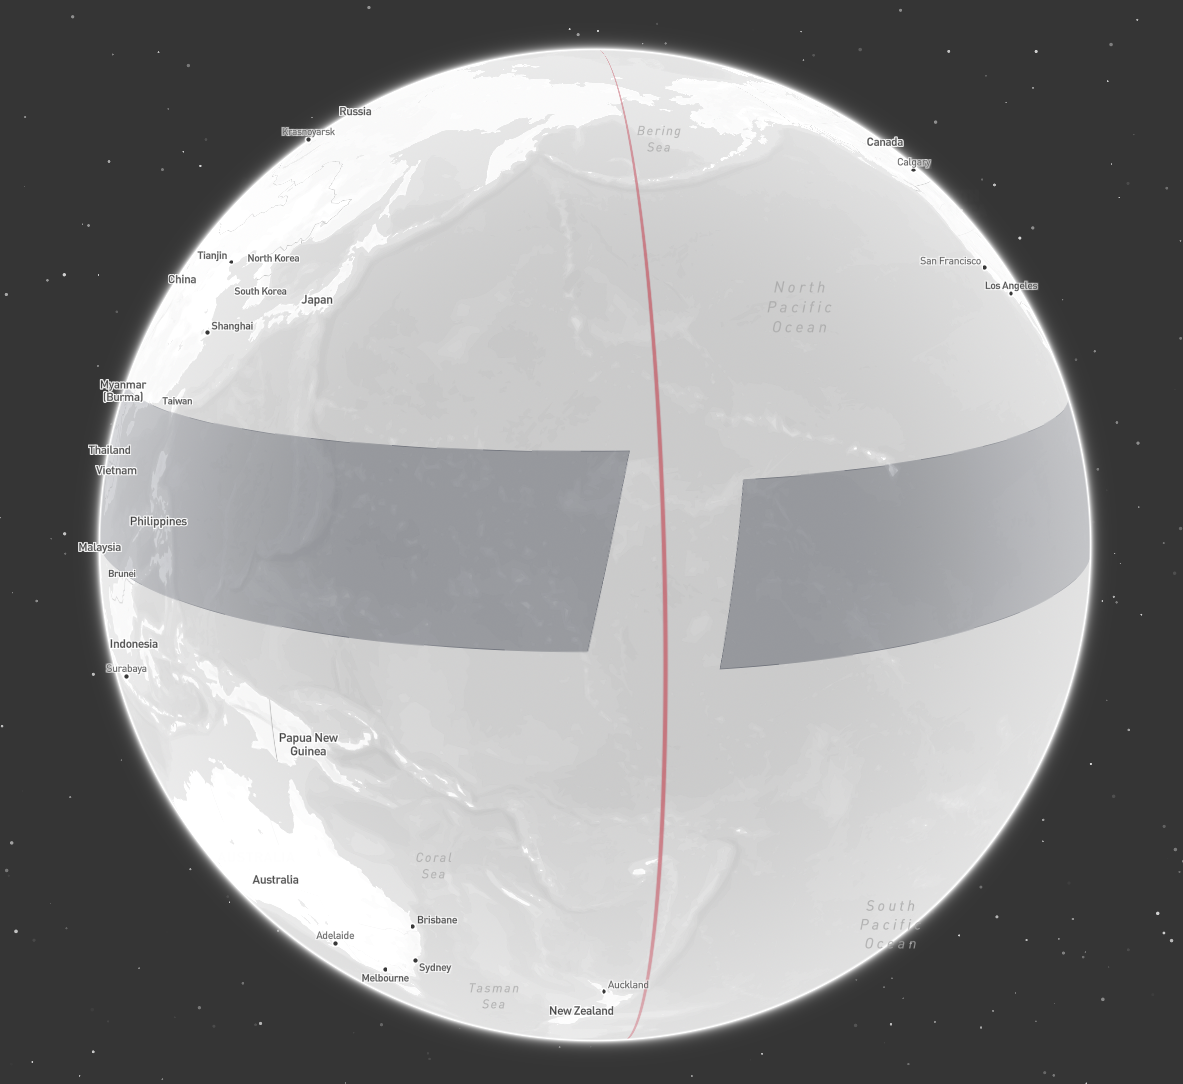 To mitigate these issues, some Cartesian coordinate tools extend the longitude range beyond the usual `[-180, 180]` bounds.
Expressing the geometry in such a way, may look like this.
```plaintext Extending the longitude range beyond 180 theme={"system"}
POLYGON ((173 5, 185 3, 188 20, 177 23, 173 5))
```
Or, the exact same area on the globe can also be expressed as a geometry by extending the longitude range below `-180`.
```plaintext Extending the longitude range below -180 theme={"system"}
POLYGON ((-187 5, -175 3, -172 20, -183 23, -187 5))
```
While most visualization tools may handle such geometries correctly, special care is required for intersection and containment checks.
The following code snippet demonstrates this by constructing a Polygon that covers the same area using both methods and checking for intersection (which should logically occur, as they represent the same geographic area).
```python Incorrect intersection check theme={"system"}
from shapely import from_wkt
a = from_wkt("POLYGON ((173 5, 185 3, 188 20, 177 23, 173 5))")
b = from_wkt("POLYGON ((-187 5, -175 3, -172 20, -183 23, -187 5))")
print(a.intersects(b)) # False
```
### Antimeridian Cutting
Additionally, none of the representations shown are valid according to the GeoJSON specification. The GeoJSON specification does offers a solution for this problem, though, which is [Antimeridian Cutting](https://datatracker.ietf.org/doc/html/rfc7946#section-3.1.9).
It suggests always cutting lines and polygons that cross the antimeridian into two parts—one for the eastern hemisphere and one for the western hemisphere.
To achieve this, check out the [antimeridian](https://pypi.org/project/antimeridian/) python package, and an implementation of it in [Go](https://github.com/go-geospatial/antimeridian).
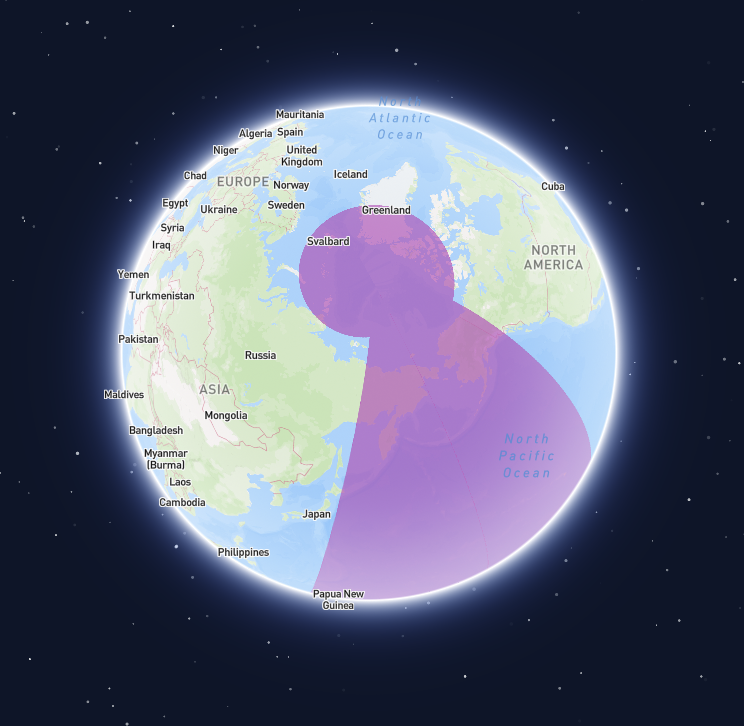
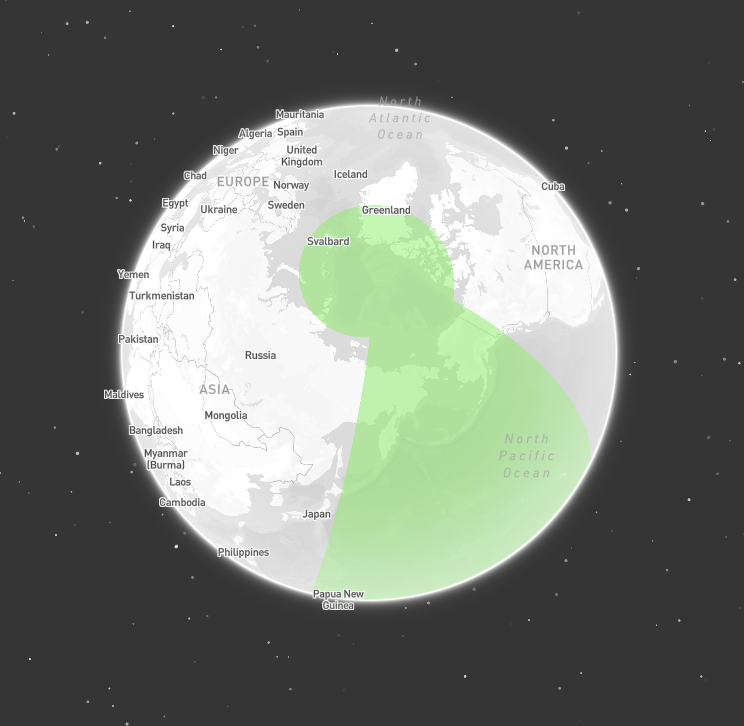

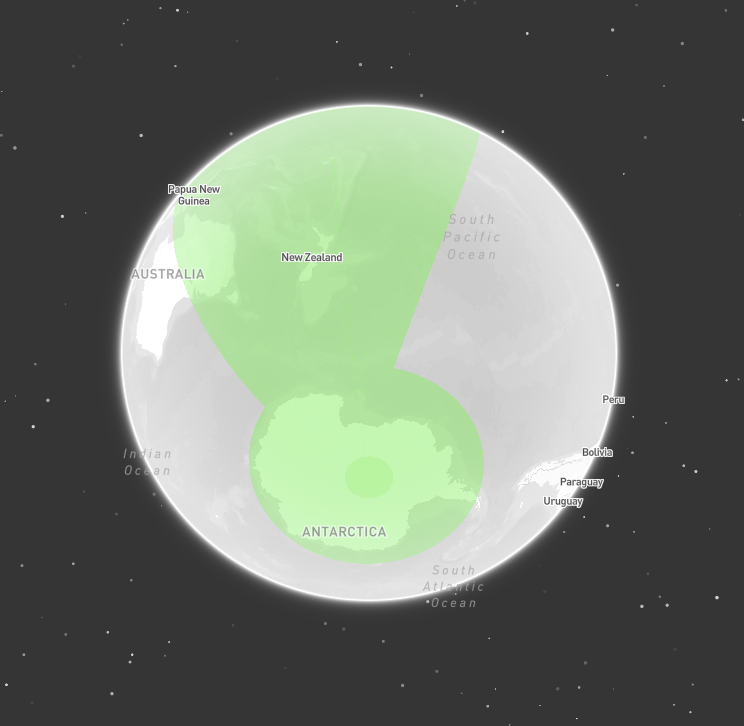
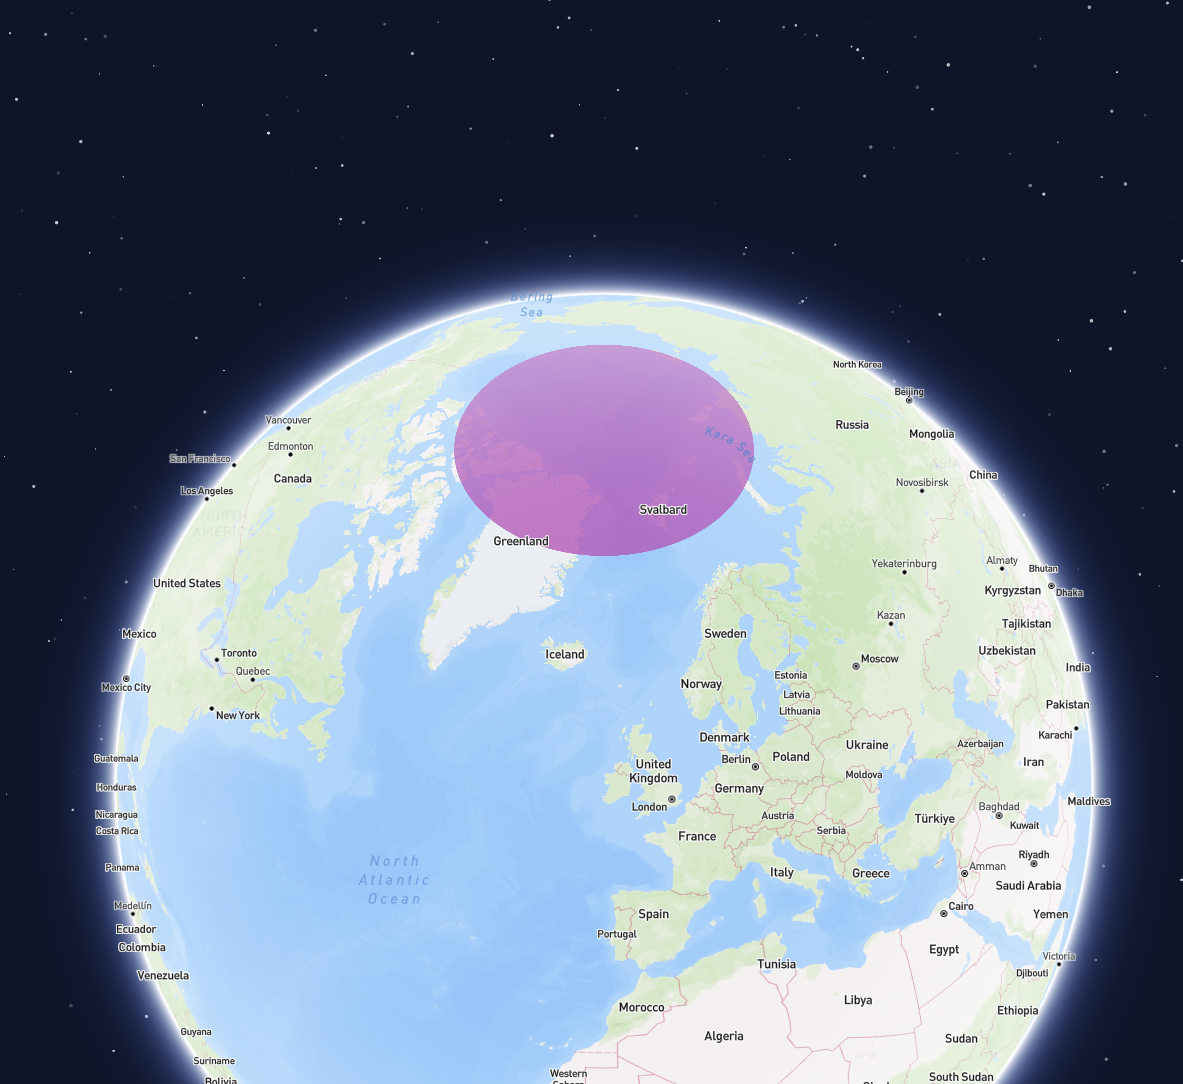
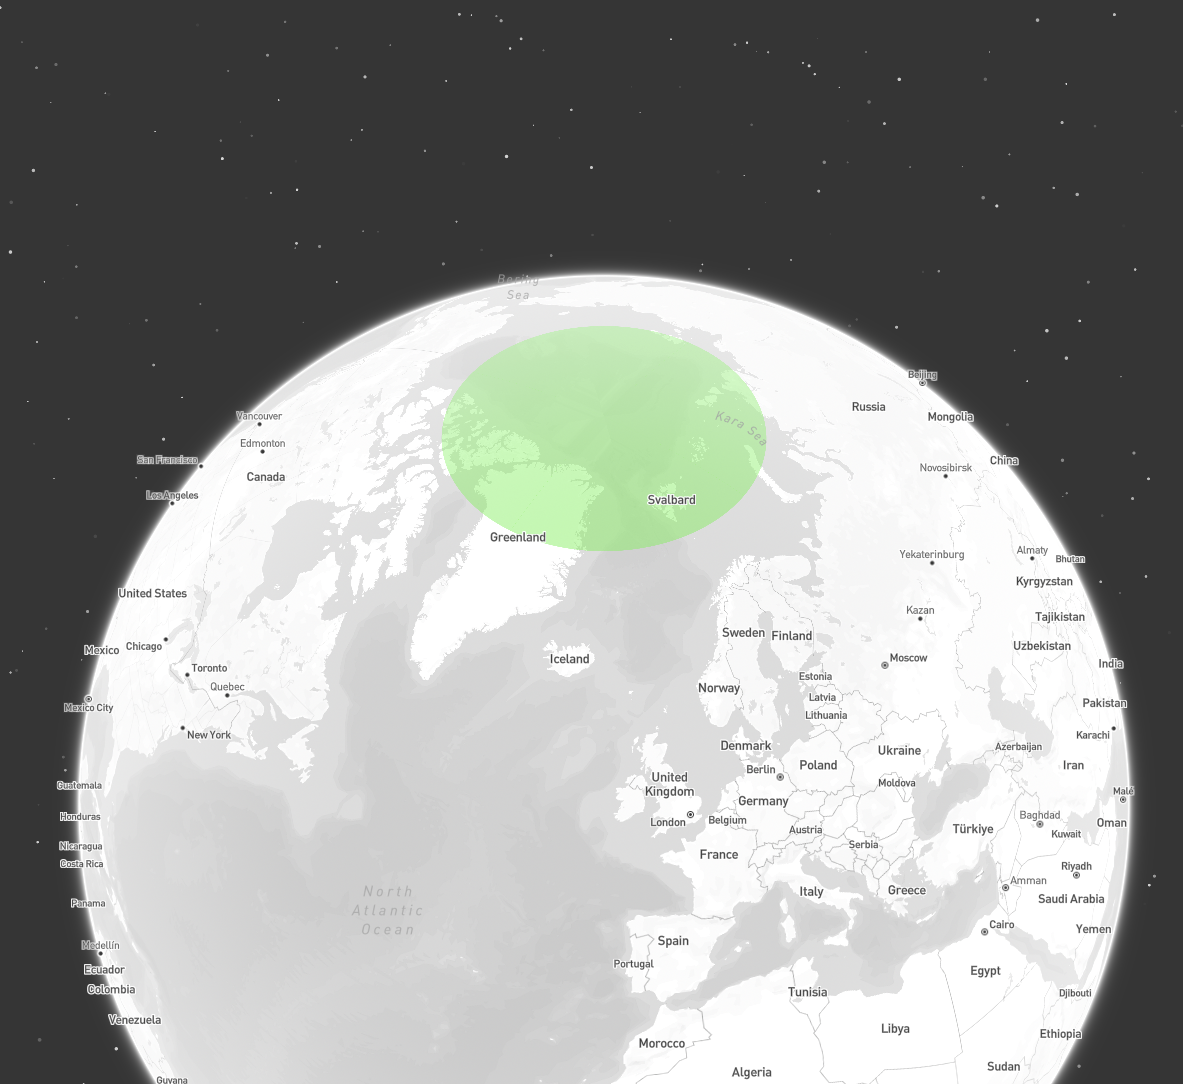 ```plaintext Geometry of a circular cap covering the north pole theme={"system"}
MULTIPOLYGON (
((-90 75, 0 75, 0 90, -90 90, -90 75)),
((0 75, 90 75, 90 90, 0 90, 0 75)),
((90 75, 180 75, 180 90, 90 90, 90 75)),
((-180 75, -90 75, -90 90, -180 90, -180 75))
)
```
# Ingesting Data
Source: https://docs.tilebox.com/datasets/ingest
Learn how to ingest data into a Tilebox dataset.
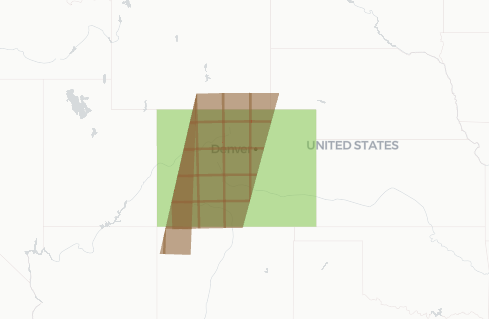
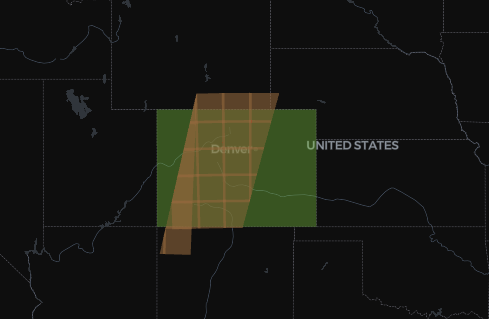
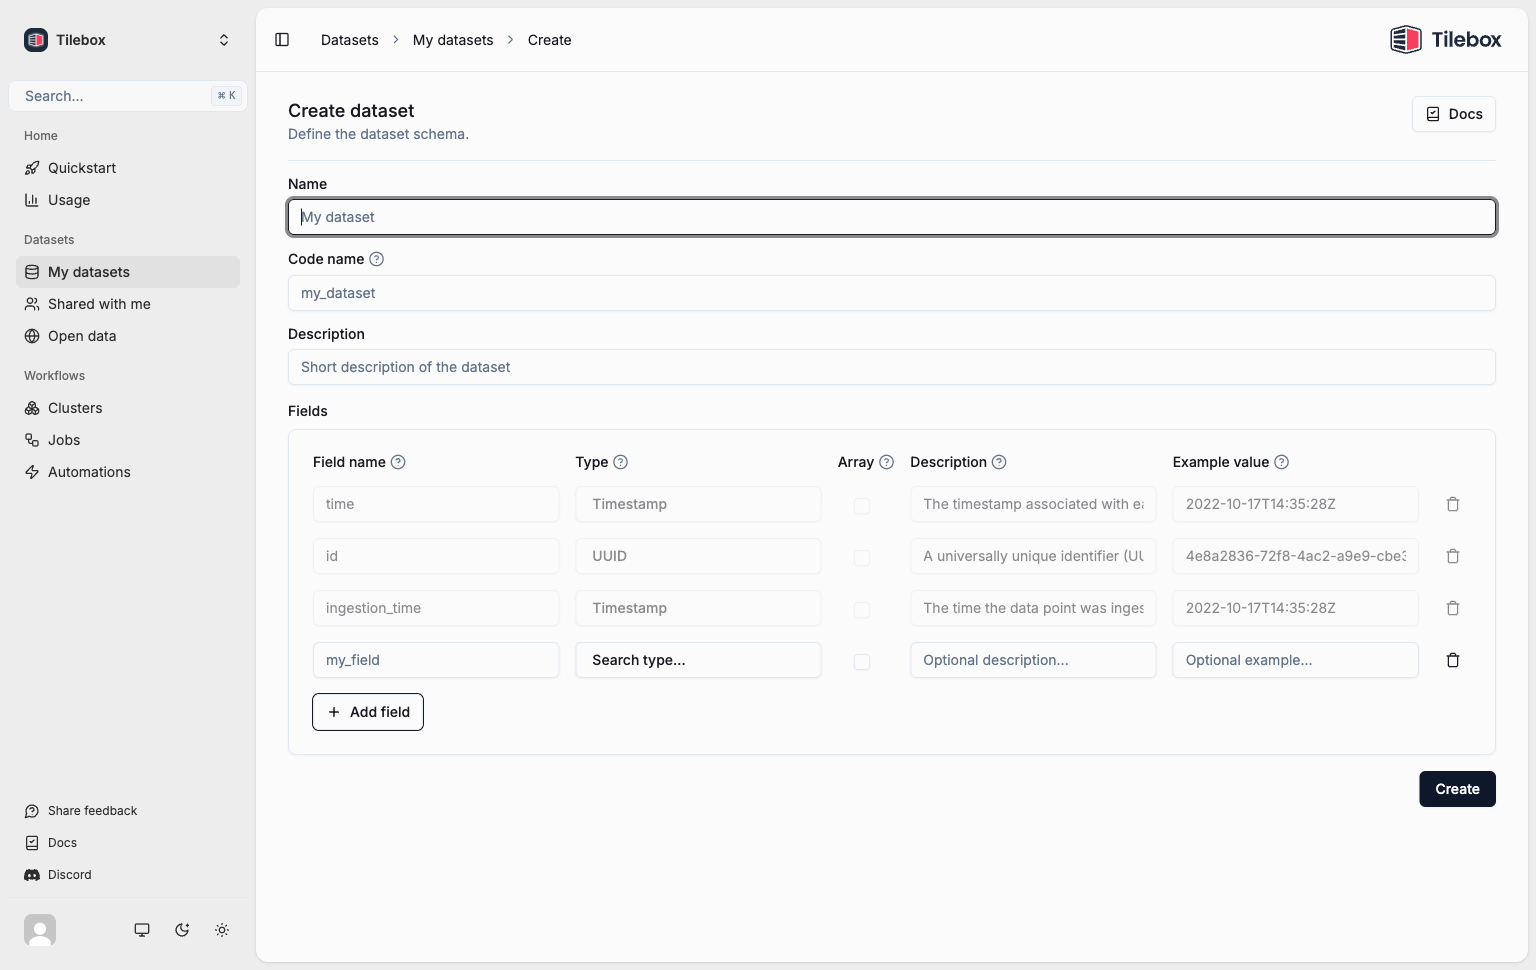
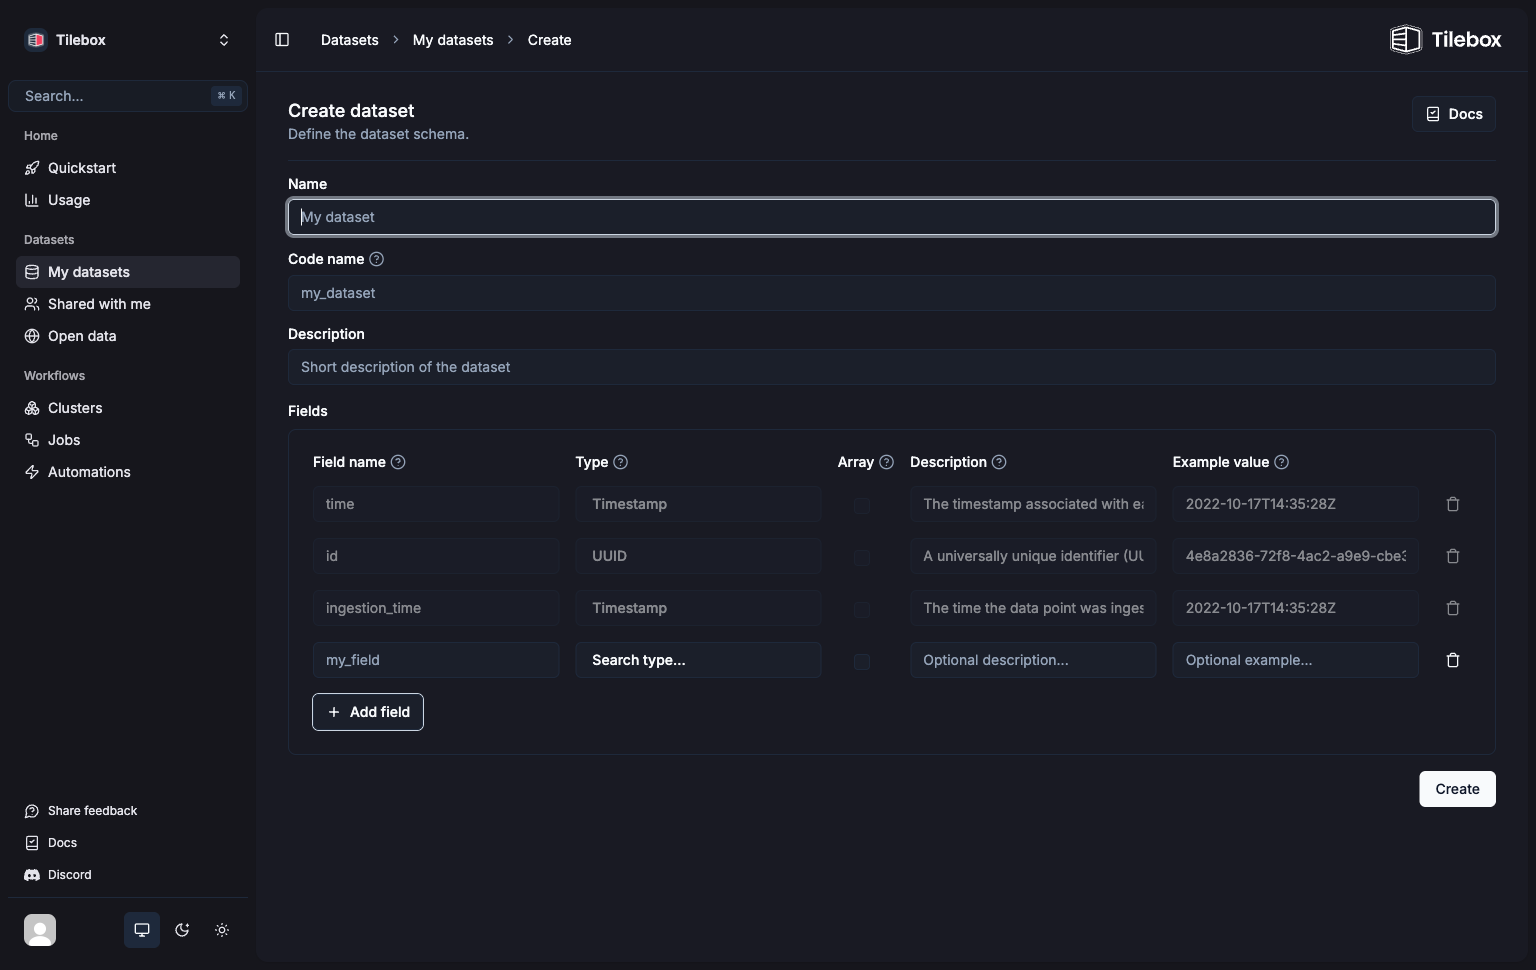
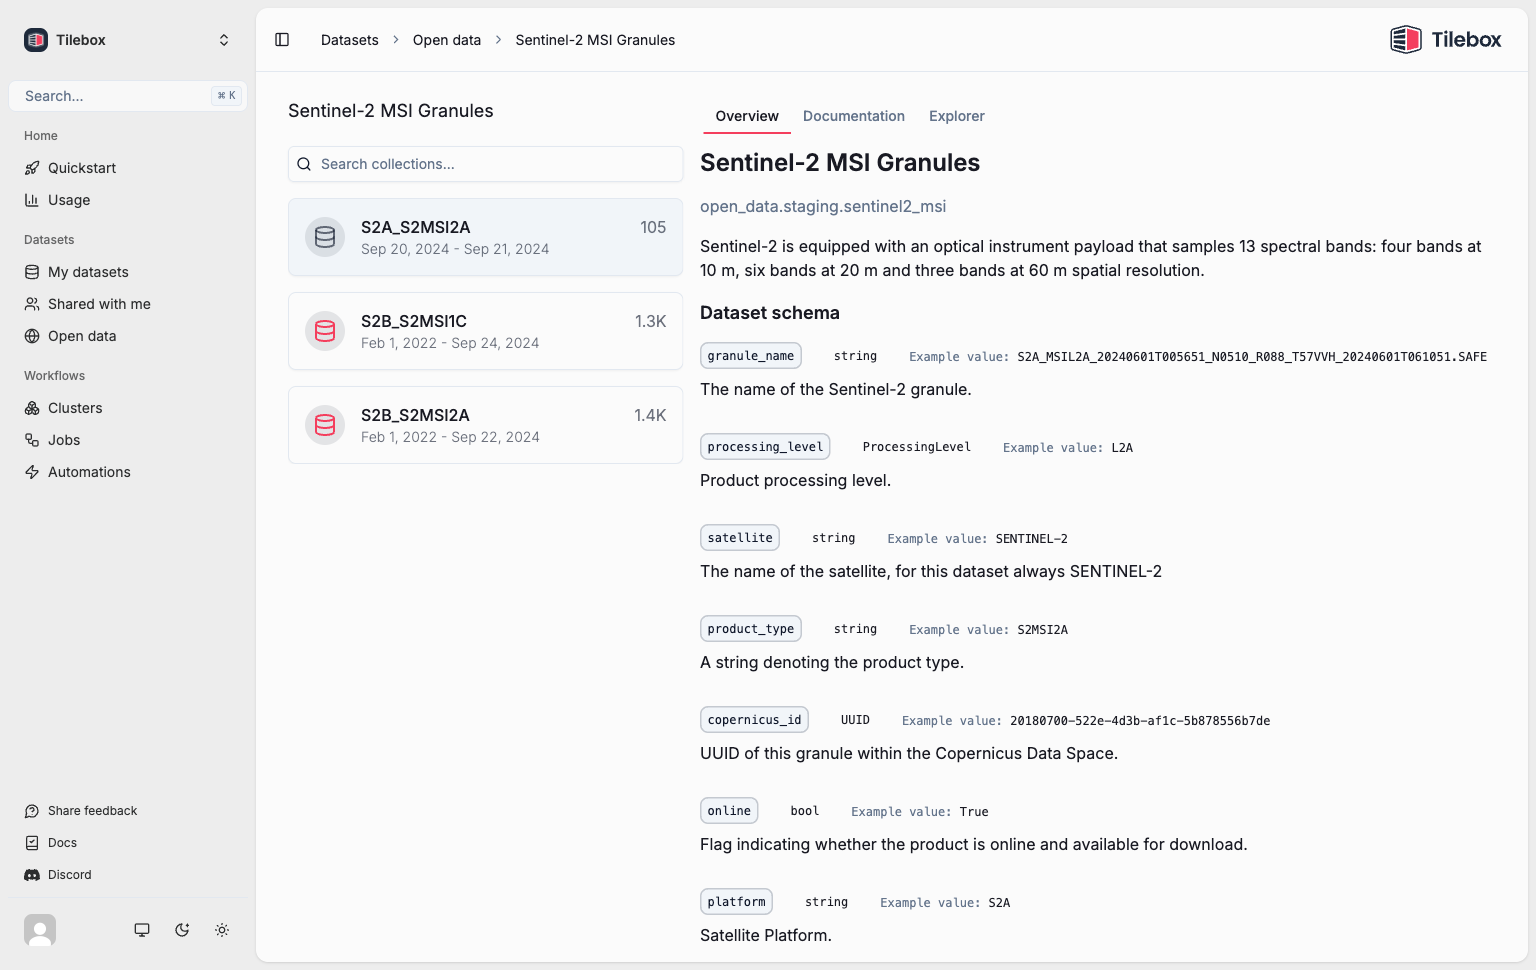
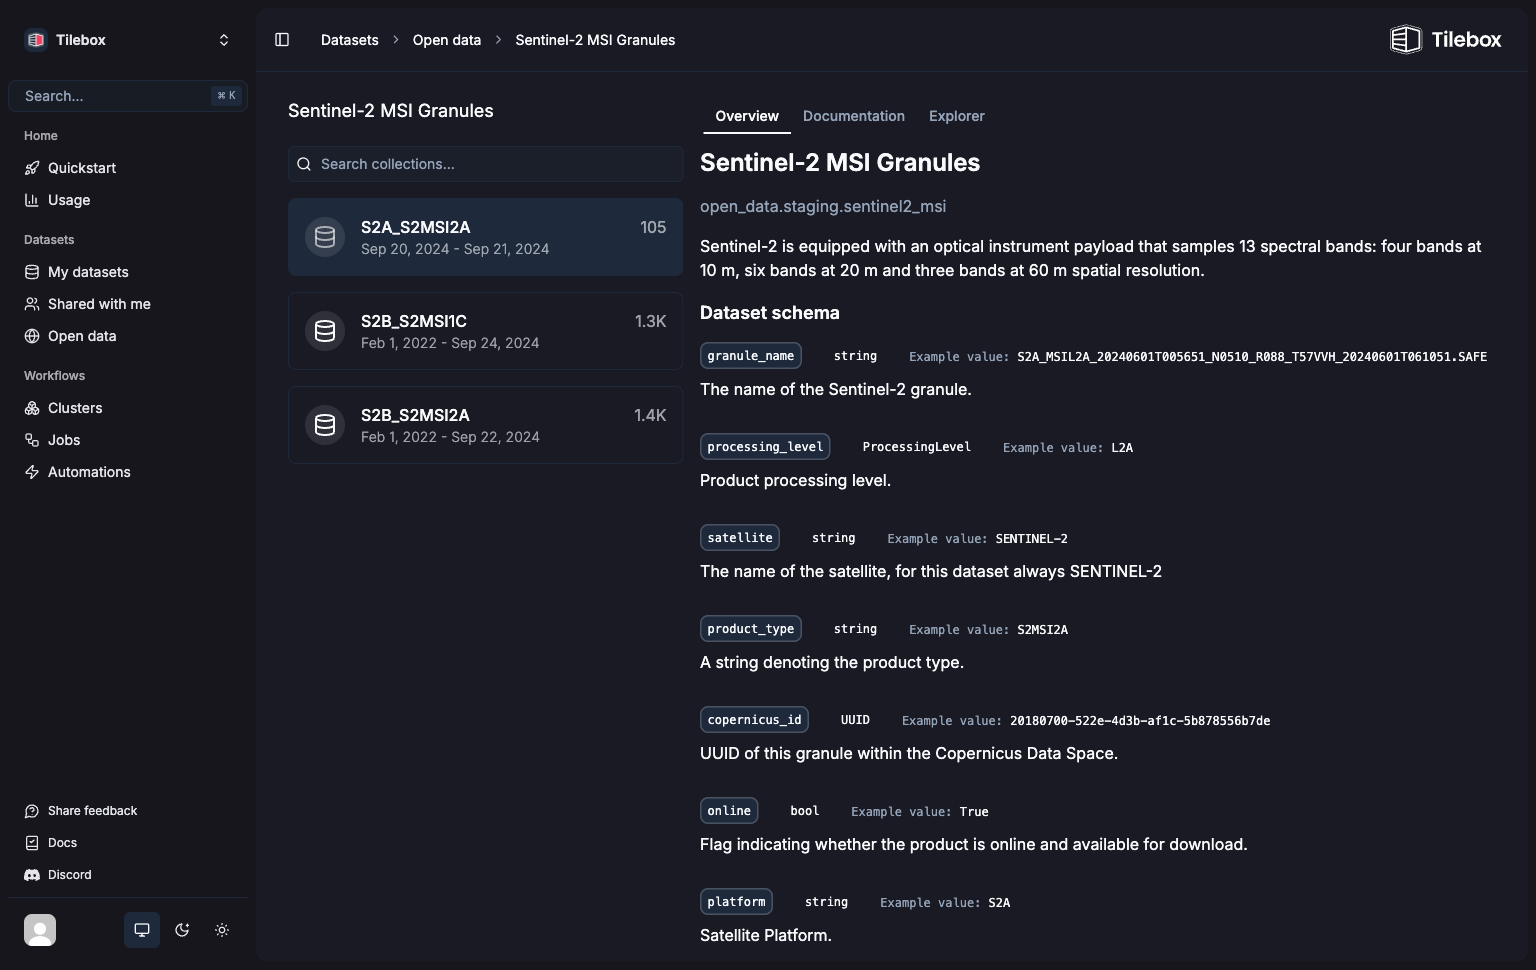 ## Adding extra documentation
You can also add custom documentation to your dataset, providing more context and details about the data included data.
This documentation supports rich formatting, including links, tables, code snippets, and more.
 To add documentation, click the edit pencil button on the dataset page to open the documentation editor.
You can use Markdown to format your documentation; you can include links, tables, code snippets, and other Markdown features.
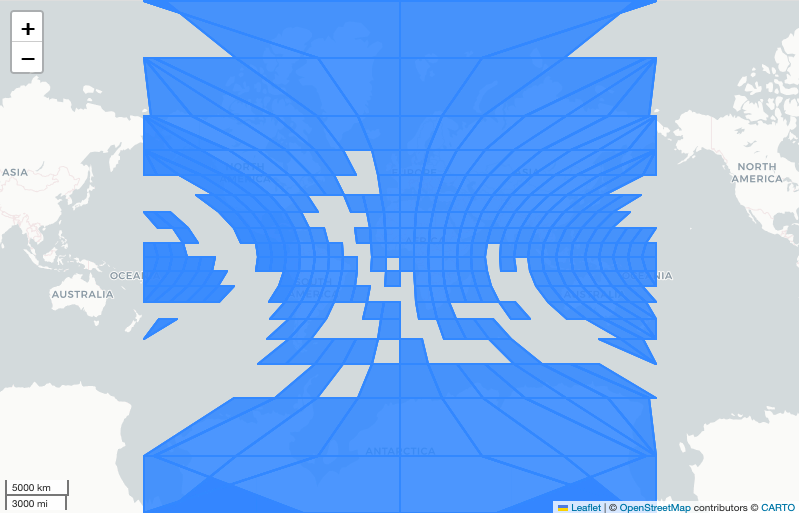
 ## Create a Tilebox dataset
Now you'll create a [Spatio-temporal](/datasets/types/spatiotemporal) dataset with the same schema as the given MODIS dataset.
To do so, you'll use the [Tilebox Console](/console), navigate to `My Datasets` and click `Create Dataset`. Then select
`Spatio-temporal Dataset` as the dataset type.
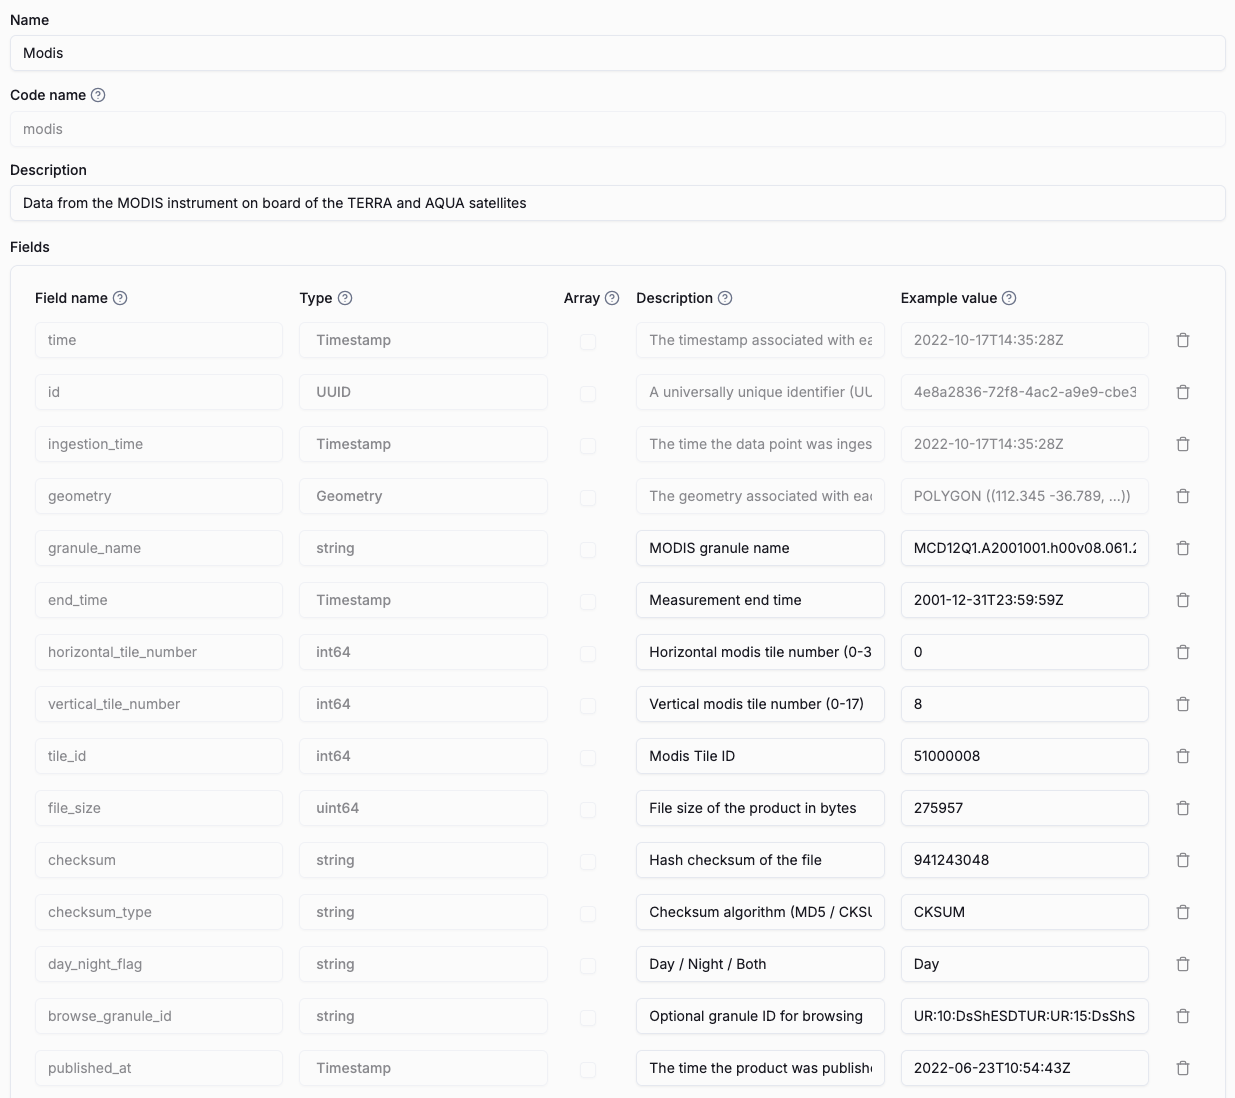
 ## Access the dataset from Python
Your newly created dataset is now available. You can access it from Python. For this, you'll need to know the dataset slug,
which was assigned automatically based on the specified `code_name`. To find out the slug, navigate to the dataset overview
in the console.
 You can now instantiate the dataset client and access the dataset.
 ## Next steps
Congrats. You've successfully ingested data into Tilebox. You can now explore the data in the console and use it for
further processing and analysis.
 # Sample notebooks
Source: https://docs.tilebox.com/sdks/python/sample-notebooks
Sample code maintained to use and learn from.
To quickly become familiar with the Python client, you can explore some sample notebooks. Each notebook can be executed standalone from top to bottom.
## Sample notebooks
You can access the sample notebooks on [
 ## USGS Landsat
The [United States Geological Survey (USGS)](https://www.usgs.gov/) provides a wide range of Earth observation data, including Landsat data, which are also available as open data through Tilebox.
### Accessing Landsat data
Landsat data is available in a S3 bucket. The following code snippet demonstrates how to query and download Landsat data using the Tilebox Python SDK.
 ## Alaska Satellite Facility (ASF)
The [Alaska Satellite Facility (ASF)](https://asf.alaska.edu/) is a NASA-funded research center at the University of Alaska Fairbanks. Check out the [ASF Open Data datasets](/datasets/open-data#alaska-satellite-facility-asf) that are available in Tilebox.
### Accessing ASF Data
You can query ASF metadata without needing an account, as Tilebox has indexed and ingested the relevant metadata. To access and download the actual satellite products, you will need an ASF account.
You can create an ASF account in the [ASF Vertex Search Tool](https://search.asf.alaska.edu/).
The following code snippet demonstrates how to query and download ASF data using the Tilebox Python SDK.
```python Python highlight={4,9-13,27} theme={"system"}
from pathlib import Path
from tilebox.datasets import Client
from tilebox.storage import ASFStorageClient
# Creating clients
client = Client()
storage_client = ASFStorageClient(
user="YOUR_ASF_USER",
password="YOUR_ASF_PASSWORD",
cache_directory=Path("./data")
)
# Choosing the dataset and collection
ers_dataset = client.dataset("open_data.asf.ers_sar")
collection = ers_dataset.collection("ERS-2")
# Loading metadata
ers_data = collection.query(temporal_extent=("2009-01-01", "2009-01-02"), show_progress=True)
# Selecting a data point to download
selected = ers_data.isel(time=0) # index 0 selected
# Downloading the data
downloaded_data = storage_client.download(selected, extract=True)
print(f"Downloaded granule: {downloaded_data.name} to {downloaded_data}")
print("Contents: ")
for content in downloaded_data.iterdir():
print(f" - {content.relative_to(downloaded_data)}")
```
```plaintext Output theme={"system"}
Downloaded granule: E2_71629_STD_L0_F183 to data/ASF/E2_71629_STD_F183/E2_71629_STD_L0_F183
Contents:
- E2_71629_STD_L0_F183.000.vol
- E2_71629_STD_L0_F183.000.meta
- E2_71629_STD_L0_F183.000.raw
- E2_71629_STD_L0_F183.000.pi
- E2_71629_STD_L0_F183.000.nul
- E2_71629_STD_L0_F183.000.ldr
```
### Quicklook images
Many ASF products include a quicklook image. The Tilebox storage client includes support for displaying these quicklook images directly when running in an interactive environment such as a Jupyter notebook.
```python Python highlight={10} theme={"system"}
# Loading metadata
ers_dataset = client.dataset("open_data.asf.ers_sar")
collection = ers_dataset.collection("ERS-2")
ers_data = collection.query(temporal_extent=("2009-01-01", "2009-01-02"), show_progress=True)
# Selecting a data point to download
selected = ers_data.isel(time=0) # index 0 selected
# Displaying a quicklook image
storage_client.quicklook(selected)
```
 ### Further Reading

 ## States
Every Job is always in exactly one of the following states:

 You can also register new automations or edit and delete existing ones directly from the console.

 # Cron triggers
Source: https://docs.tilebox.com/workflows/near-real-time/cron
Trigger jobs based on a Cron schedule.

 ## Deleting Storage Event automations
To delete a registered storage event automation, use `automations.delete`. After deletion, no new jobs will be submitted by the storage event trigger. Past jobs already triggered will still remain queued.
```python Python theme={"system"}
from tilebox.workflows import Client
client = Client()
automations = client.automations()
# delete the automation as returned by create_storage_event_automation
automations.delete(storage_event_automation)
# or manually by id:
automations.delete("0190bafc-b3b8-88c4-008b-a5db044380d0")
```
## Submitting Storage Event jobs manually
You can submit Storage event tasks as regular tasks for testing purposes or as part of a larger workflow. To do so, instantiate the task with a specific storage location and object name using the `once` method.
```python Python theme={"system"}
job_client = client.jobs()
task = LogObjectCreation(head_bytes=20)
# submitting it directly won't work; raises ValueError:
# job_client.submit("manual-storage-event-job", task)
# instead, we specify a trigger condition, and submit a job manually
job_client.submit(
"manual-storage-event-job",
# simulate an event that occurred in the gcs bucket for the object "my-object.txt"
task.once(gcs_bucket, "my-object.txt"),
)
```
# Logging
Source: https://docs.tilebox.com/workflows/observability/logging
Set up distributed logging using the OpenTelemetry logging protocol
## Overview
Tilebox workflows are designed for distributed execution, making it essential to set up logging to a centralized system. Tilebox supports OpenTelemetry logging, which simplifies sending log messages from your tasks to a chosen backend. Collecting and visualizing logs from a distributed cluster of task runners in a tool like [Axiom](https://axiom.co/) can look like this:

 ## Configure logging
The Tilebox workflow SDKs include support for exporting OpenTelemetry logs. To enable logging, call the appropriate configuration functions during the startup of your[task runner](/workflows/concepts/task-runners). Then, use the provided `logger` to send log messages from your tasks.
 Tilebox Workflows has built-in support for Axiom, a cloud-based observability and telemetry platform. The examples and screenshots in this section come from this integration.
To get started, [sign up for a free Axiom account](https://axiom.co/), create an axiom dataset for traces and logs, and generate an API key with ingest permissions for those datasets.
You can then configure Tilebox to export traces and logs to Axiom using [configure\_otel\_tracing\_axiom](/workflows/observability/tracing#axiom) and [configure\_otel\_logging\_axiom](/workflows/observability/logging#axiom).
### Jaeger
 Another popular option is [Jaeger](https://jaegertracing.io/), a popular distributed tracing system. You can use the [OpenTelemetry Collector](https://opentelemetry.io/docs/collector/) to collect telemetry data from Tilebox Workflows and export it to Jaeger.
An all-in-one Jaeger environment can be spun up using Docker:
```bash theme={"system"}
docker run --rm --name jaeger \
-p 5778:5778 \
-p 16686:16686 \
-p 4318:4318 \
jaegertracing/jaeger:2.9.0
```
You can then configure Tilebox to export traces to Jaeger using `configure_otel_tracing`.

 Tracing your workflows enables you to easily observe:
* The order of task execution
* Which tasks run in parallel
* The [task runner](/workflows/concepts/task-runners) handling each task
* The duration of each task
* The outcome of each task (success or failure)
This information helps identify bottlenecks and performance issues, ensuring that your workflows execute correctly.
## Configure tracing
The Tilebox workflow SDKs have built-in support for exporting OpenTelemetry traces. To enable tracing, call the appropriate configuration functions during the startup of your [task runner](/workflows/concepts/task-runners).

 ## Tracking Progress
Progress indicators in Tilebox use a `done` / `total` model. Tasks can increase a `total` value to specify the total work to be done, and the same or any other task can increase a `done` counter to track the amount of work that has already been completed.
Progress tracking is always done at a task level. Each task can report its progress updates, as increases in `done` and `total` independently, and the job's total progress is the sum of all tasks' progress.

 ## Progress idempotency
Since tasks may fail and can subsequently be retried, it's possible that a task is executed more than once. This means that a task may report progress more than once.
To avoid double-counting such progress updates, Tilebox only considers the progress reported by the last execution of a task.