Related documentation
Datasets
Learn about Tilebox datasets and how to use them.
Timeseries Datasets
Learn about Timeseries datasets, which link each data point to a specific point in time.
Creating a dataset in the Console
Navigate to the Create dataset form
Create a dataset in Tilebox by going to My datasets and clicking the
Create dataset button.Select a dataset kind
Choose a dataset kind from the dropdown menu. Required fields for the selected dataset kind are automatically added.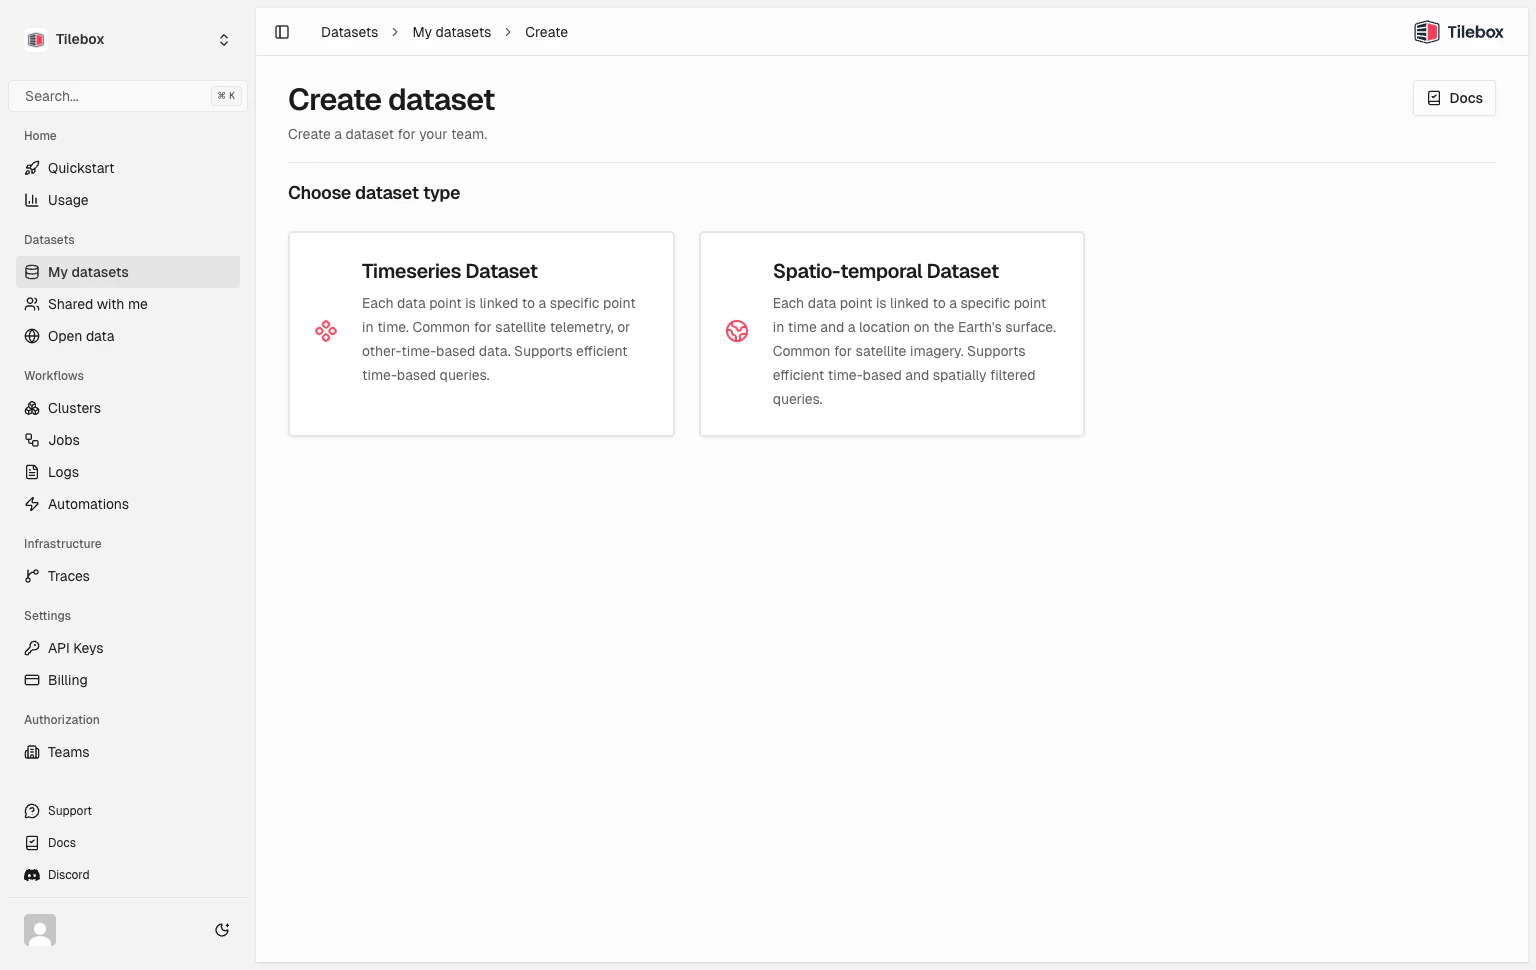
Specify a name, code name, and description
Complete these fields: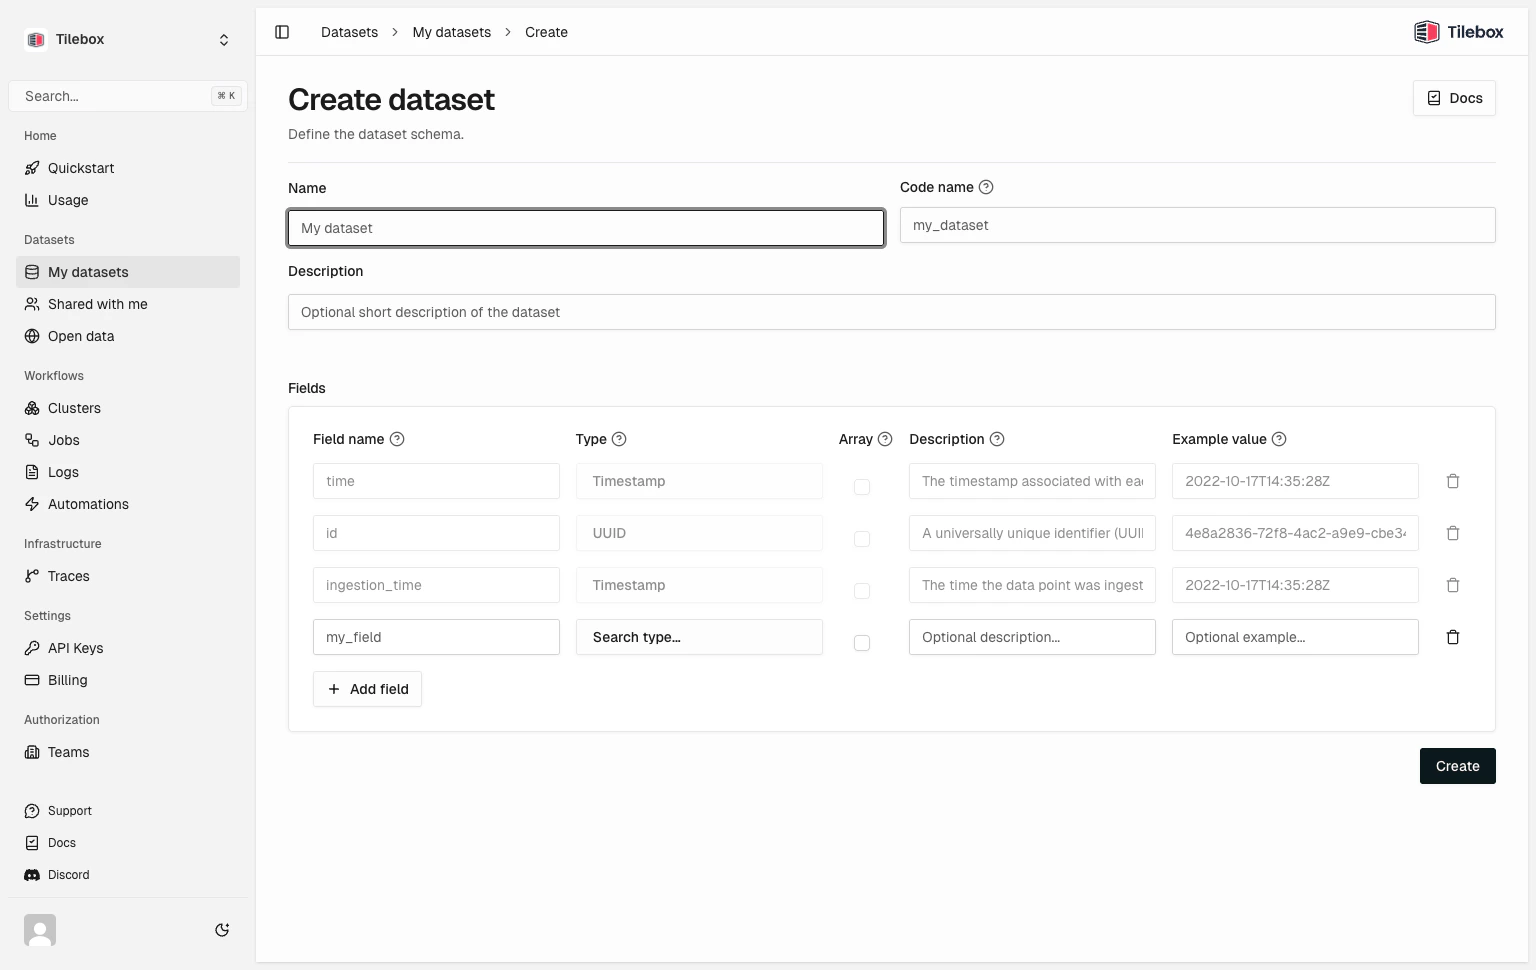
Nameis the name of your dataset.Code nameis a unique identifier for the dataset within your team. It’s automatically generated, but you can adjust it if needed.Descriptionis a brief description of the dataset purpose.
Define the dataset schema
Specify the fields for your dataset.Each field has these properties:
Nameis the name of the field (by convention it is recommended to be insnake_case).Typeis the data type of the field.Arraycan be set to indicate that the field contains multiple values of the specified type.Descriptionis an optional brief description of the field. You can use it to provide more context and details about the data.Example valueis an optional example for this field. It can be useful for documentation purposes.
Automatic dataset schema documentation
By specifying the fields for your dataset, including the data type, description, and an example value for each one, Tilebox is capable of automatically generating a documentation page for your dataset schema.
Adding extra documentation
You can also add custom documentation to your dataset, providing more context and details about the data included data. This documentation supports rich formatting, including links, tables, code snippets, and more.
If you don’t see the edit pencil button, you don’t have the required permissions to edit the
documentation.
Save button to save your changes.